Rust-Oleum Projects
Take Your Game to the Next Level Controller
Browse Projects
-
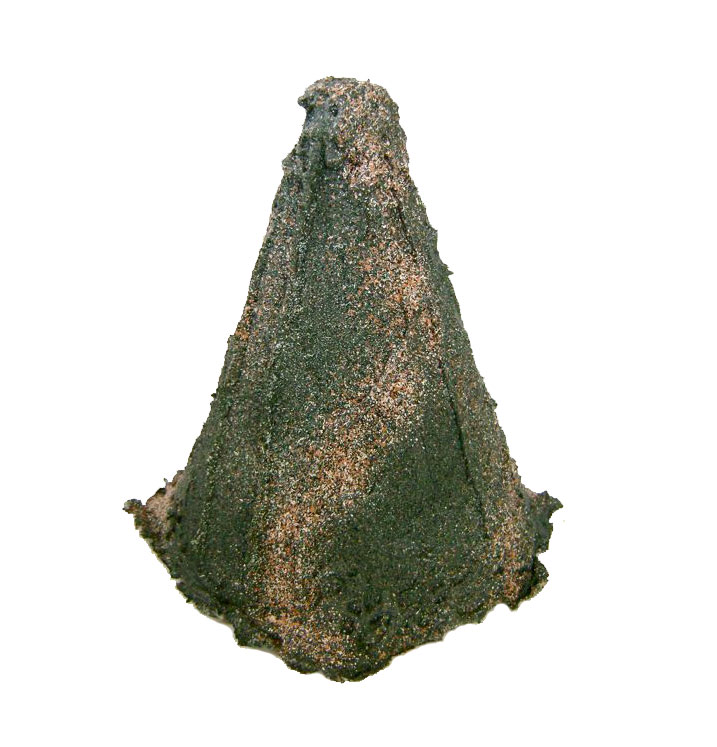
Erupting with Excitement
-
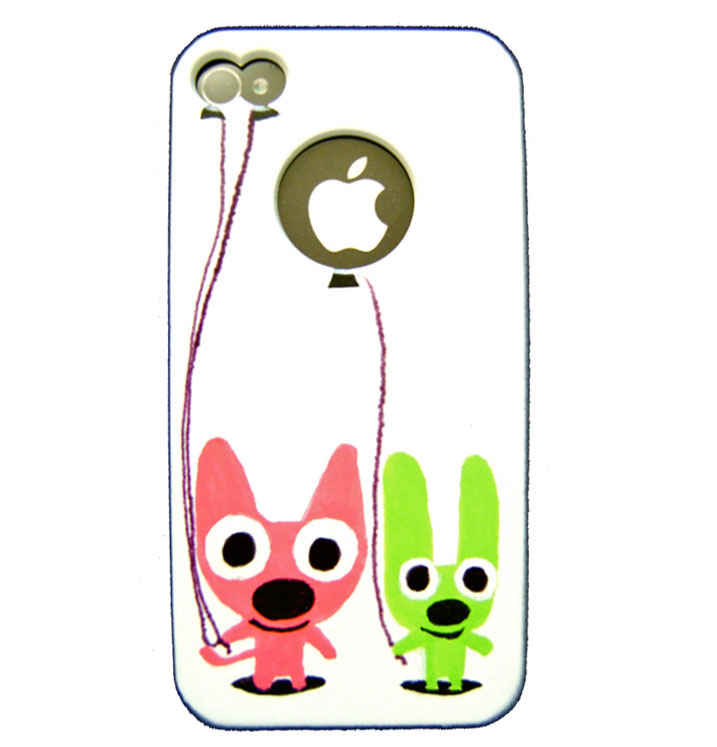
Create a Phone with Personality
-
Tools & Supplies:
-
Scissors
-
Tape
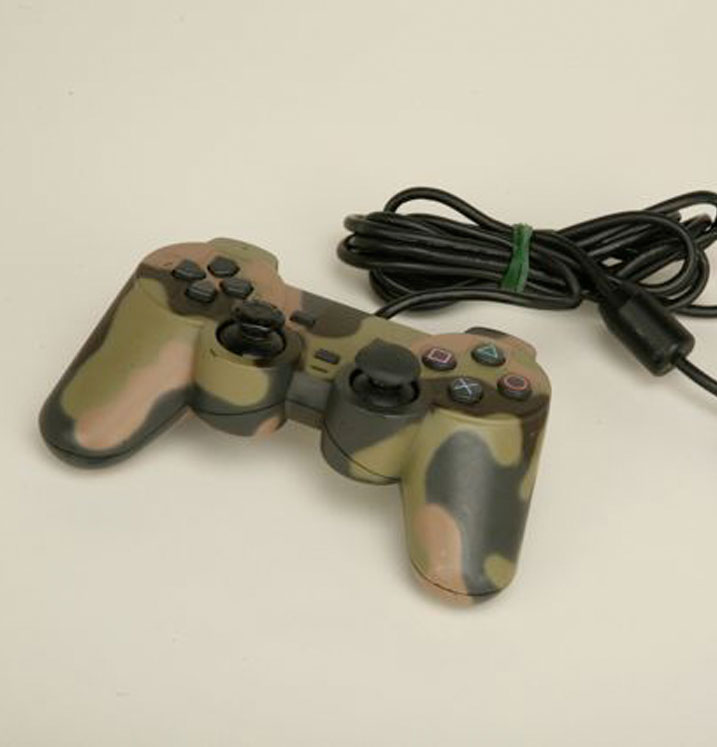
How to camouflage your game controller:
- Disassemble your game controller. Be very careful not to damage any of the internal electronics. If you don’t feel comfortable doing this carefully mask of all the buttons and joy sticks. If you do disassemble the controller make notes about where things go and how they are orientated. Cell phone pictures are great for this. Again if you don’t fell comfortable just mask of the buttons. With Testors Sanding Film, sand off all the printing as well as scuff up the entire surface. Don’t use the coarse film as it will cause scratches that you will see through the paint film. The sanding will help the paint stick to the surface better.
- Once the controller is thoroughly sanded, clean the parts of well. You can use hot soap and water but remember to rinse well. Always let the part dry well before painting.
- Base coat the game controller with Model Master spray Modern Desert Sand. Know you could also use an airbrush to spray this since the goal here is to cover the whole controller with a solid even coat. Use enamels as the first coat as it really bonds well to the controller. You can use a primer but if you sand well before and clean the controller you will not need it. Leave the controller to dry for 24 hours before you proceed.
- Using tape, carefully cut little blocks and place them on the controller, you will need a lot of free time for this as it takes time but be patient and it will get done. This is the first masking so you need to cover up less than a third or you will end up with too much tan.
- Spray the whole controller with the second color, Afrika Mustard. Let this dry. As before you can airbrush this but the goal is to cover the whole controller. Once you have finished set it aside and let it dry. Don’t rush the drying by heating it or using a blow dryer this will soften the glue on the tape and make it almost impossible to get off.
- Take your time follow the pattern that you have already started, and place more masking film on, make sure you cover the non-masked areas as covering the masking fill will have no effect. When you are finished there should still be about a third not covered with masking film.
- For the third color coat apply Dark Green. When spraying colors over color’s it is always best to work from light to dark the darker colors cover so much better than the lighter colors and this stopped the paint form getting too thick. This is the other advantage of using an airbrush you can keep the coats of paint very thin. Let the paint layer dry over night.
- Peel off all the layers of the masking tape. You can use the edge of a knife to get the tape started and then peel it off with your fingers, this actually takes some time but it is fun as you see the pattern you have created.
- Check very carefully for tape that you have missed as it is hard to see it because sometimes it blends in. After the paint is removed you may feel a roughness to the surface along the paint edges. Smooth these down with your hands. Don’t try to sand the paint layer as it is too thin for that.
- To make the paint finish last and get the finish that you want, clear coat the controller using 2 thick coats of Testors Dull Coat letting it dry between each coat.
Tip: When re-assembling electronics, it is vital that things go back correctly, or it will not work. Follow the guide that you made when you took it apart and do not force things. Take your time if it will not go together the first recheck and try again.
“Designed and Created for Testors by Domestic-Divaonline.com