Rust-Oleum Projects
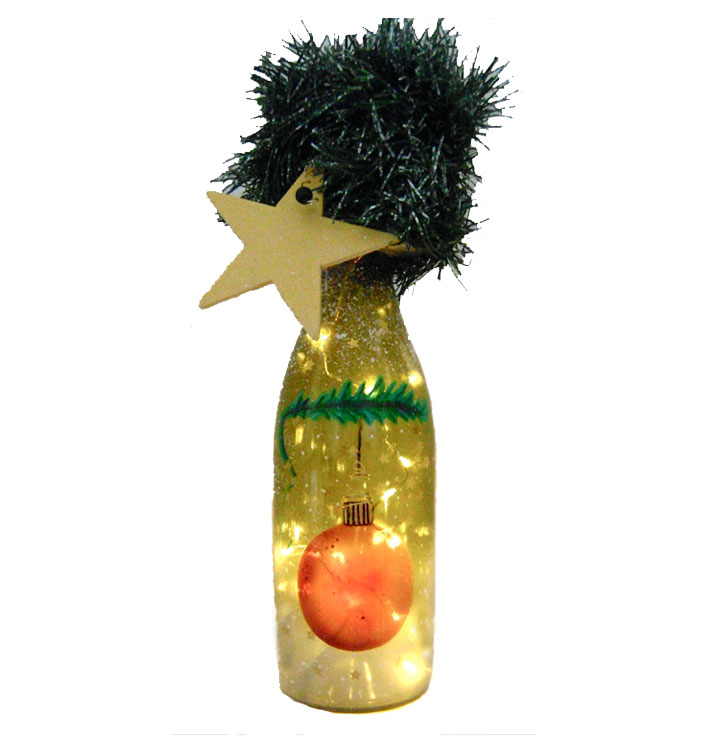
Ornament Wine Bottle
Browse Projects
-
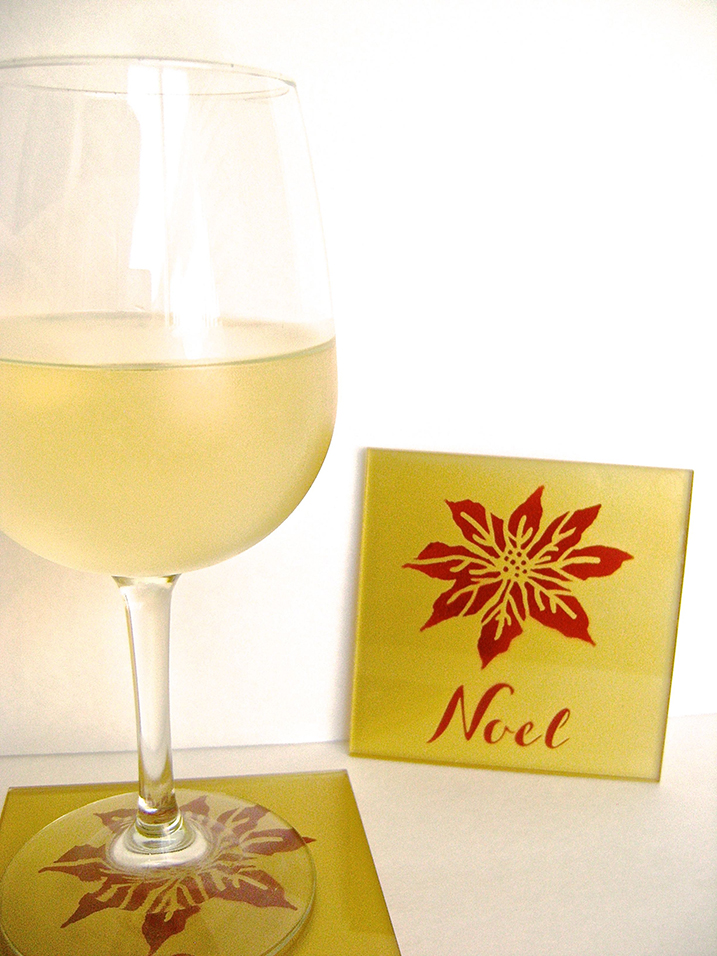
Aztek Airbrushed Noel Glass Drink Coasters
-
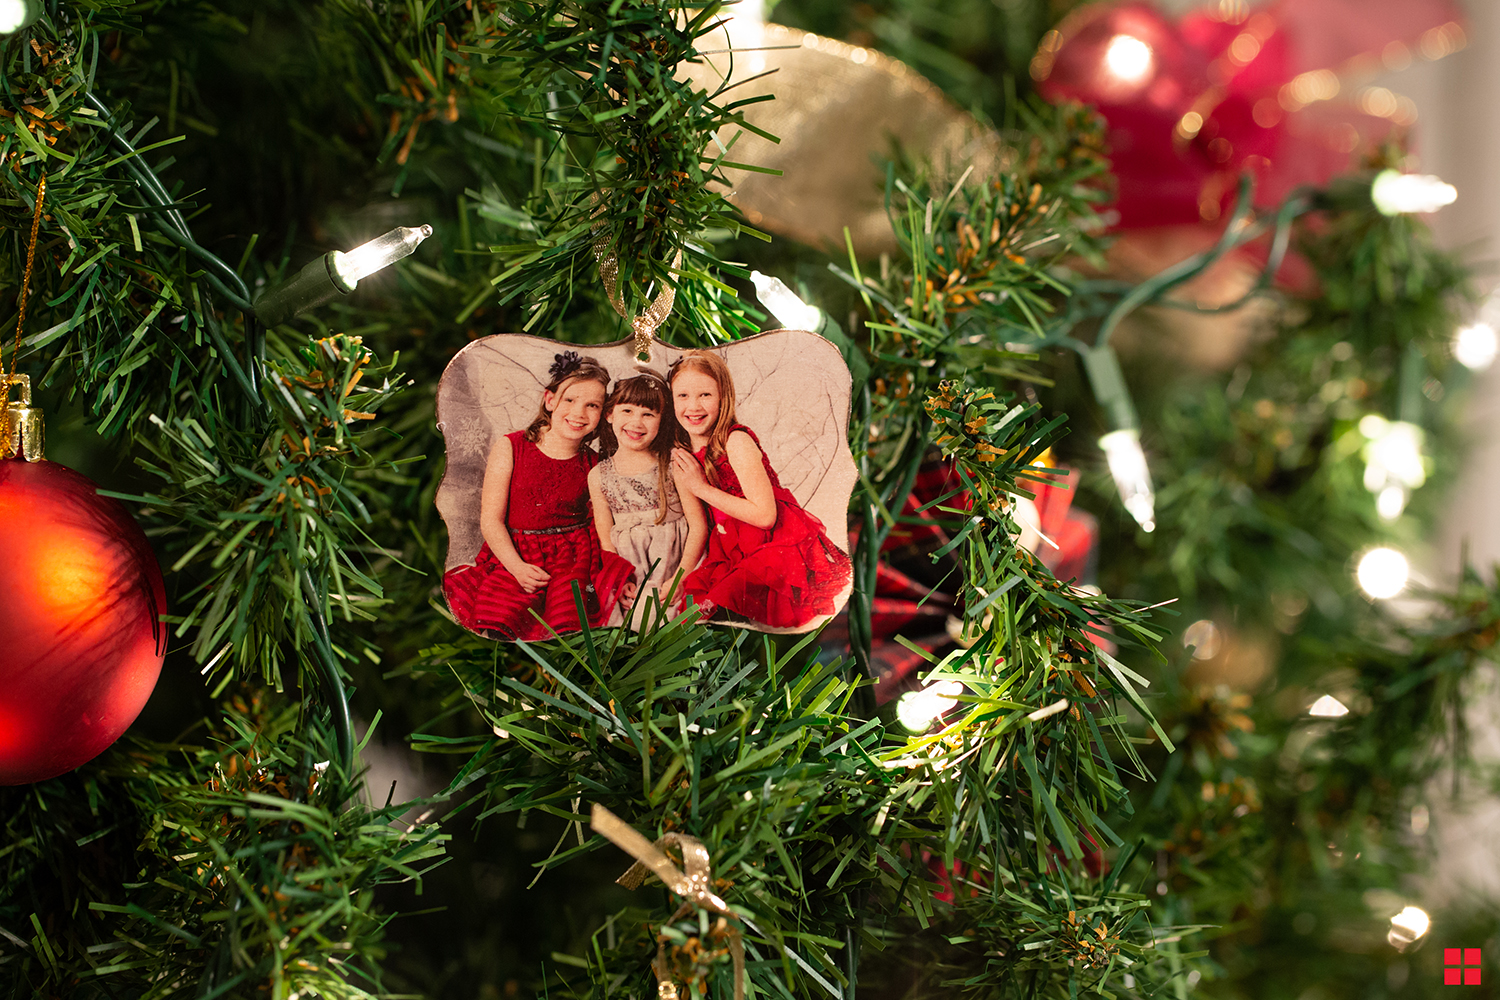
DIY Photo Ornaments
-
Tools & Supplies:
-
Aluminum Foil
-
Branch
-
Card Stock
-
Diamond Glaze
-
Drill
-
Glue
-
Gold Wire 18 Gauge
-
Green Bead
-
Green Garland
-
LED Light String With Battery Pack
-
Masking Tape
-
Paint Brush
-
Permanent Marker
-
Spray Mount Repositonable Adhesive
-
Star Paper Punch
-
Toothbrush
-
Wine Bottle
-
Wire Cutters
-
Wood star 4 Inches
Instructions:
- Soak the bottle in warm sudsy water to remove the label and all traces of glue.
- Airbrush the bottom three inches of the bottle with white paint, using a lighter spray as you move higher on the bottle.
- Pour a little of the paint into a small container. Dip a used toothbrush into the paint. Tap off the excess then flick a gloved finger across the bristles to splatter the entire bottle with flecks of white to simulate snow.
- Using card stock, create a stencil for the tree branch, stars, and the ornament. For the branch make a jagged shape 4" wide with lots of spikes. Use a star paper punch in random patterns for the star stencil. For the ornament create a circle 2" in diameter with a small box shape at the top. Spray the back of the branch and ornament stencils with adhesive.
- Position the branch on the bottle and airbrush with green paint. Remove the stencil when dry.
- Cover the square at the top of the ornament with masking tape and position the stencil below the branch. Airbrush the ornament. Apply paint only to the outer edges of the stencil. Add a little white paint to the cherry paint and airbrush the center of the ornament.
- Hold the star stencil tightly against the bottle and airbrush gold stars all over the bottle. Allow the paint to dry before moving the stencil to another area to add more stars.
- Hold a piece of cardstock over the painted ornament and airbrush the square gold.
- Add detail to the branch by adding cherry paint to the green to create a dark color and white to the green to create a light green. With a fine brush, paint light diagonal lines on the branch and a dark horizontal line across the center.
- Detail the outer edges and vertical lines of the ornament square with a permanent marker.
- Spray the bottle with two light coats of Glosscote to protect the paint.
- Coil a piece of gold wire around a marker or other round object. Form a loop in one end and bend it so it lays flat against the bottle. Attach the wire to the bottle with glue. Allow it to dry for 24 hours.
- Use a brush to generously apply Diamond Glaze to the ornament surface. Allow the glaze to dry overnight.
- Stuff the light string into the bottle. Attach the battery pack to the neck of the bottle with a rubber band. The switch on the pack should be facing out and easy to access.
- Use a toothbrush to flick white paint on the green garland as you did the bottle. When the paint is dry, wrap the green garland around the neck of the bottle to conceal the battery pack. Stuff some short green pieces into the open neck of the bottle and shape them over the battery pack.
- Drill a hole in a wooden star. Airbrush both sides of the wood with gold paint. Curl a piece of gold wire and attach a green bead to it along with the star.
- Bend the straight end of the wire and hook it onto the garland.