Rust-Oleum Projects
Airbrushed French Country Clock
Browse Projects
-
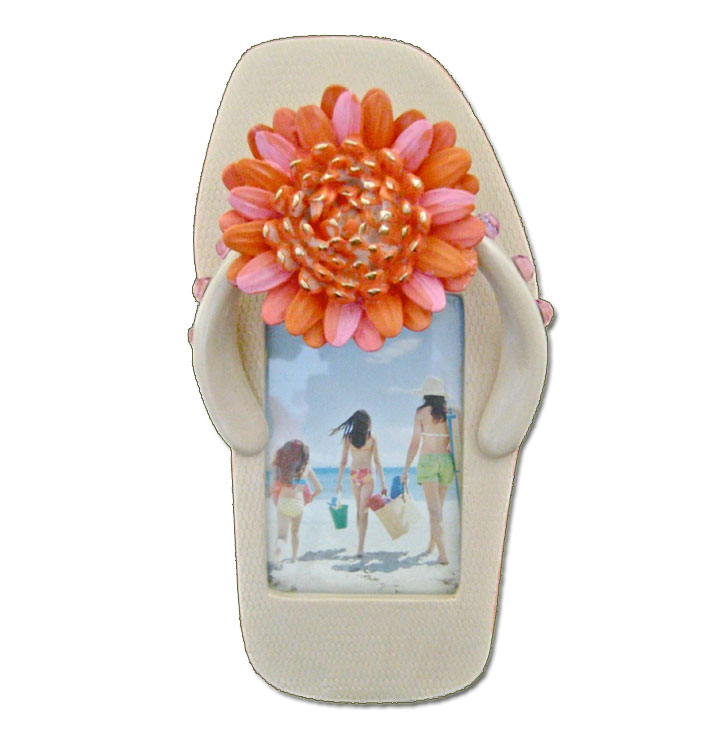
Beach Fun Photo Frame
-
Create a Coordinating Gallery Wall

-
Tools & Supplies:
-
Painter's tape
-
Marker
-
Repositionable Stencil Spray Adhesive
-
E6000 Adhesive
-
ArtMinds .75 inch Clock Movement Kit
-
ArtMinds Basswood Oval 14" x 11"
-
ArtMinds Clock Numbers
-
American Decor The French Inn stencil

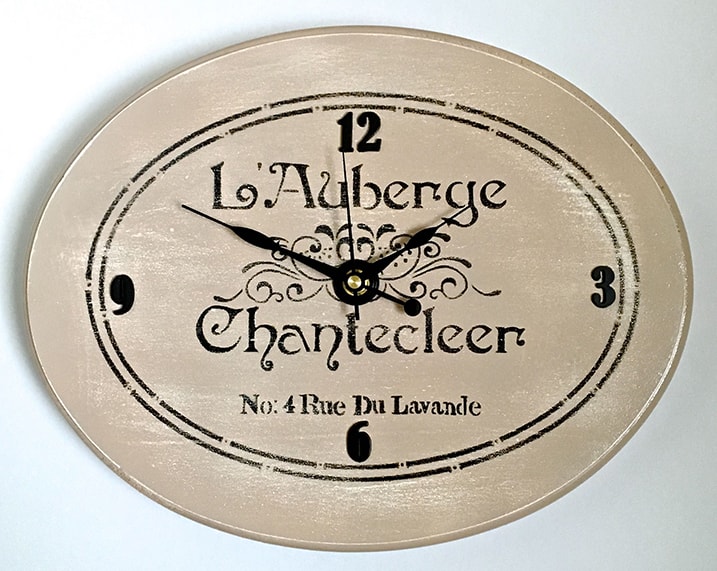

Airbrushed French Country Clock
Project designed and created by Gloria Uhler at Domestic-Divaonline.com for Testor’s Corp.
Supplies
At Testors:
Airbrush
Testors Paints - Flat Tan 1167TT, Flat Black 1149TT
Testors GlossCote 1261T
Model Master White Primer 2948
At Michaels:
ArtMinds .75” Clock Movement Kit
ArtMinds clock numbers
Americana Décor “The French Inn” stencil
ArtMinds Basswood Oval 14” x 11”
Repositionable Stencil Adhesive
E6000 Adhesive
Miscellaneous:
Painters tape
Marker
Protect your work surface and all areas not being painted. Always allow paint to dry completely before moving to the next step.
Project Steps
Step 1
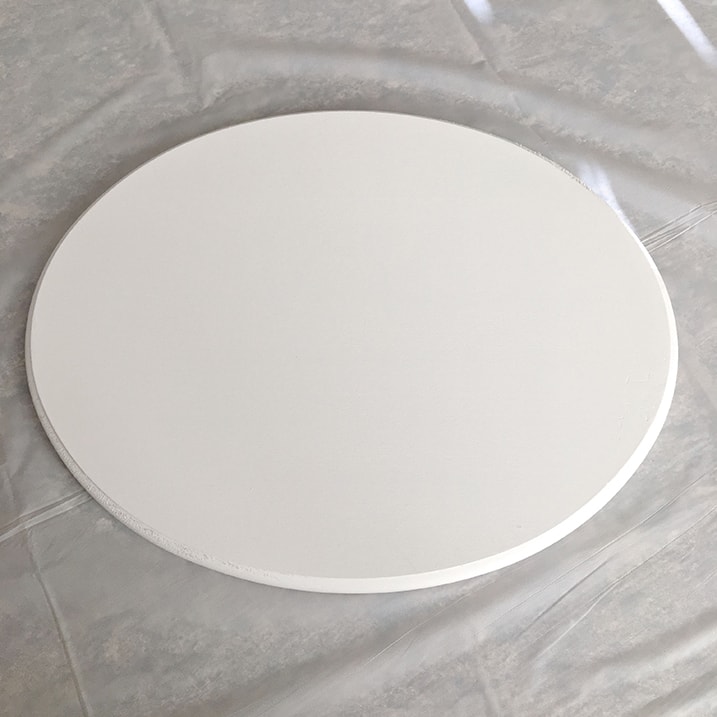
Lightly move over the basswood with a fine sand paper. Wipe down the wood with a dry, clean, lint free cloth.
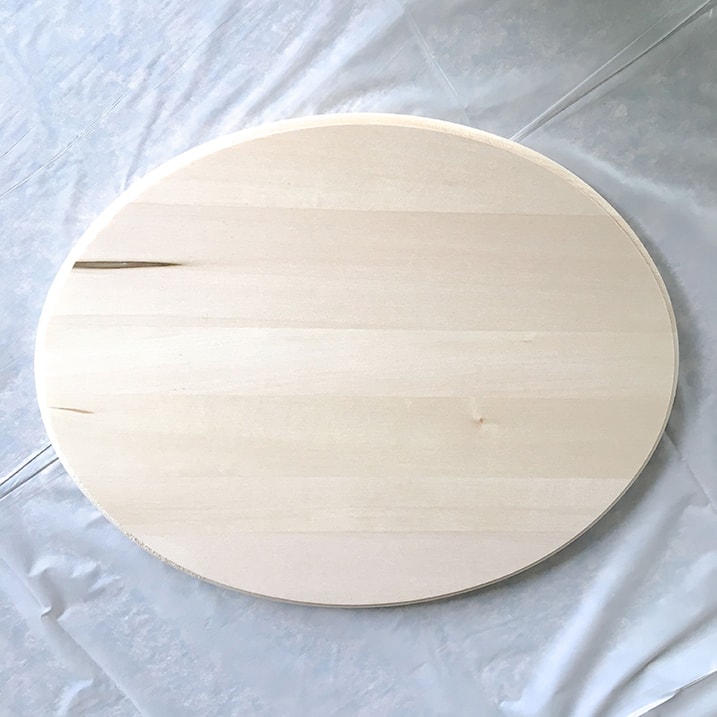
Step 2
Spray the wood with a minimum of two coats of white primer. The number of coats you will need for coverage will be determined by how much dark grain is visible.
Step 3
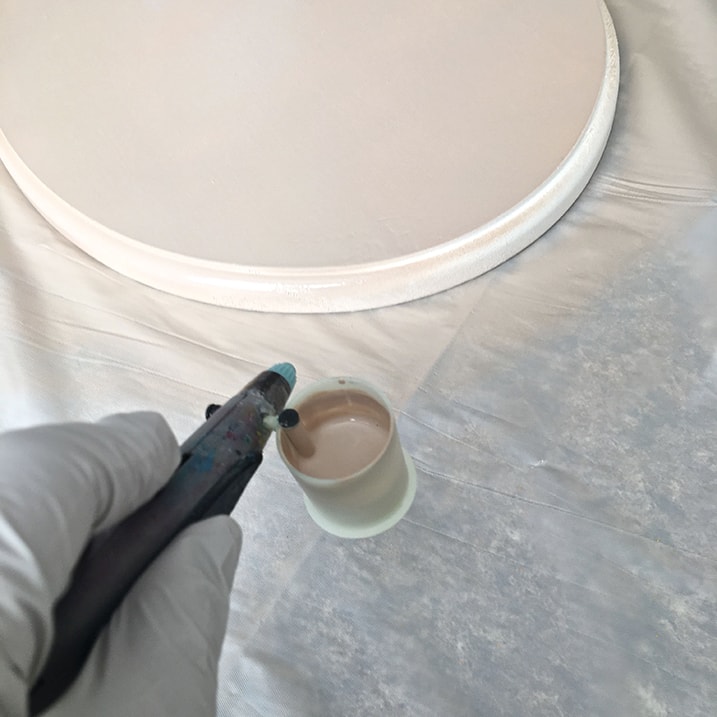
Airbrush the entire plaque with tan paint.
Step 4
Slip something under the plaque to raise it off the work surface. A small disposable box would work well. Airbrush the bottom edges of the wood.
Step 5
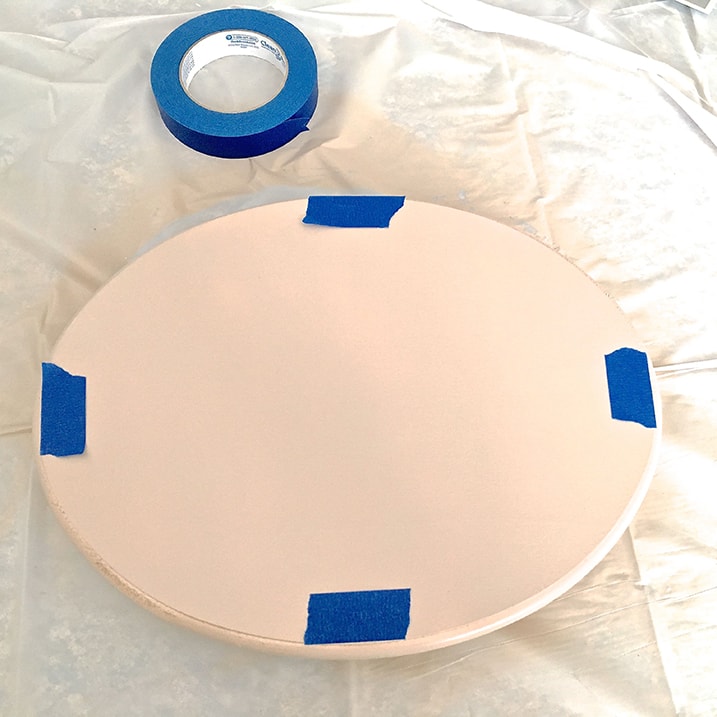
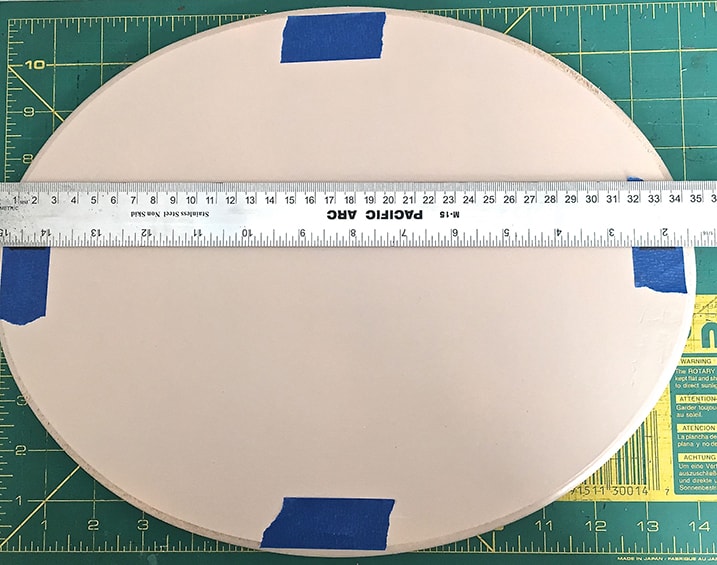
Place tape on the top, bottom and side edges.
Step 6
Set the wood on a cutting mat and mark the tape at the horizontal centers, and the vertical centers with a marker.
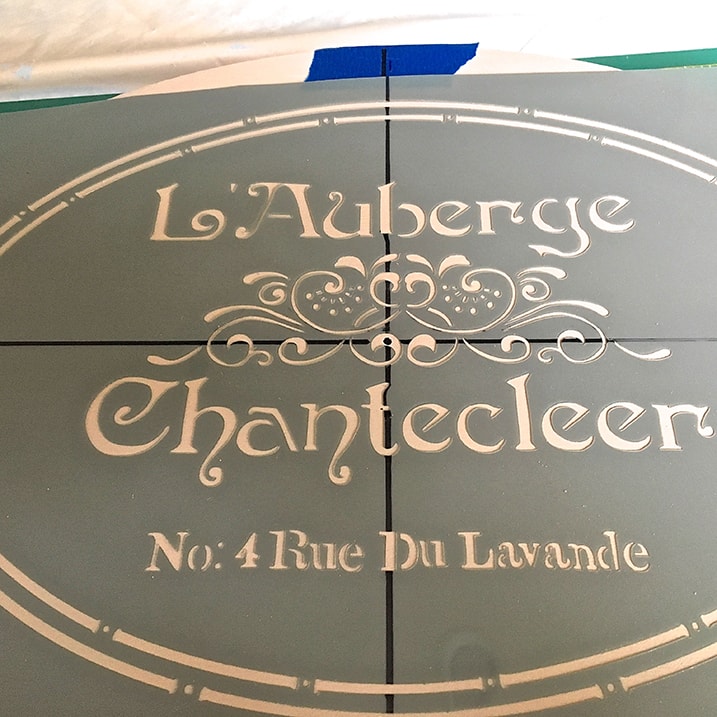
Step 7
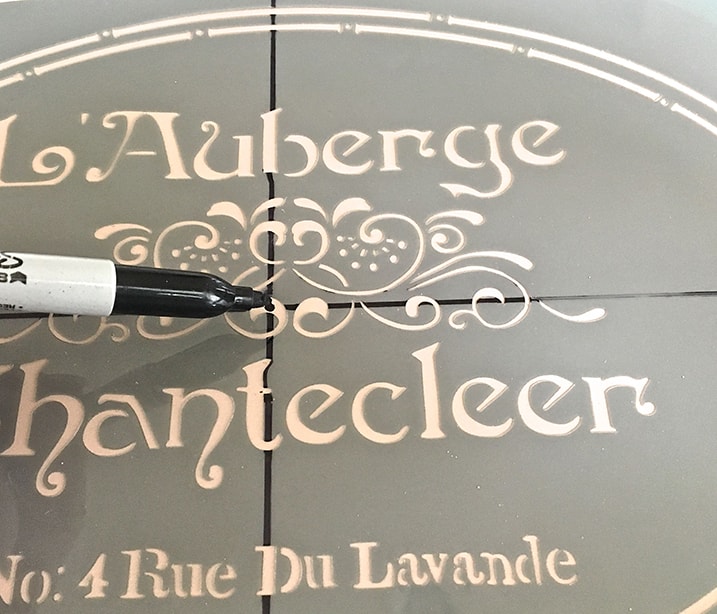
Mark the horizontal and vertical center on the right side of the stencil. Spray the back with adhesive.
Step 8
Place a dot on the front where the two lines intersect. This is where you will drill a hole in step 13. Transfer the dot to the wood.
Step 9
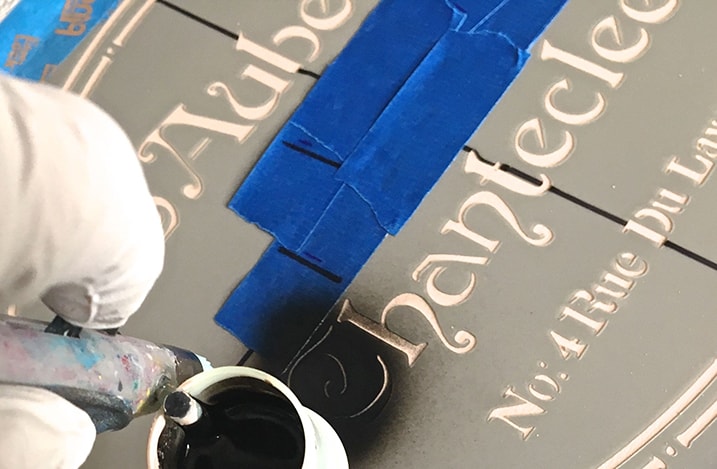
Airbrush the stencil with black paint.
Step 10
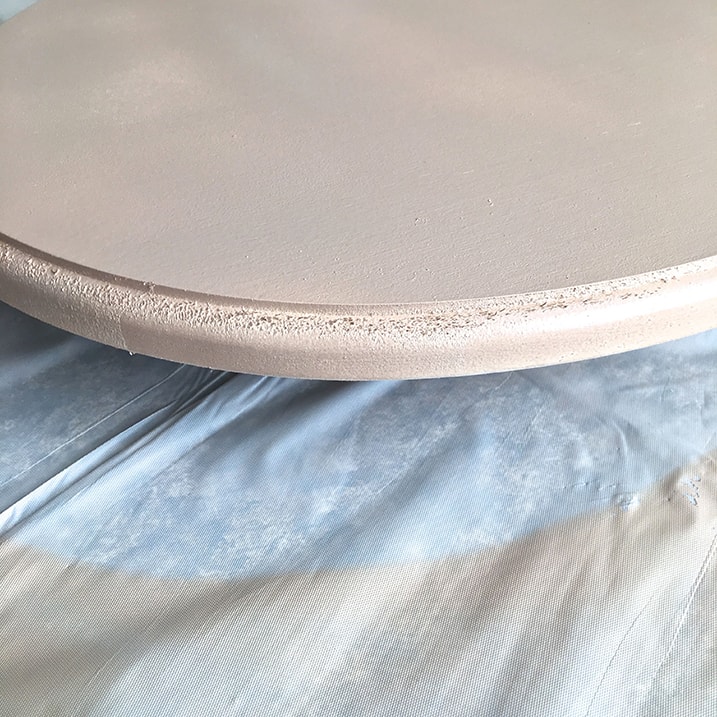
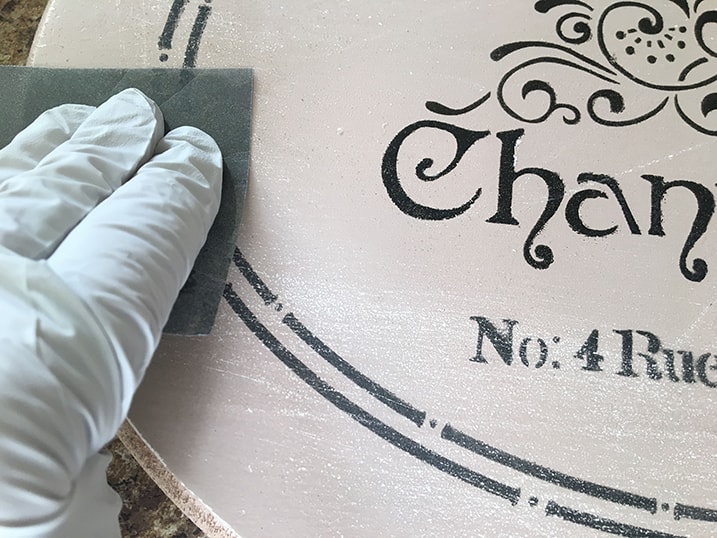
Use medium sandpaper to alter the perfect finish of the paint. Don’t forget to sand the raised edge. This will allow the primer to show through and create an interesting white border around the entire oval.
Step 11
Apply two coats of Glosscote.
Step 12
Use E6000 to glue the numbers to the clock face inside the double lines.
Step 13
Drill a hole at the dot in the center of the wood to accommodate the clock shaft.
Step 14
Follow the instructions on the package to install the Clock kit.
note: The scrolled design is not perfectly centered on my stencil. This may just be a defect in the one I purchased. If yours is the same, cover the scroll design with tape to avoid paint during step 9. When the paint is completely dry, remove the tape from the scroll design. Lift the stencil and replace it again with the scroll design centered on the wood. Cover all the other open areas to avoid overspray. Airbrush only the scroll design with black paint.