Rust-Oleum Projects
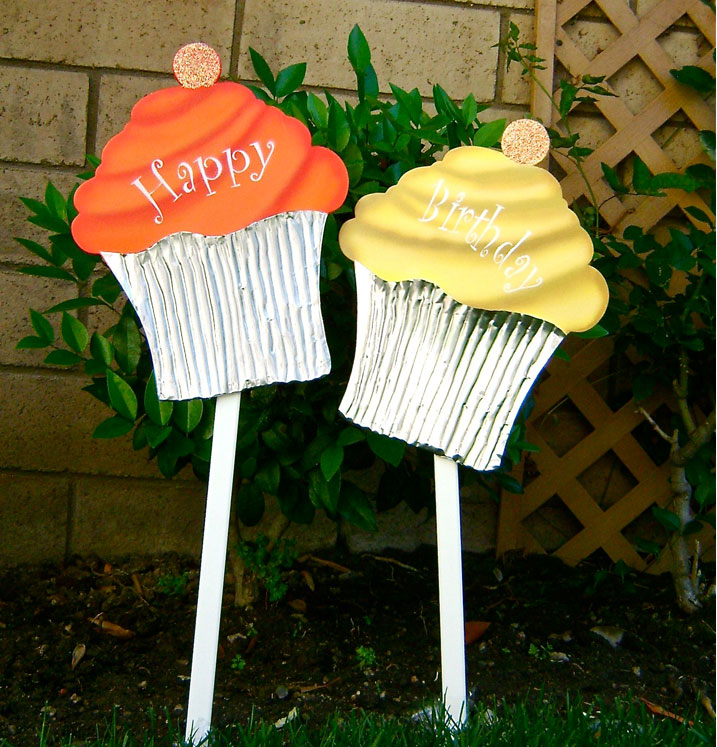
Cupcake Stakes to Help Celebrate
Browse Projects
-
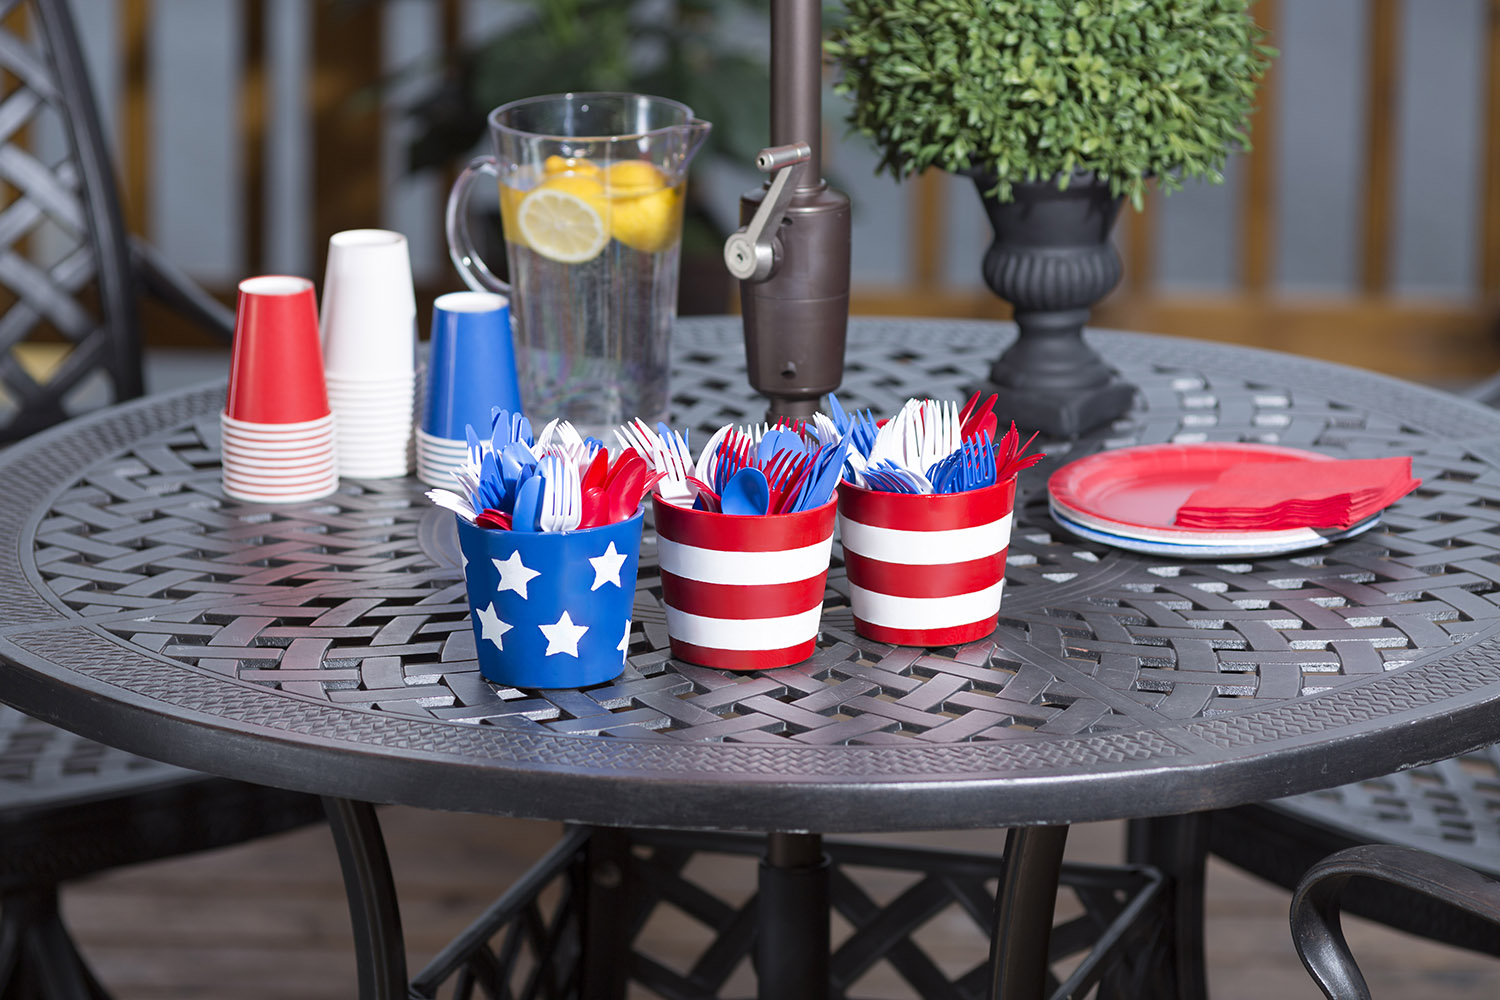
Memorial Day Party Fun With Patriotic Pots
-
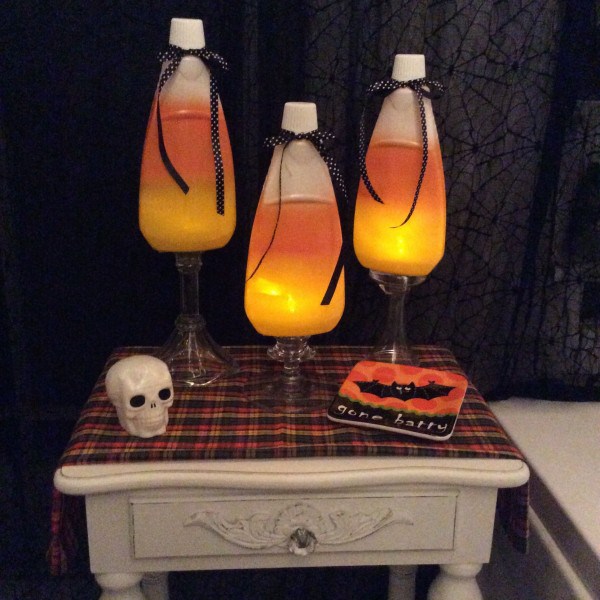
AirBrainz Airbrushed Candy Corn Lights
-
Tools & Supplies:
-
Artminds Cupcake Plaques 2
-
Diamond Glaze
-
Embossing Tool
-
Foam Brush
-
Foil Baking Pan Cover
-
Glitter
-
Hot Glue Gun
-
Paint Cups
-
Scissors
-
Sponge Brush
-
Wooden Butterfly Stakes
-
Instructions
- Remove the labels and tags from the unfinished wood cupcake. You might want to leave on the cord hanger. It might come in handy later for moving the piece without touching wet paint. Paint the right side of the wood cupcakes and wood stakes (18" long each) with two coats of white primer.
- Print out the cupcake bottom template and the Happy Birthday stencil located here.
- Use a craft knife to cut each. Trace the template onto a disposable, foil, baking pan cover. Carefully cut out the shape with scissors. Use caution as foil edges can be very sharp
- Place the foil piece on a couple of layers of fleece or other thick soft fabric. Use an embossing tool to draw lines across the foil to mimic the look of store bought foil cupcake papers. Set the foil pieces aside.
- When the primer is dry, set the template in place on the cupcake. Use metal washers or other heavy items to prevent the template from shifting or lifting while painting.
- Each cupcake is painted in the same way. The dark and light shades are achieved by adding other colors to the base. For the orange cupcake you’ll need to mix in red to create the dark shade for folds, and yellow, to create the light shade for highlights. Airbrush one cupcake top with orange paint using a general purpose nozzle.
- Mix red with the orange to create a darker shade. Using a fine nozzle, light pressure and working very close to the surface, diagonally create a line following from one curve in the wood to another. Add more paint to make the line thicker at the finish than at the start. Pull the airbrush away from the surface and dust the line to eliminate the sharp edge and create more shaping.
- In a clean paint cup mix yellow into the orange and paint above the dark lines following them from one edge of the wood to the other. Holding the airbrush a distance from the surface, put down a light dusting of this shade to blend the light line into the orange paint. Paint the cherry at the top with solid red paint.
- When the paint is completely dry, put down the stencil and paint it with white paint.
- Remove the stencil. Create the second cupcake. With a general purpose nozzle, airbrush it with yellow paint. Mix in purple for the darker shade, and orange for the light and follow steps 6, 7 and 8.
- Attach the foil bottoms to the cupcakes with a hot glue gun. Apply the glue only to the side and bottom edges. The top edge should remain free to ripple.
- Hot glue the wood stakes to the back of the cupcakes, each at a different angle. Remove the cord hanger.
- Pour Diamond Glaze into a small container. Using a sponge brush, apply the glaze to the cupcake cherries.
- Sprinkle on glitter and allow it to set.
“Designed and Created for Testors by Domestic-Divaonline.com