Customer Project
Easy Sunburst Finish- Guitar body
Browse Projects
-
Dorm Door Hanger
-
Hand Picked Headbands

-
Tools & Supplies:
-
Sandpaper

Instructions:
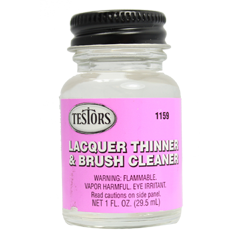
- Sand down the original finish using 150 and 400 grit sandpaper. If stripping to bare wood, a sealer is recommended. I did not use one for this project. If you do not want the wood grain to show, Testors lacquer primer can be used (79622, 79623, or 79624). Wet sand with 400 grit sandpaper. If you want a professional looking final product, wet sanding is essential.
- The wood body needs to be stained or painted a desired color. For this project, I used a translucent yellow to replicate a vintage look.
- Trace the guitar body on a heavy card stock paper or cardboard. Follow the contour of the shape and redraw the image about 1-1/2 inside the original line. Cut out the template. It should look like a slightly smaller version of the original guitar.
- Place toothpicks around the perimeter of the the paper template to allow it to sit above the guitar body.
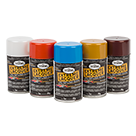
- Spray the first sunburst color. For this guitar, I used Testors One Coat Revving Red aerosol paint (1837MT). Lacquer paint applies easily and dries quickly. Lacquer was the choice for vintage guitars and purists claim it lets the tone of the wood shine through. Spray lightly moving around the body. The trick is to not to create any hard edges. Let dry thoroughly. Preferably overnight. Wet sand using 400 grit sandpaper. Use a very light touch being careful not to remove any of the paint.
- Spray the 2nd color. I used Model Master Semi-Gloss Black (296207). Spray tight to the edges making sure the 1st sunburst color shows around the entire guitar. Again be careful not to spray too heavily. You want a blending effect and not hard edges. For this project, I painted the sides and back of the guitar black as well. Lacquer paint is very forgiving if you make a mistake simply touch it up. Wet sand using 400 grit sandpaper Use an extremely light touch being careful not to remove any of the paint.
- Once satisfied with the results let dry thoroughly preferably overnight and finish with several coats of clear gloss lacquer finish (79661). Spray lightly to avoid runs. Remember never spray enamels over lacquer paint or you risk the paint finish lifting off. For guitars I recommend waiting at least 3 days before reassembling.
- That's it. Lacquer dries quickly but one of its real benefits it that it continues to harden over time. As it ages the clear lacquer finish forms a protective rock hard finish. If you have the patience to let the guitar sit for weeks you can wet sand using progressively fine grit sand paper from 400-2000 grit. I don't have the patience and just leave the lacquer finish as is. Minor imperfections simply add character.