Rust-Oleum Projects
Hydrodipped Picture Frame
Browse Projects
-
DIY Halloween Canvas Slip-On Shoes
-
Clay Leaf Bowl DIY Project


-
Tools & Supplies:
-
Wood picture frame
-
Gloves
-
Stir Stick
-
5-gallon bucket

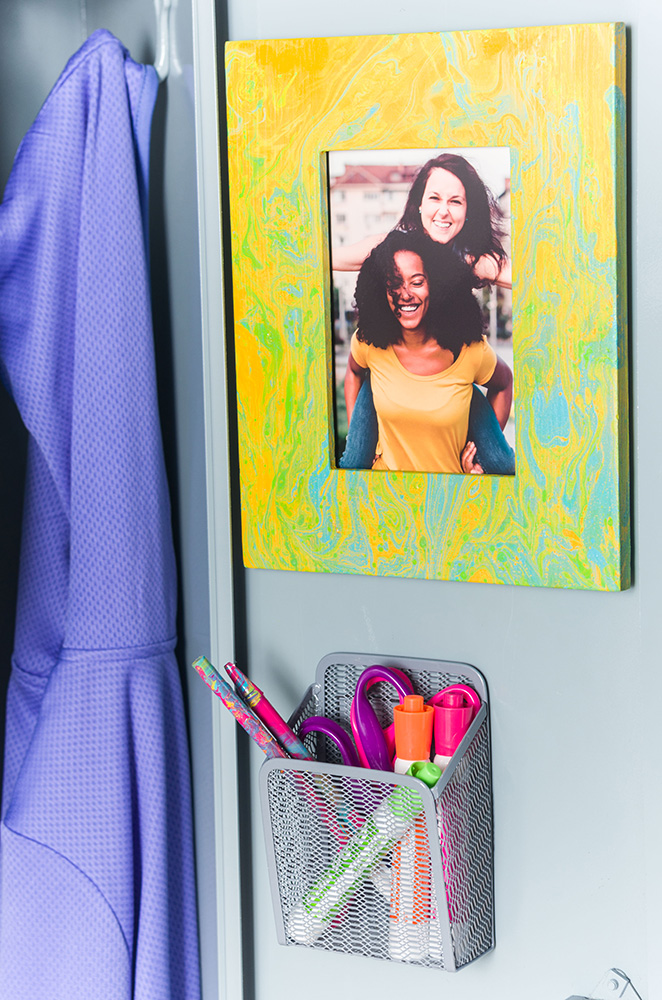
Create your own hydrodipped wood picture frame with your team colors or just your favorite colors! Decorate your room, dorm or locker using Testors enamel paints dripped in water give you a tie-dyed look.
Project Steps
Step 1
Prepare your surface with a drop cloth or Kraft paper.
Step 2
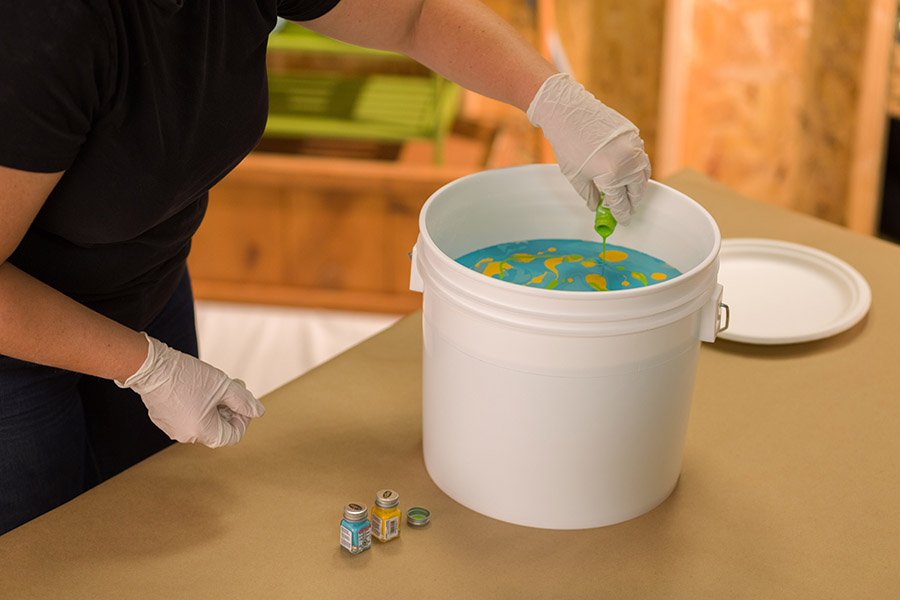
Fill a 5-gallon bucket with lukewarm water (78 degrees) for best results.
Step 3
Slowly pour enamel paints into the water, one bottle at a time until the desired color is achieved.
Step 4
Use a stir stick to gently swirl the paints in the bucket to form a unique pattern.
notE: Do not stir the paint into the water, gently drag the paint into a cool pattern on top of the water.
Step 5
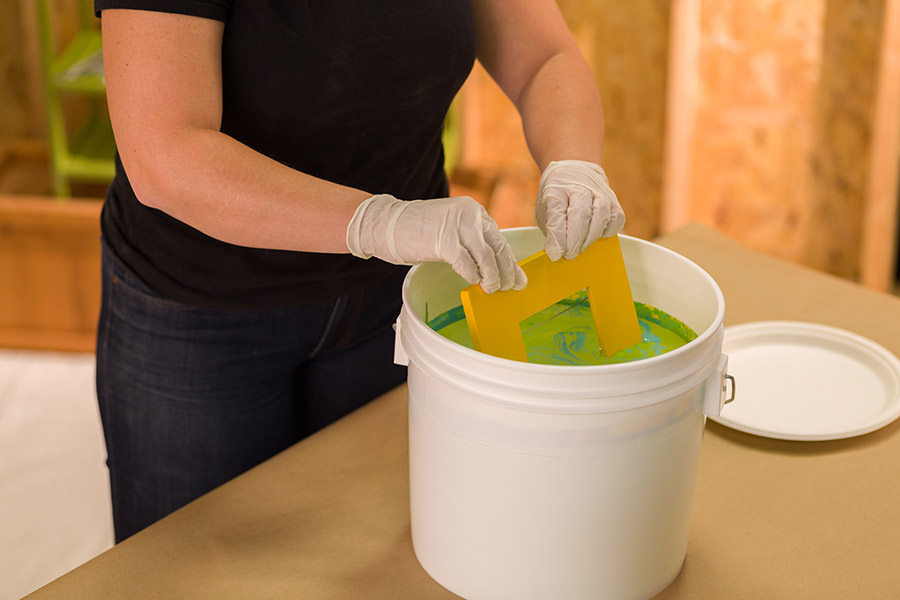
At a slight angle, slowly dip the wood frame into the paint and water until completely submerged.
Step 6
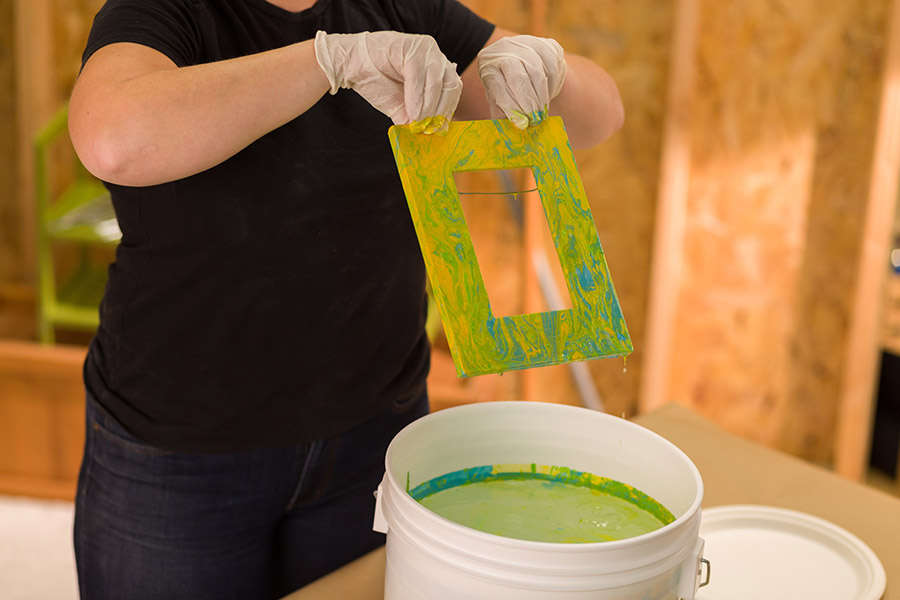
Slowly remove the frame from the water making sure paint adheres to the frame.
Step 7
Set the frame aside to dry for approximately 1 hour to the touch, and approximately 24 hours to use.