Rust-Oleum Projects
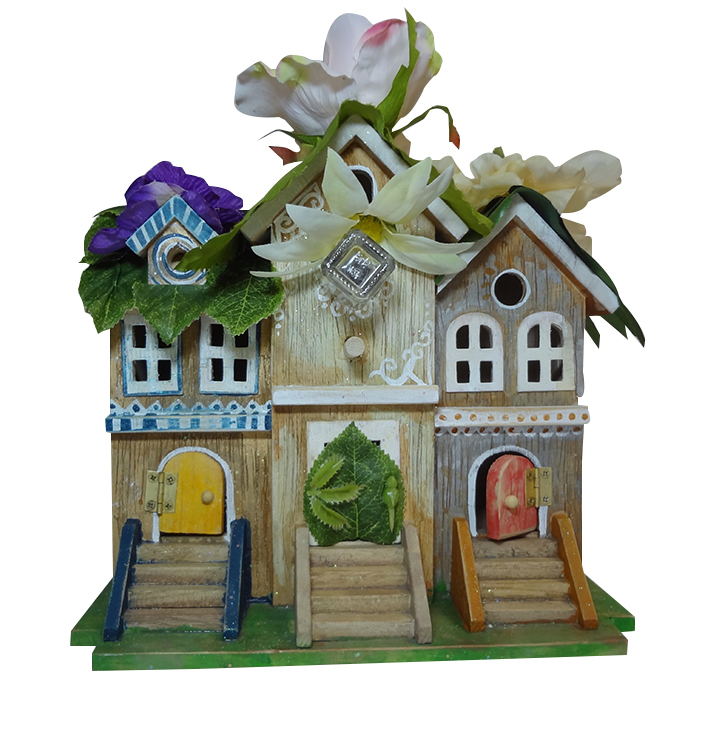
Fairy Condo Bird House
Browse Projects
-
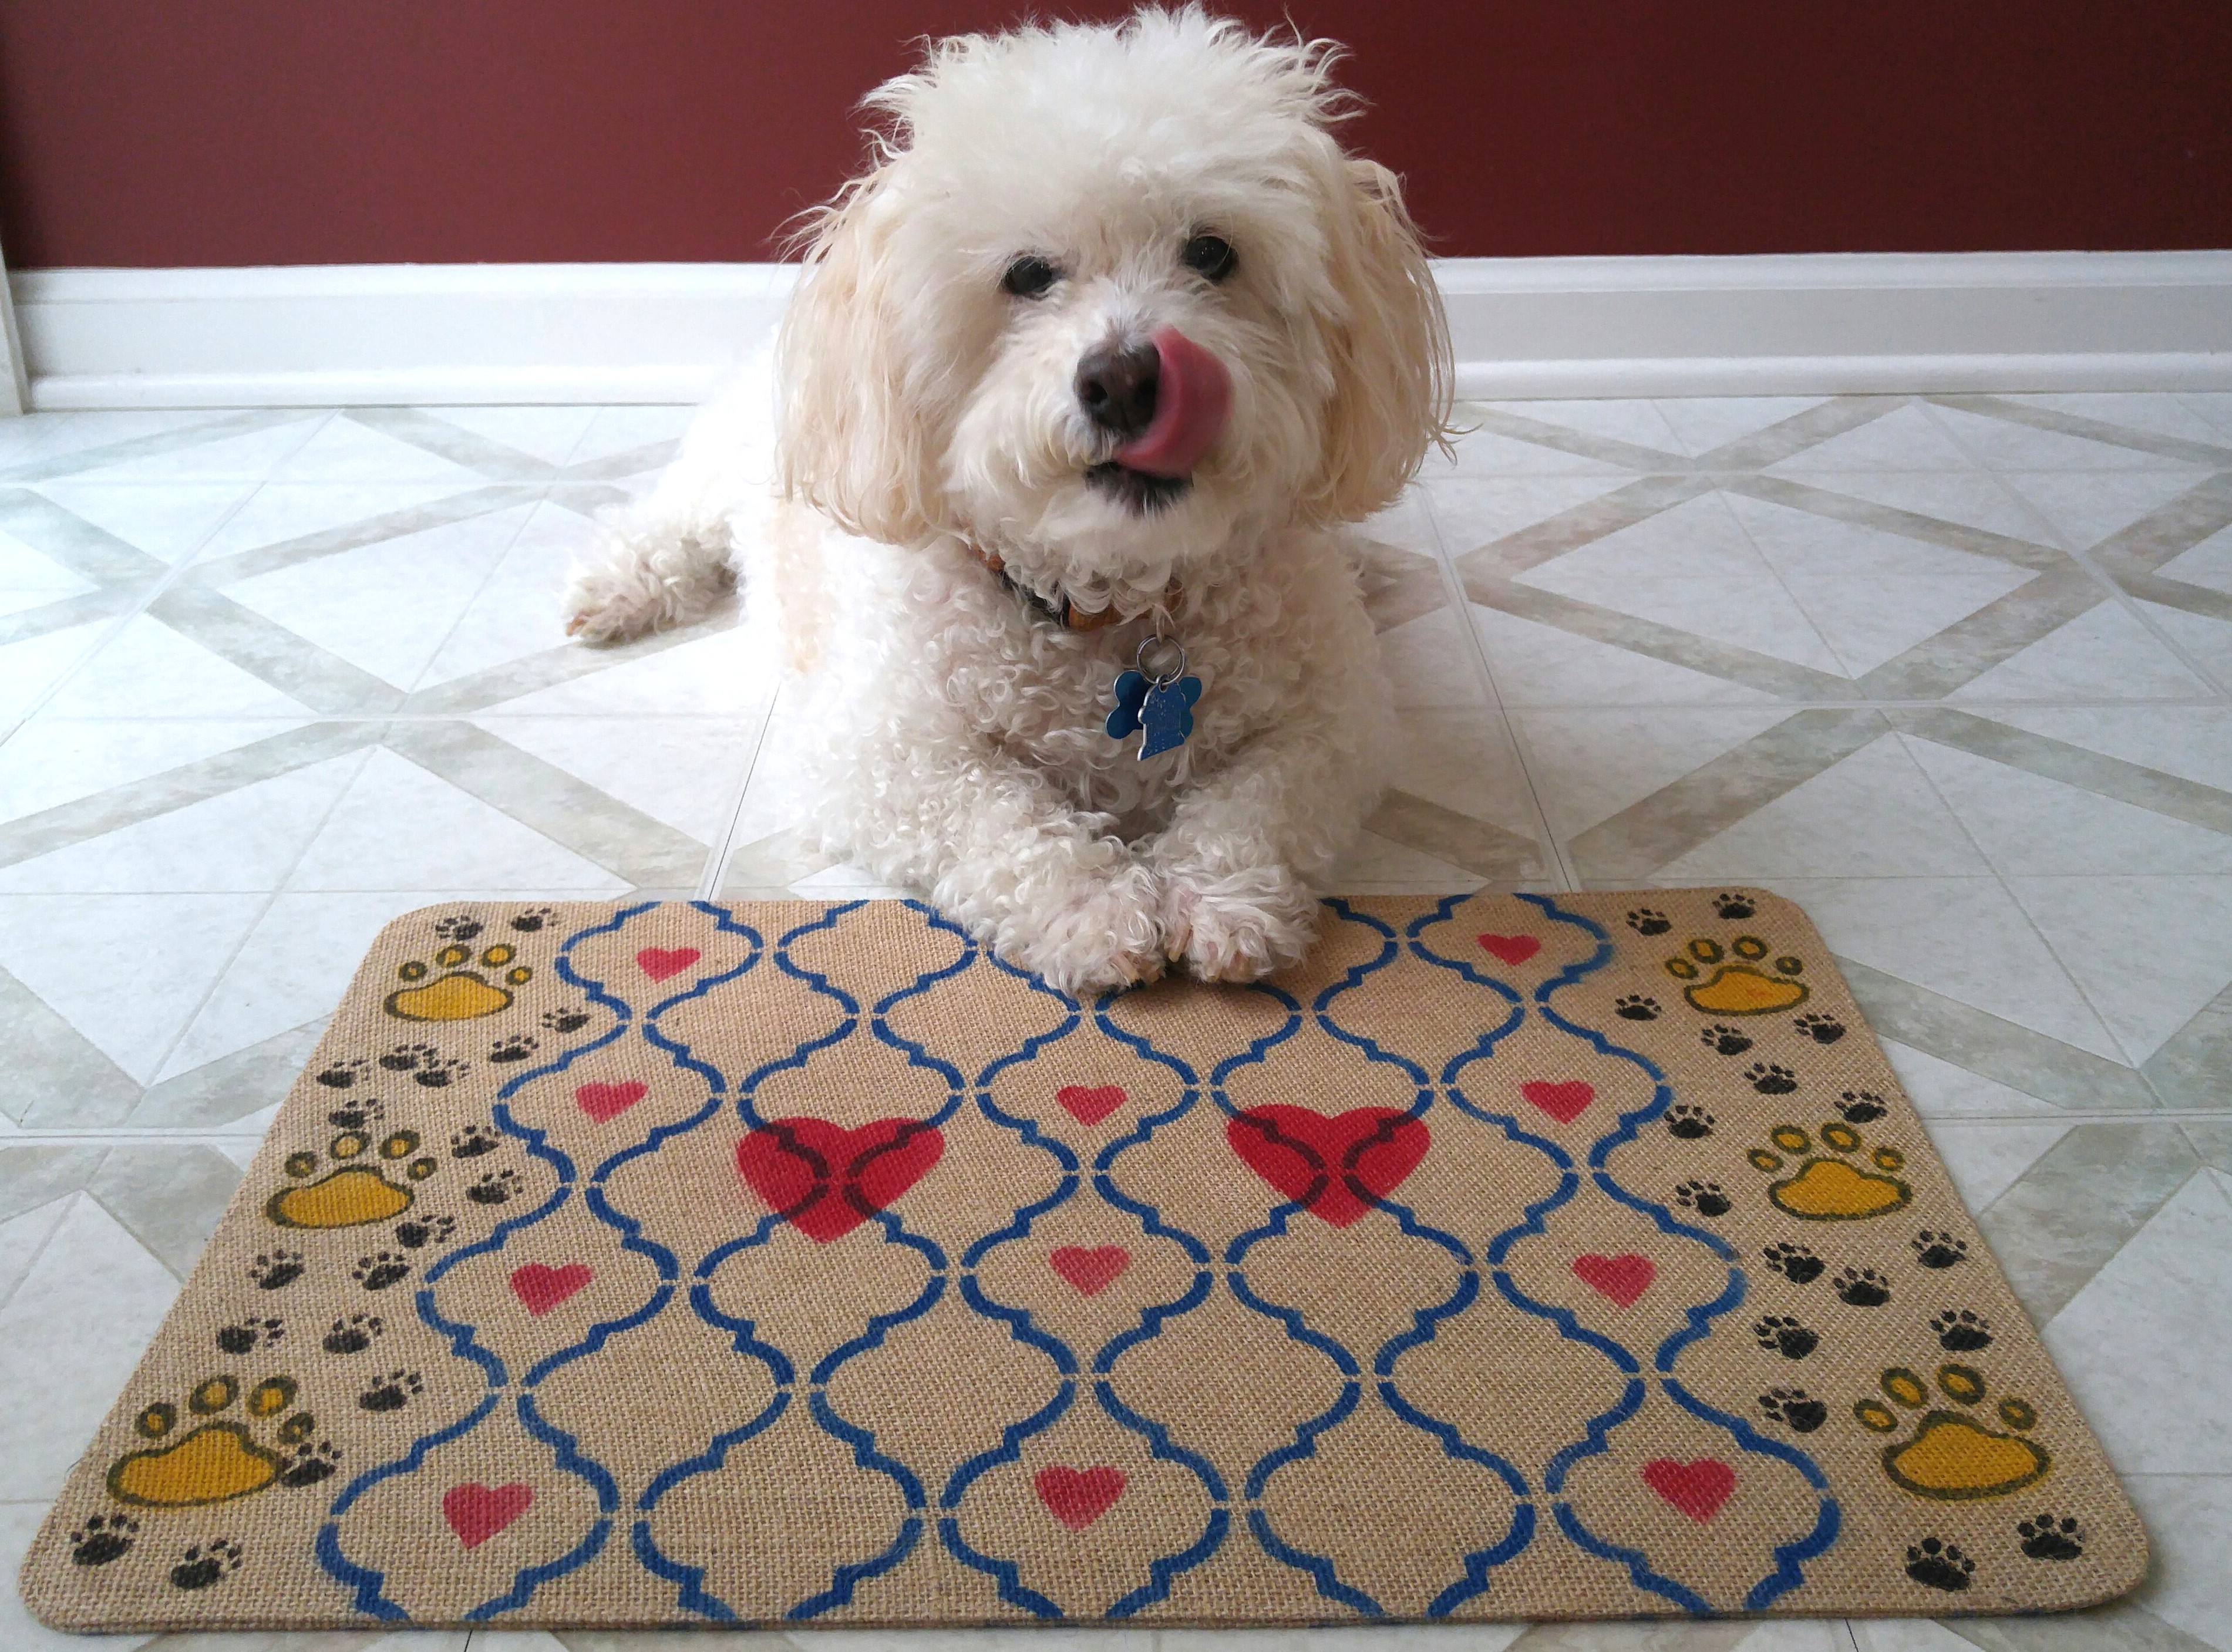
Doggy Placemat
-
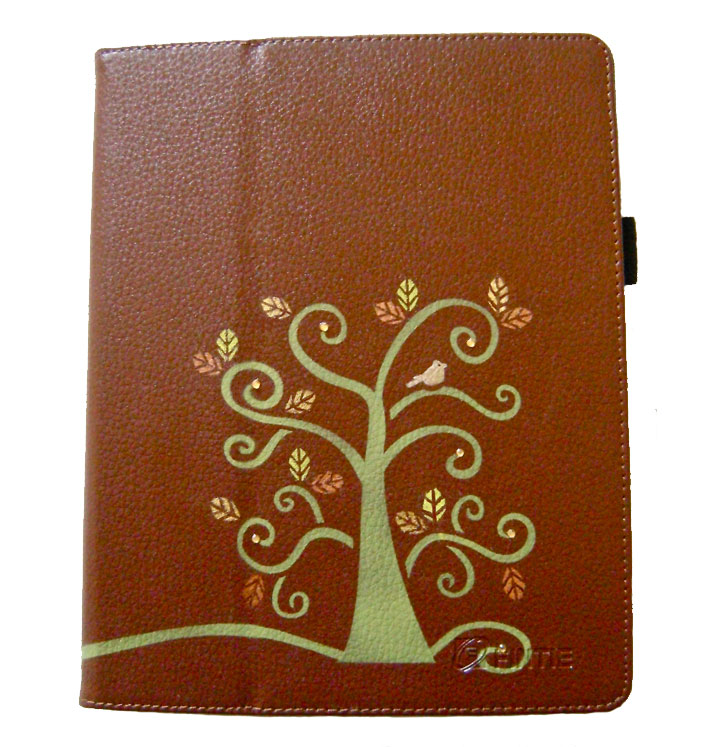
Fall Themed iPad Case
-
Tools & Supplies:
-
Artminds Brownstone Birdhouse (Item #10210147 at Michaels)
-
Fork
-
Sandpaper
-
Glitter
-
Glue Gun
-
Assorted Faux Flowers and Leaves
-
Assorted Paint Brushes

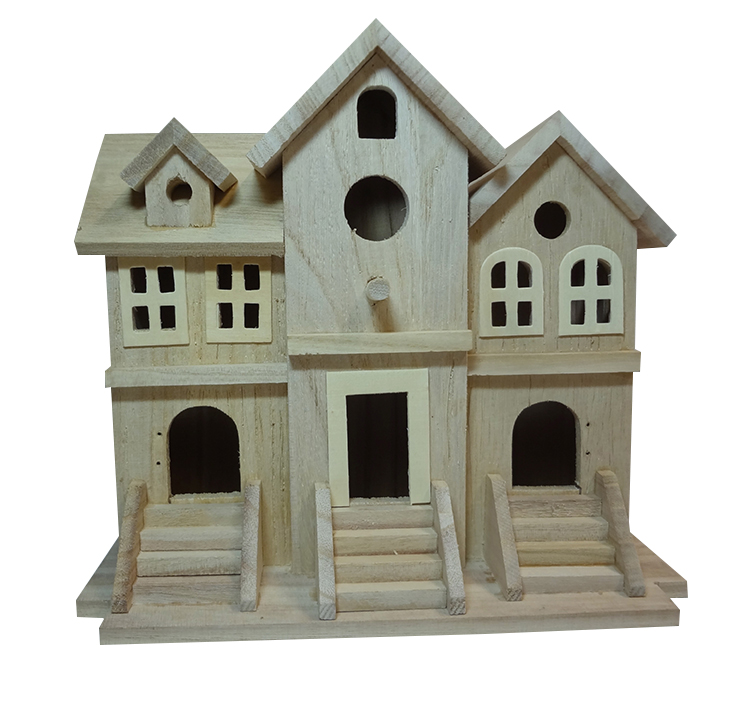
- Prep the birdhouse by lightly sanding any rough edges. Remove the two little doors and set aside. To add a rougher wood texture to the bird house, take a regular kitchen fork and drag the points up and down the wood following the wood grain. Go over it several times using varying pressure.
- Begin painting the condo with Testors' CreateFX® White Gloss Enamel paint and a medium sized paintbrush. “Dry brush” the white paint onto the center condo unit. Make sure to get the back section as well. The key to dry brushing is to use a small amount of paint on the brush, then brush across the wood, so that just the outermost layer of wood is painted. If the paint is getting down into the wood grain, use less paint.
- Repeat the same process using the Metallic Silver paint on one end and Metallic Gold on the other.
- To give the bird house a more distressed look, begin to paint the CreateFX Washes over the whole house. This time, you want the wash to run down into the grooves and cracks. Use the Driftwood Wash over the white section, the Mud Wash over the silver, and the Dark Gray Wash to paint over the gold section. As before, make sure you paint the back of the condo as well.
- Once the paint is almost dry, use the CreateFX Dark Rust paint to further distress the entire condo. Using just a little bit of paint on your brush, dab the Dark Rust into the corners and along the roof lines. Make sure to get around the door frames and under the windows. Let the project dry.
- Once bone dry, generously spray the condo down with Testors’ Dullcote Spray. This takes just a few minutes to dry.
- Begin to paint the details. Start with the grass by using a mix of tan and green paints, to make varying shades. Be sure to get into the little corners.
- Use the White Gloss to paint all the window trim pieces and eaves on the condo units. On the center unit, I also used the white paint to add a few little details on the top half. Let the white dry.
- While the white paint is drying, paint the two little doors that were set aside earlier. Thin down some of the red by about half and paint onto one door. Thin down some of the yellow paint and apply it to the other door. Set them aside to dry.
- Use the Flat Sea Blue, on the gold condo, to paint in little stripes on the trim above the door and to outline the window. Add any other detail, as desired. Paint the sides of the steps the same blue.
- Use the Flat Brown paint to detail the silver section. You want each unit to have their own personality. Have fun with it. It is a fairy condo after all! Let the entire project dry.
- Once everything is nice and dry, take the 320 grit sand paper and rough up all the edges. Distress the trims and the two little doors as well.
- Put the red and yellow doors back on. Paint the steps with Dark Gray Stain. Let it Dry.
- Once the project is dry, it’s time to seal it one more time. Spray one side at a time generously with the Dullcote Spray. While the spray is still tacky, sprinkle just a touch of glitter over it for just a touch of fairy magic. Do the same to all four sides.
- It is time to finish the Fairy Condo. Pull leaves off the fake flower stems and glue them onto the roofs, as desired with a glue gun. I chose to have a different leaf roof for each condo unit. Think of how shingles lay on a roof when putting the leaves on. We wouldn’t want any little fairies getting wet! After the leaves were glued on, I used whole flowers and glue them onto two of the roofs. On the gold unit, I cut apart purple flower petals and glued them onto the roof.
- To create the center door, glue a small bud from one of the flowers onto a leaf. Glue the leaf over the opening in the center of the condo unit.
- A fun final detail: I had used up all of the thinner in the small bottle that came in the Testors’ paint kit, so I cleaned off the labels and made sure the inside was clean and dry. Then I glue gunned the top of the little jar into the bird hole opening. As a final touch, I cut a fake flower in half and added it over the jar.