Rust-Oleum Projects
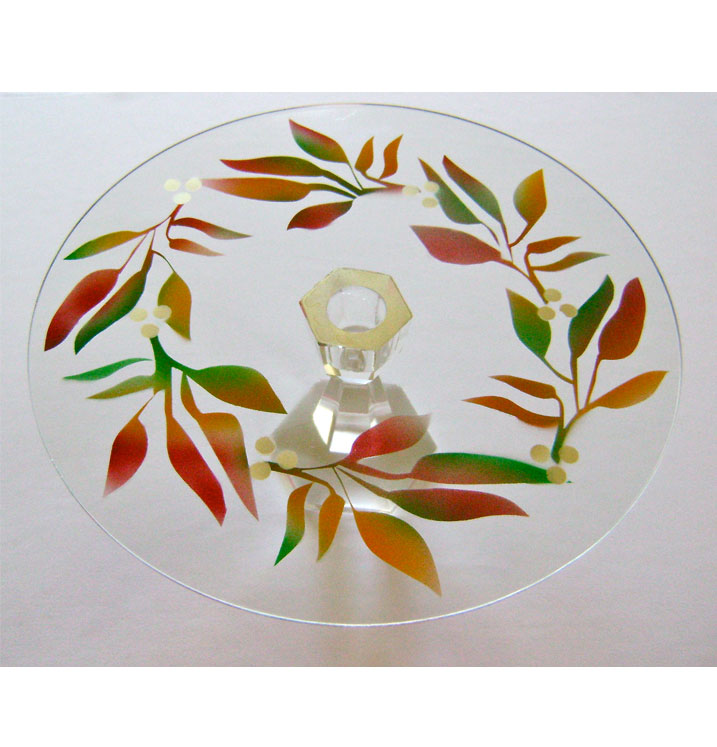
Fall Into Sweets...an Airbrushed Cake Pedestal
Browse Projects
-
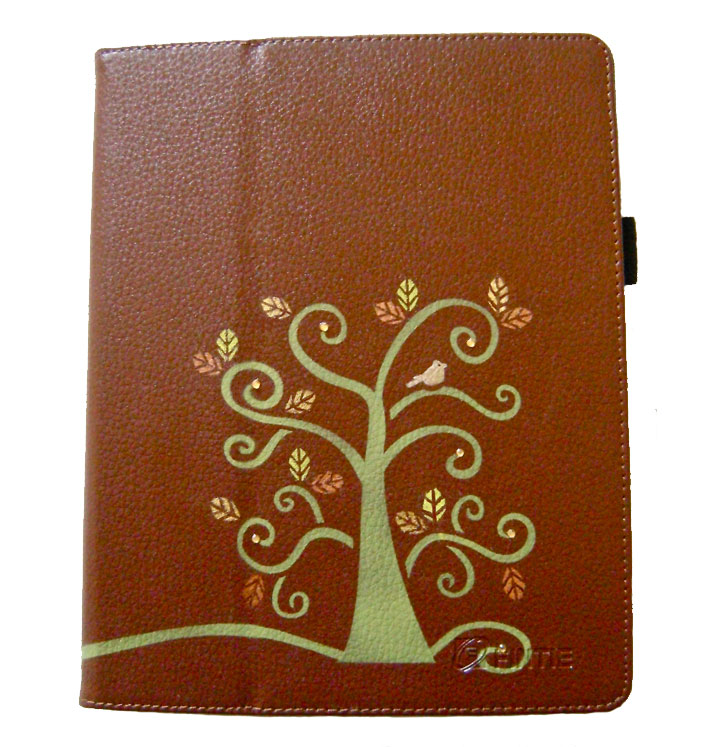
Fall Themed iPad Case
-
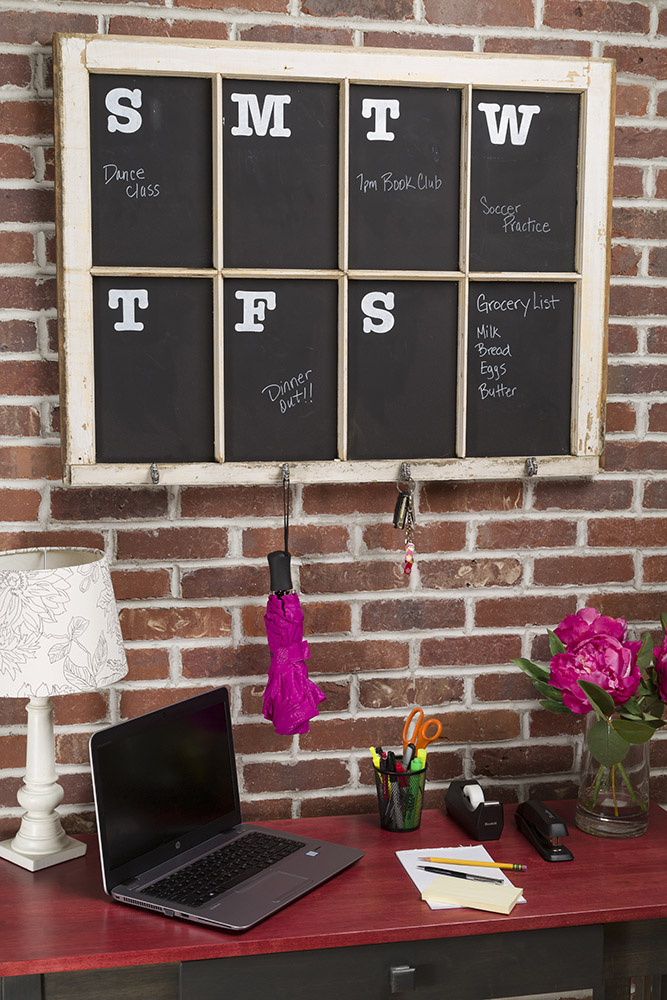
Turn A Farmhouse Window Into a Weekly Chalkboard Calendar
-
Tools & Supplies:
-
Glue
-
Hole Punch
-
Painter's tape
-
Permanent Marker
-
Removeable White Label Sheets
-
Round DS Flat Glass 10 Inches
-
Stencil
-
Tape
-
Tissue

Instructions:
- Print out two of the berries stencils and two of the leaf stencils on printer paper to use as layout pages.Tape the identical pages together to form 10” circles.The black triangles are provided to help you align the berries stencil with leaf stencil while you work.
- Print out two of the berries stencil pages on adhesive sheets.
- Print out two of the leaf stencil pages on adhesive sheets.
- Cut slits in the berries stencil to access the berry circles with a hole punch. Punch out and save the circles for use later.
- When all the berries are punched out, tape the slits closed.
- Place the berries layout page under the glass plate.
- Arrange the two berries stencil pages to form a 10” circle and place it against a window to see where images overlap. Cut away the pages as needed so as not to block any openings that should receive paint. Remove the backing from the berries stencil pages. Lay down one berries stencil page on the glass plate with the layout page under the glass as a placement guide. Repeat with the second berries page.
- Mask areas not to be painted then spray the openings with gold paint.
- Stuff a tissue into the opening in the candle holder. Tape paper towels around all but the top flat surface.
- Paint the surface with the gold paint.
- Remove the berries stencils from the glass plate.
- Cut out the leaf stencils. As with the berries stencil, the leaf stencil pages will overlap when adhered to the glass so cut away areas as needed to avoid blocking leaf openings that should receive paint.
- Position the leaf layout page under the glass to guide your placement of the stencil.
- Check placement of the leaf stencil before you remove the backing. You should be able to see the leaf layout and the painted berries through the openings.
- Tape the two leaf stencils together and remove the backing. Before you stick the stencil to the glass, position the punched circles over the painted berries. Applying the stencil directly onto the berries may result in the gold paint getting pulled up when the leaf stencil is removed. The circles will prevent that. Put down the leaf stencil matching the layout under the glass plate.
- To paint the leaves with Fall colors, mix a little Crimson with yellow to create the deep golden color, mix a few drops of green with the Crimson to create the burgundy color, and mix a few drops of Crimson with the green to create the forest green color.
- Paint 1/3 of each leaf grouping with the golden paint. Move the airbrush diagonally across the group rather than vertically or horizontally.
- Repeat with the burgundy color, followed by the deep green. Don’t obsess over cleaning the airbrush nozzle between colors. You’ll get more interesting shades if you allow them to blend.
- When all paint is dry, remove the stencil. note: Allow paint to dry completely between steps.
- Check to be sure the clear areas of the glass are clean, then spray the painted side of the glass surface with Glosscote to protect the paint. Follow the instructions on the spray can.
- On the unpainted side of the glass, mark the center of the plate with a permanent marker.
- Uncover the candle holder leaving a strip of tape wrapped around the top edge to protect it from glue.
- Smear a small amount of adhesive appropriate for glass to the gold painted surface of the candle holder and center it on the glass circle.
- Wash off the center mark. Allow the glue to dry for 24 hours.
Tip: The cake pedestal should not be immersed in water. To clean, wipe the top with a wet sponge.