Customer Project
Aztek Airbrushed Leaf Twig Wall Hanging
Browse Projects
-
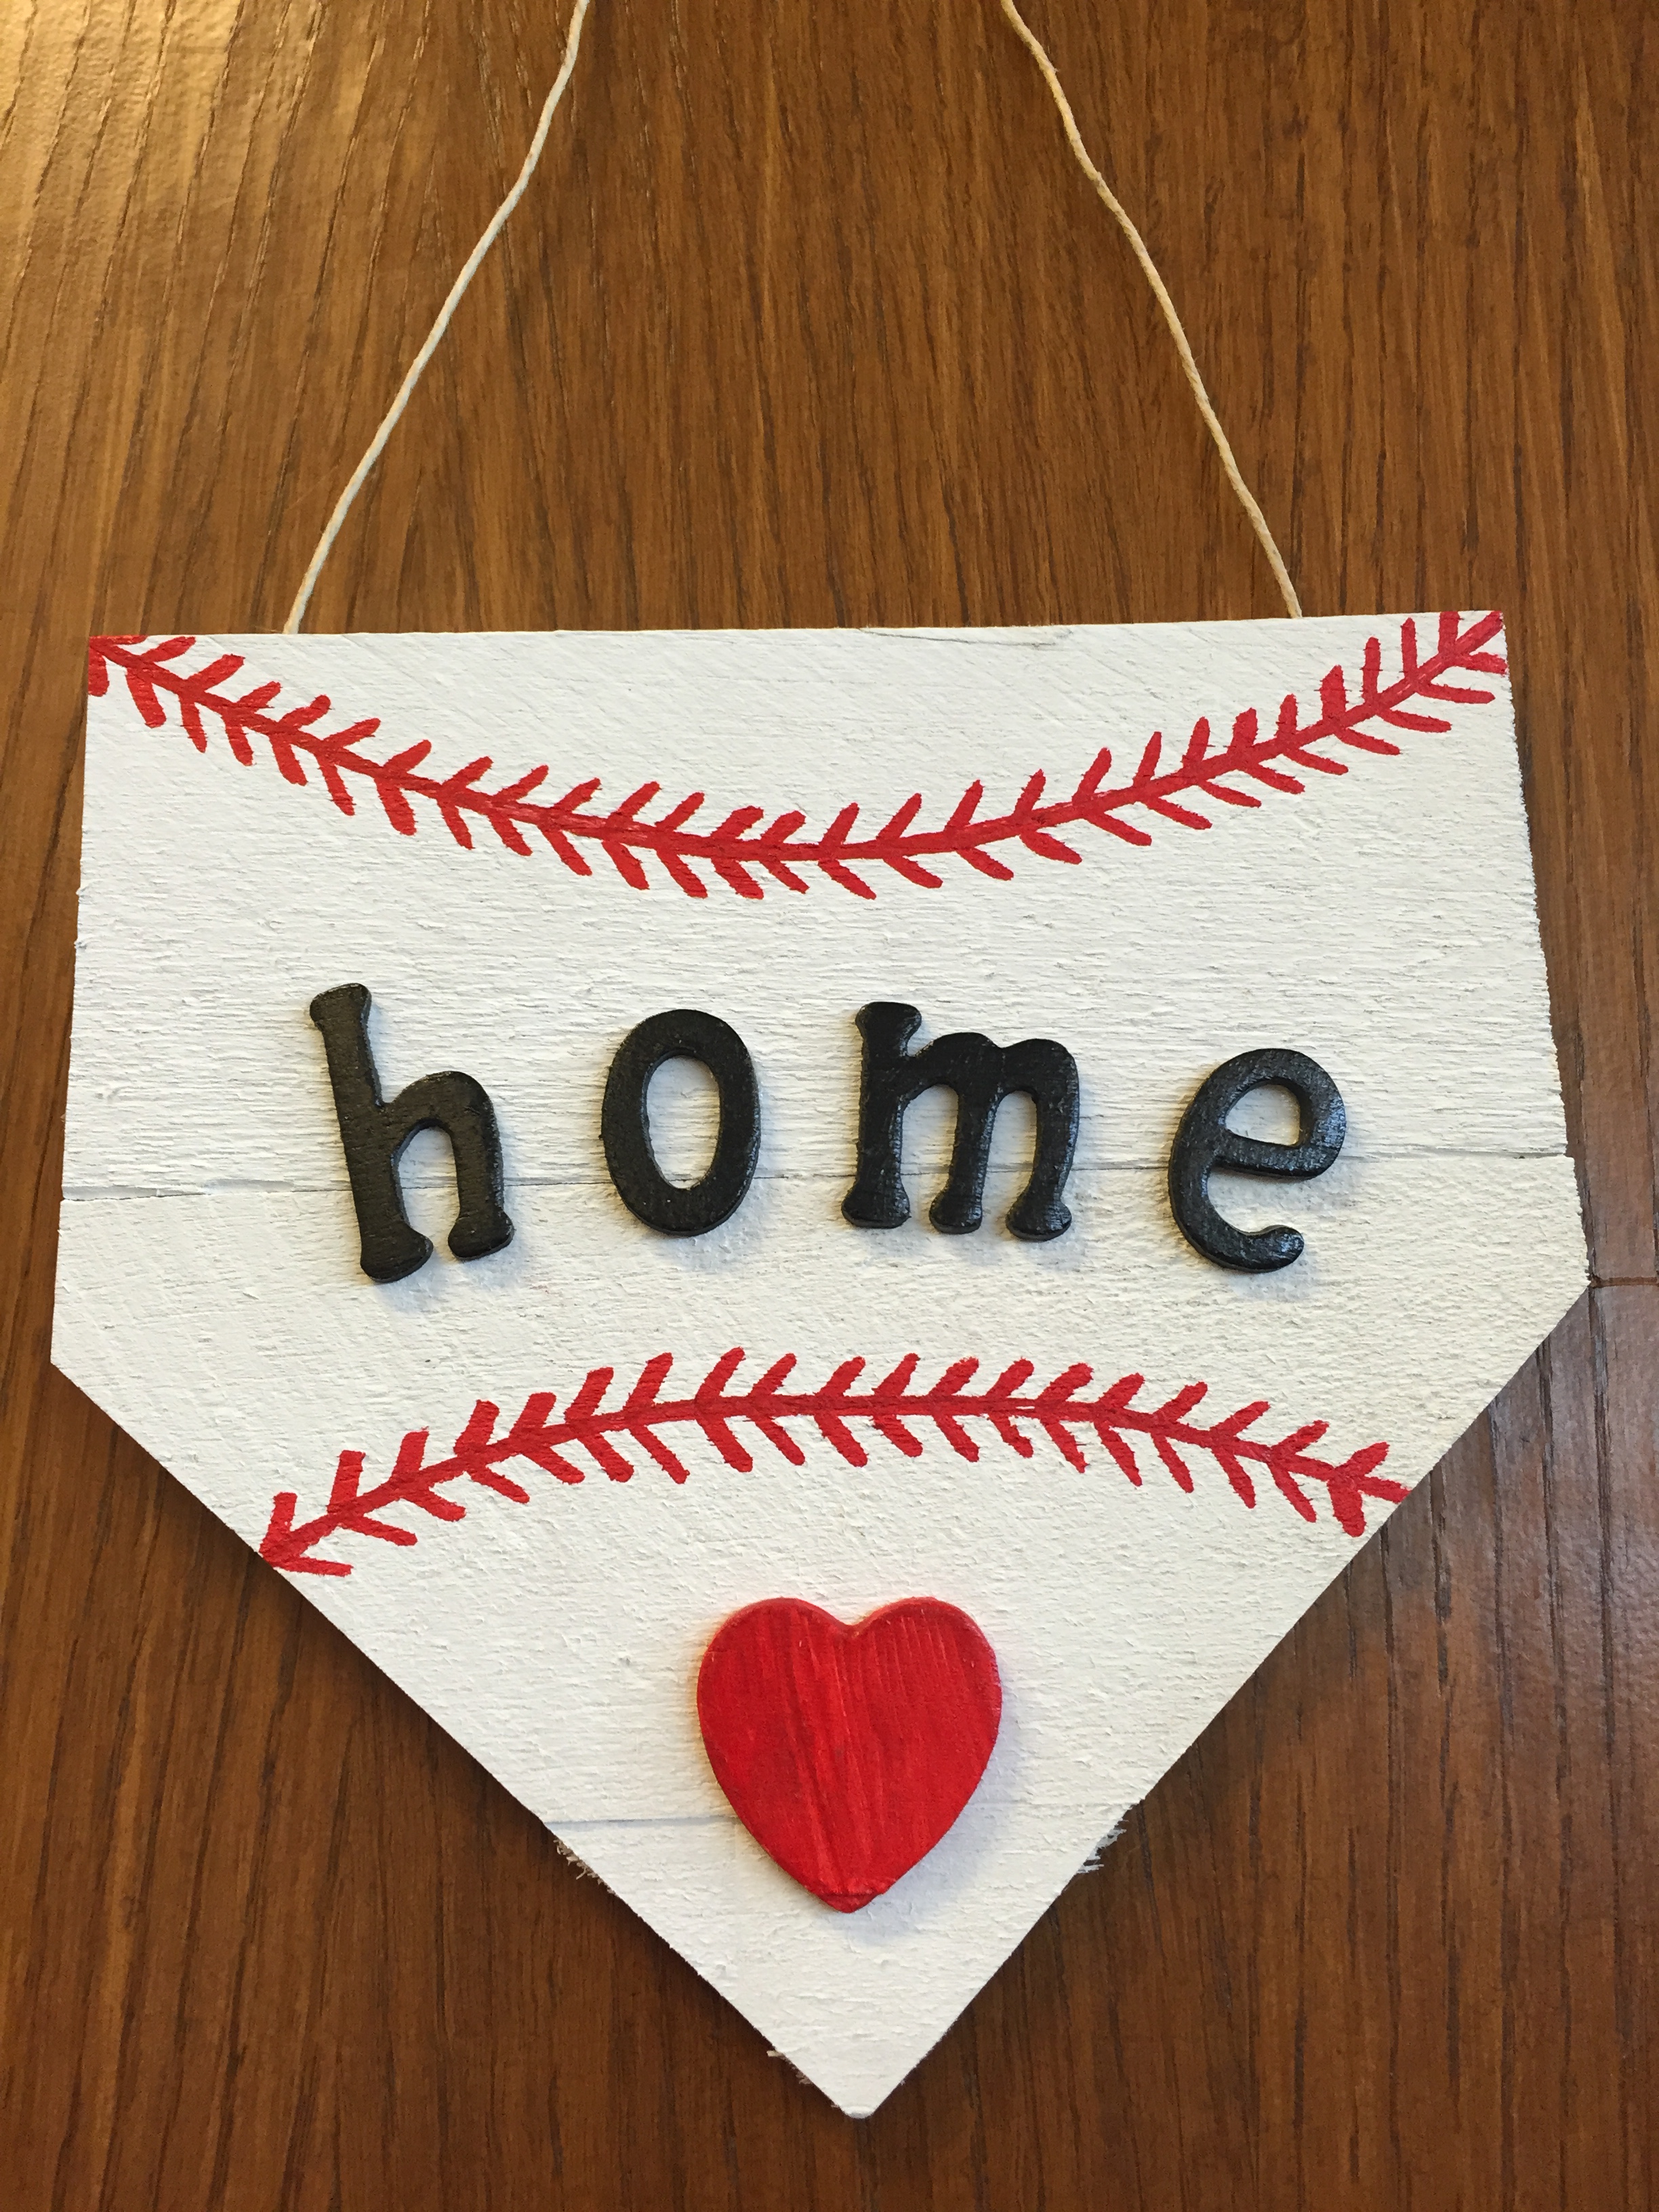
Home Plate
-
Let It Snow

-
Tools & Supplies:
-
Glue Gun
-
Glue Sticks
-
Paper Towels
-
Scissors
-
Wire Cutters
-
Bird Seed
-
Painter's tape
-
Burlap Ribbon
-
Raffia
-
Red Floral Sprigs
-
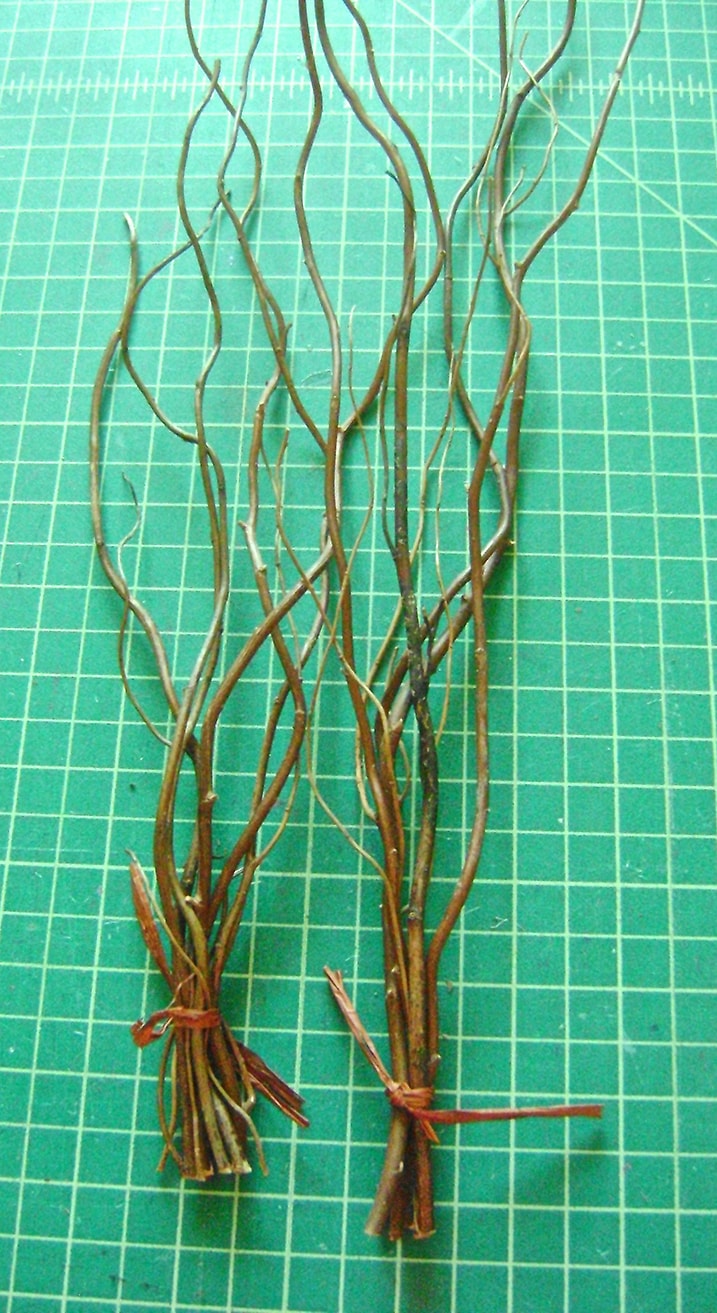
Branches
-
1/8" Red Rawhide 36"
-
Leaf Stencils
-
Cardboard Tubes
-
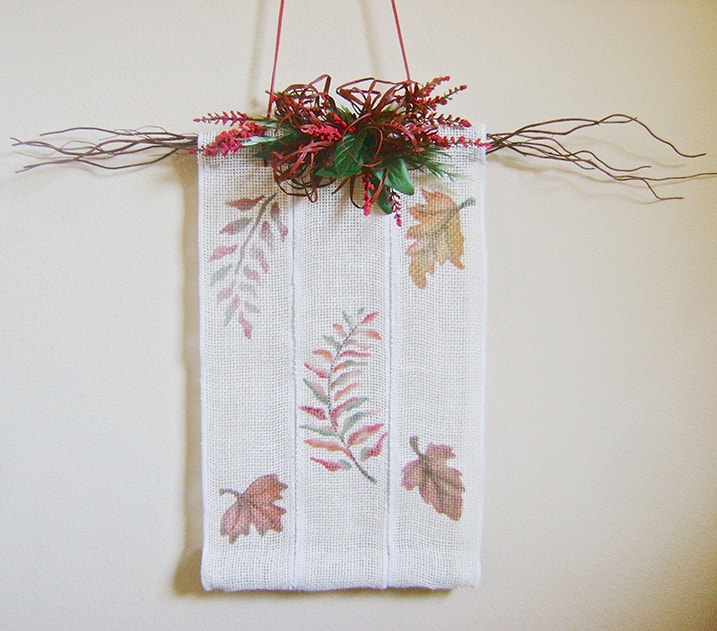

Finished Hanger measures 12” x 20”
Allow all paint to dry between steps.
Protect areas not being painted from accidental overspray.
Step 1
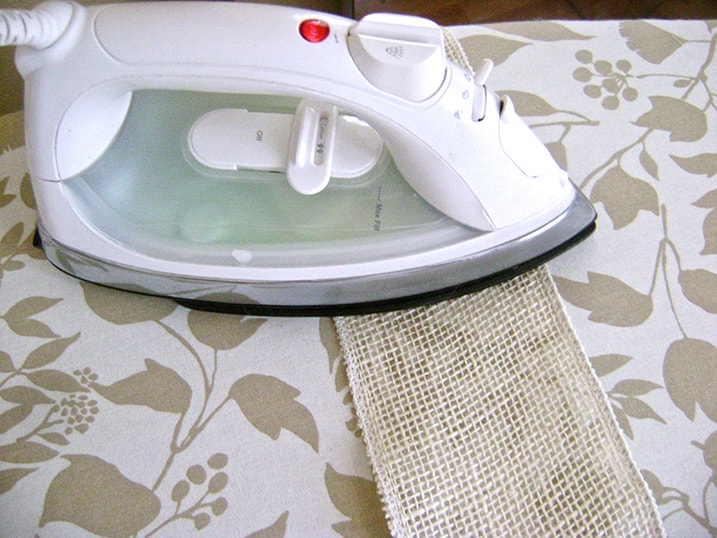
Cut the burlap ribbon into three strips measuring 32” long. Iron the creases and wrinkles out of the ribbon strips.
Step 2
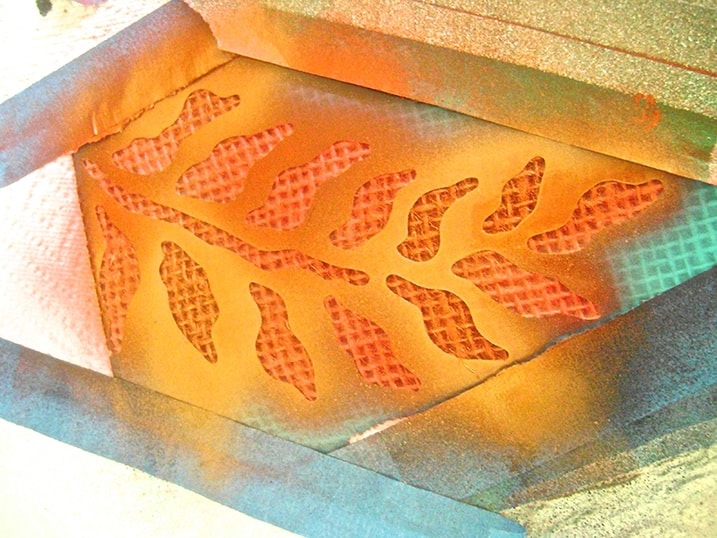
Spray adhesive on the backside of the leaf stencils. On a protected surface, set down a paper towel with a ribbon on top. Position the first stencil on the ribbon about 8.50” from the top edge and another stencil 8.50” from the bottom.
Step 3
To create three autumn colors, mix a little green into the red, mix a little red into the green, and mix a little green into the copper for details like the veins and leaf outlines. Fill paint cups or bottles with these three colors. Also have available solid copper and orange and white paints.
Step 4
Choose colors for the stencils. Consider adding white to any color to create a different look with one color. Airbrush the stencils with your chosen colors.
Step 5
Airbrush the next ribbon strip in the same way, with the stencils 8.50” from the ends. This time choose two different stencils and different colors.
Step 6
Airbrush the last strip with the largest stencil centered on the ribbon.
Step 7
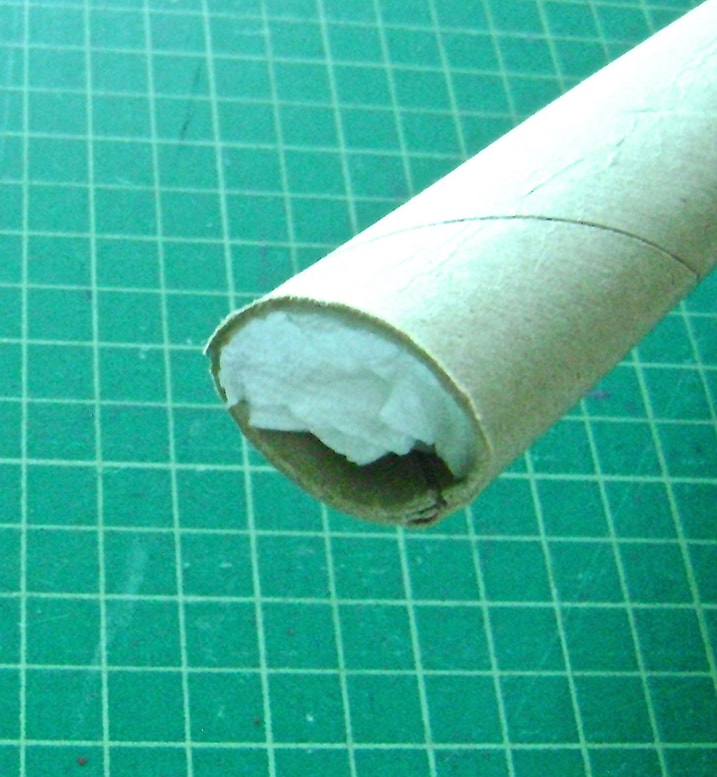
Cut a sturdy piece of cardboard tube into two 11” long pieces. Flatten the tubes slightly so they are oval instead of round. Put one tube aside. Hot glue a piece of paper towel in one end of the first tube.
Step 8
Hot glue a scrap of the burlap ribbon over the tube end. Fill the tube with birdseed. Hot glue the other end with the paper towel and glue ribbon over it. This tube will be at the bottom of the hanger and will provide ballast and stability.
Step 9
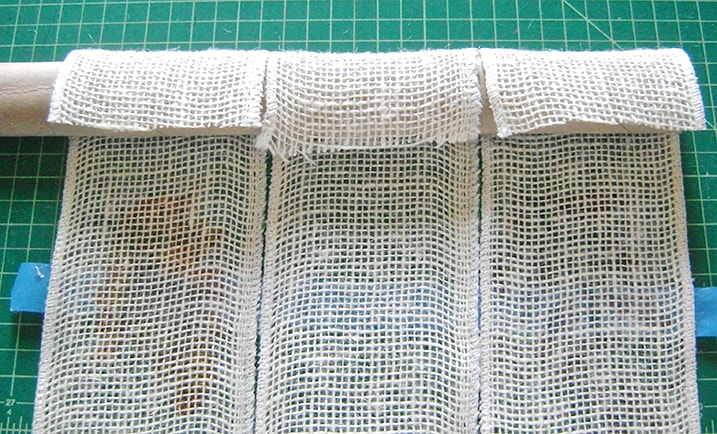
Tape the three ribbons to keep them from moving and line them up with the single leaf ribbon in the center.

Step 10
Turn the bottoms of the ribbons over the tube. Trim them and tuck in the raw edges. Hot glue them to the tube. Turn the tube again and hot glue it in place.
Step 11
With scissors, cut a DVD into irregular shaped pieces. Use caution as cut edges can be sharp.
Step 12
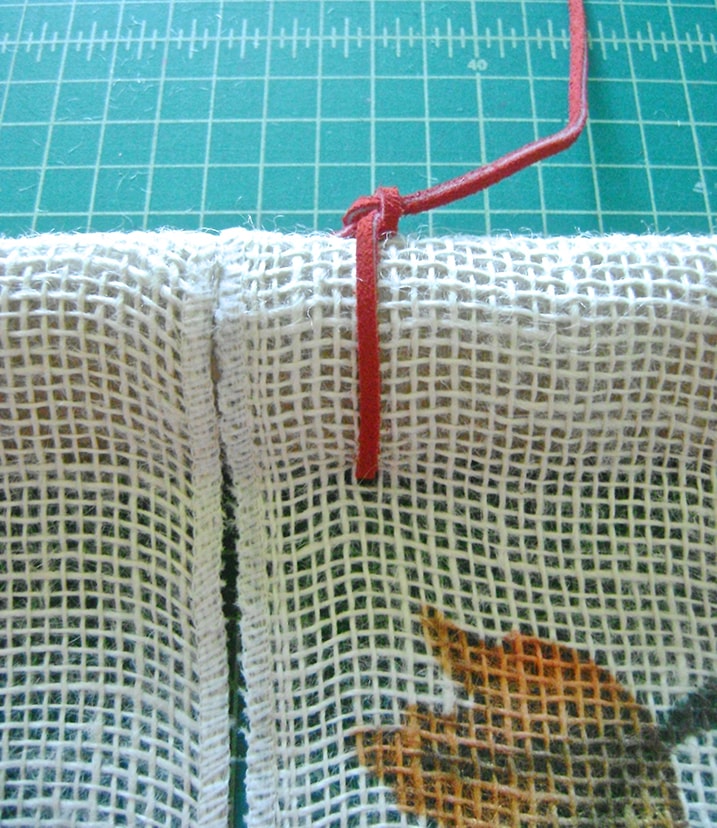
Create a hanger for the project. Cut a piece of rawhide to measure 32”. Slip the ends into the weave of the ribbon 3” from the sides of the hanger. Tie the rawhide in knots and trim off the tails.
Step 13
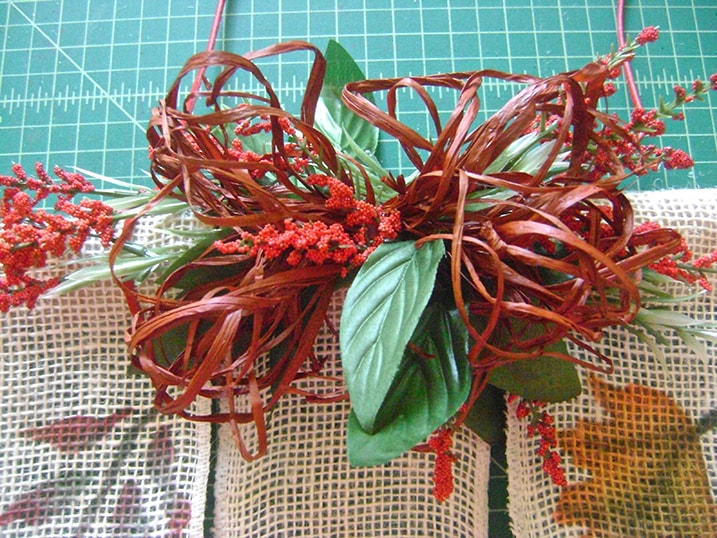
With wire cutters, trim the red stems to fit in the center of the hanger. Hot glue them to the ribbon.
Step 14
Make a bow with three yards of raffia. Wind it around a six-inch wide cardboard. Slip it off and secure it in the center with a separate piece of raffia. Hot glue the bow to the top center ribbon. Pull the strands away from each other to create volume.
Step 15
Separate the branches into two bunches. Hold each together with a piece of raffia. Cut off the blunt ends so the branches measure 6” long. Coat the ends with a generous glob of hot glue and insert them into the tube on both ends.

Project designed and created by Gloria Uhler at Domestic-Divaonline.com for Testor’s Corp.