Rust-Oleum Projects
Airbrushed Garden Tool Tote
Browse Projects
-
3D Printed Planter
-
Airbrushed Lacy Flower Pots
-
Tools & Supplies:
-
Amazing Air Airbrush System
-
Aztek Paint - 9450 Turquoise, 9447 Pink, 9451 Green
-
Duck Cloth Fabric 1 1/2 Yards
-
Scotch Spray Mount Repositionable Adhesive
-
9" Round Plastic Bucket
-
Testors Paint Cups
-
6" Velcro Strips® - 6"
-
1" Wide Straps - 4'
-
Sewing Notions
-
Painter's Tape
-
Floral Stencil
-
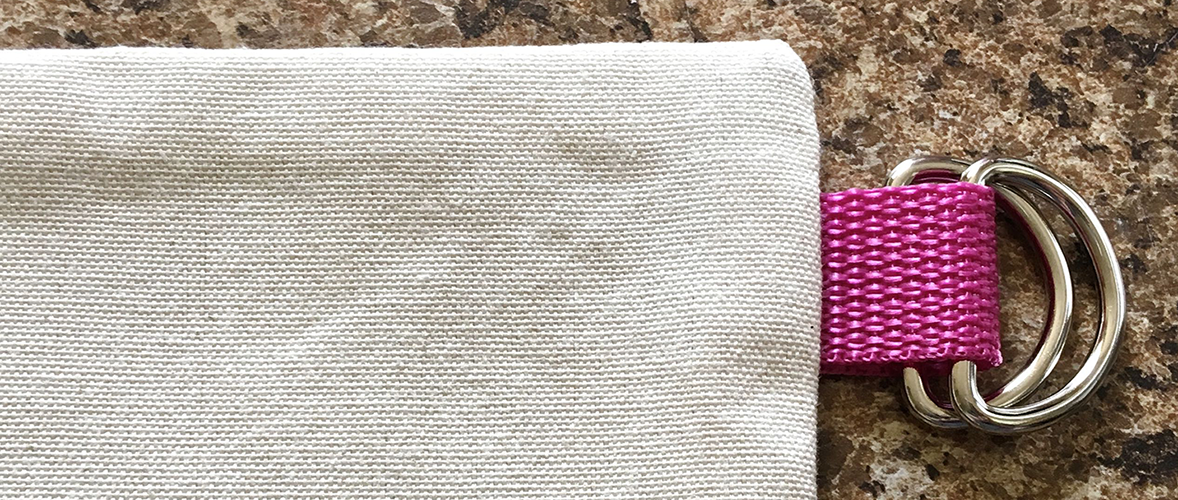
"D" Rings - 2
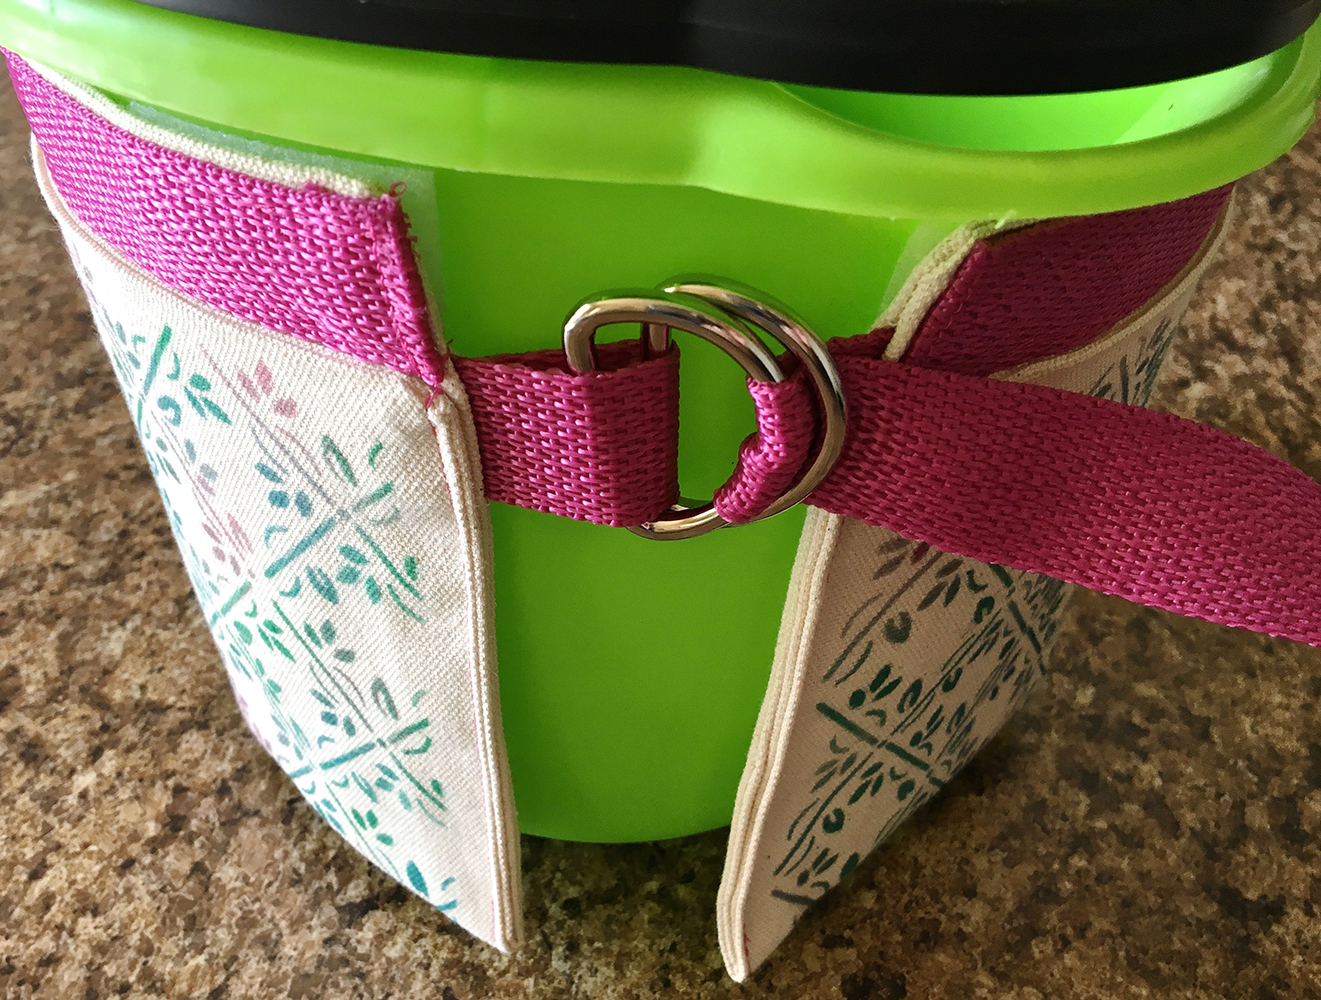
Make your own tote to wear around your waist. It'll hold your gloves, seeds and garden tools easily so you can be hands-free in your garden space. Airbrush a stenciled design and make it uniquely yours.
1. Protect areas not being painted from accidental overspray.
2. Cut two fabric pieces to measure 25.50" x 13”.
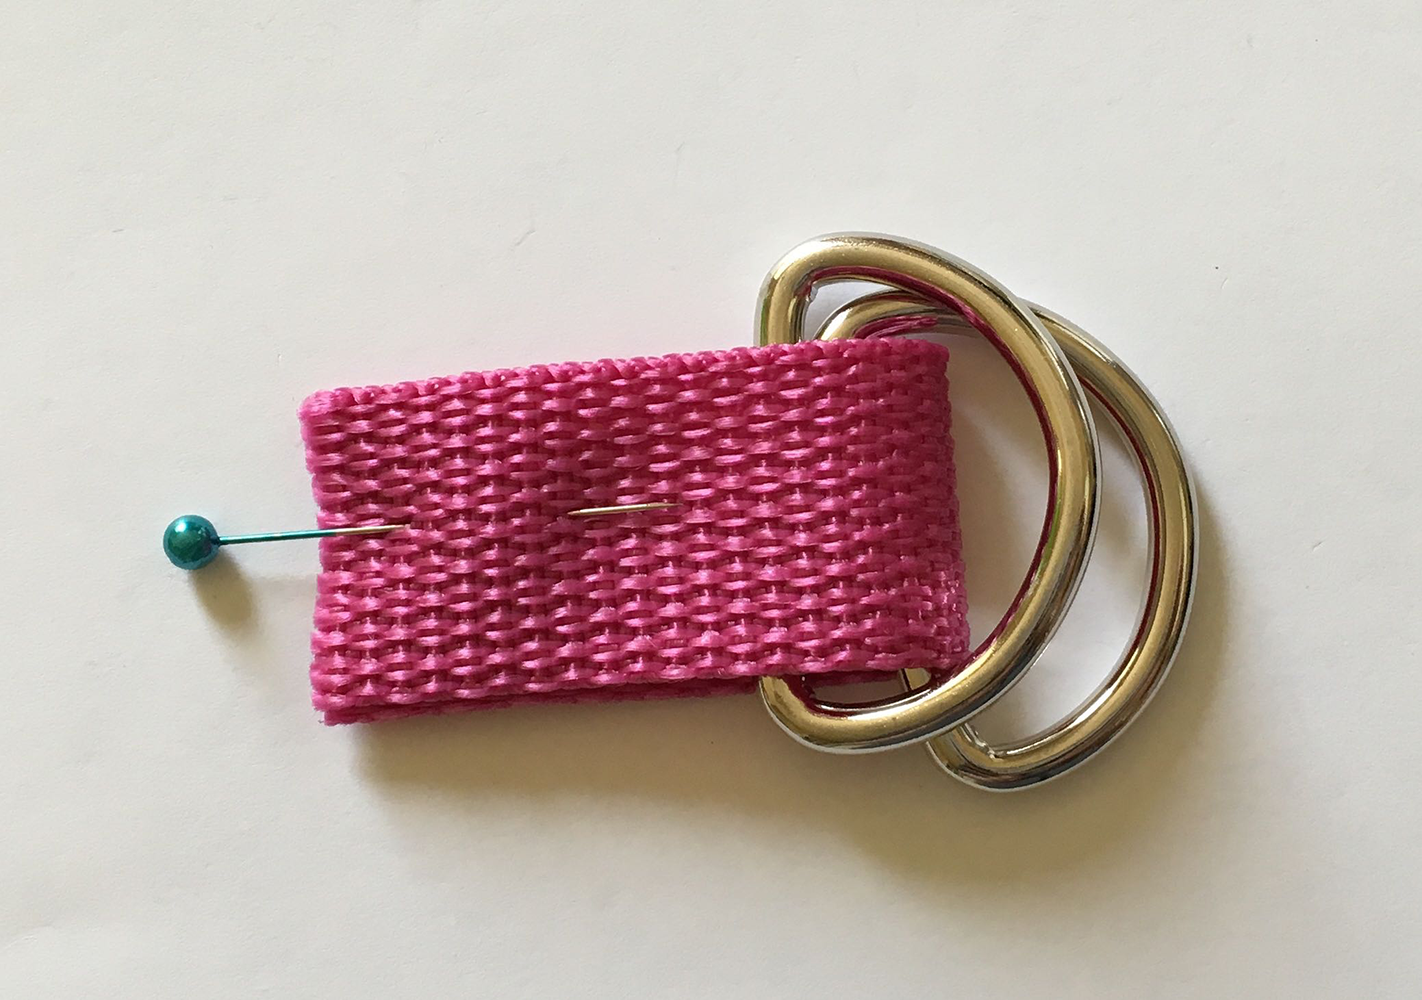
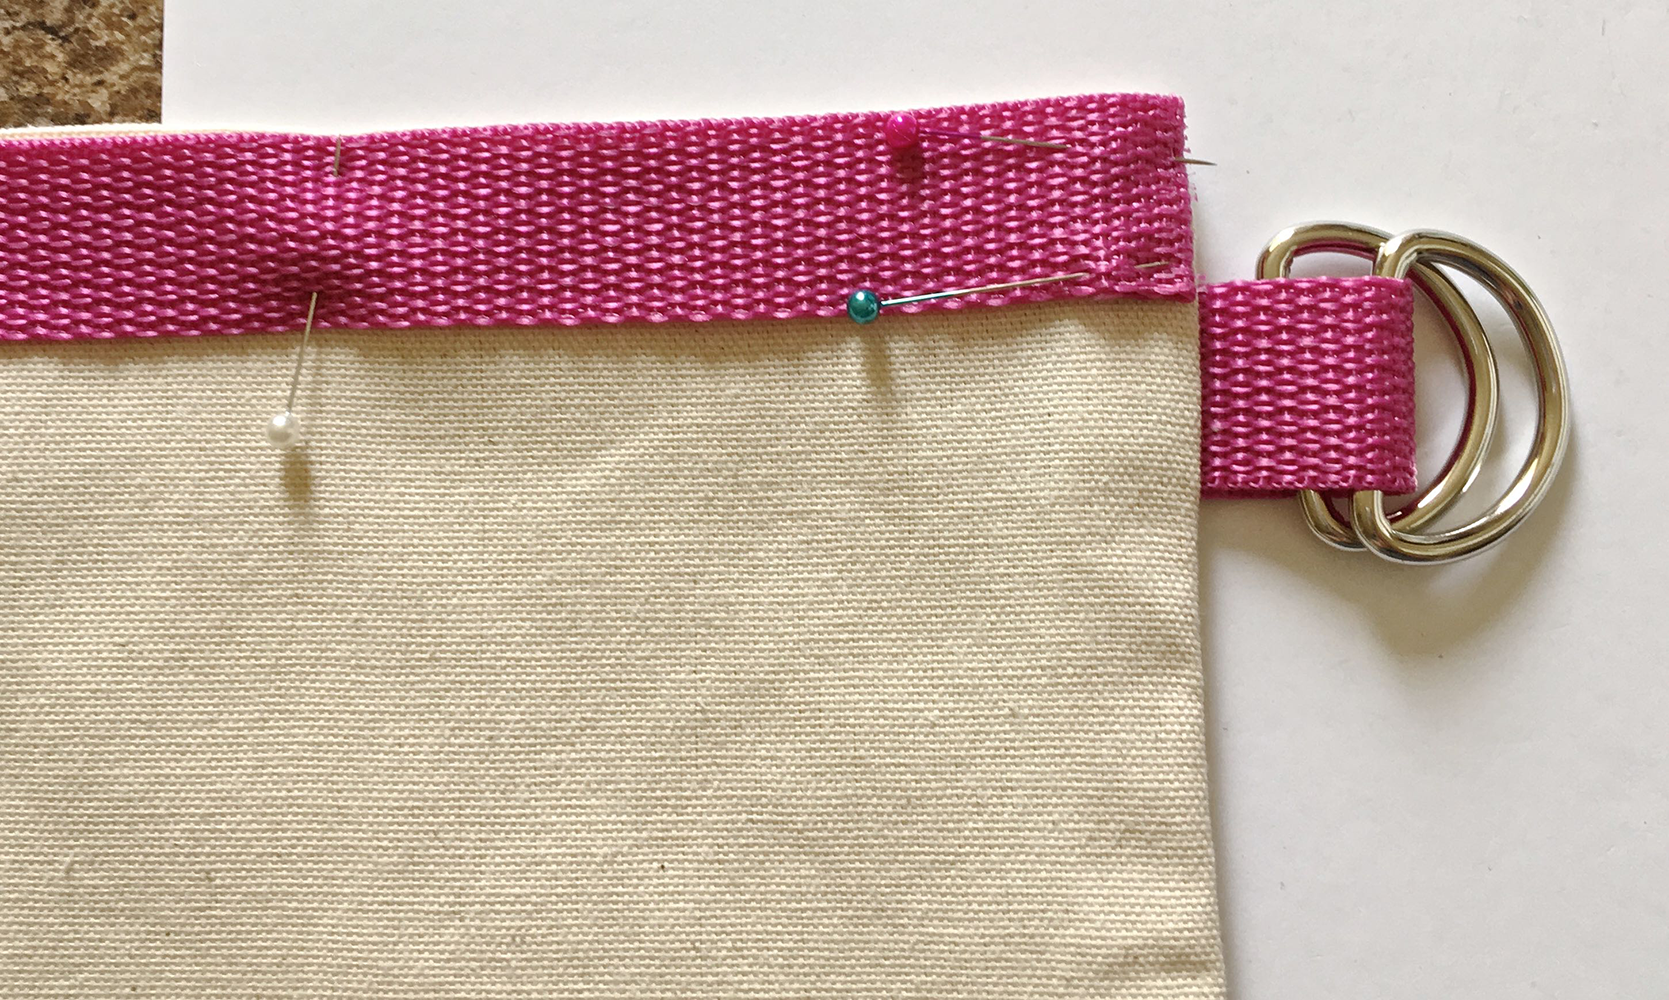
3. Cut a piece of strap to measure 3". Slip on two "D" rings and pin the strap ends together.
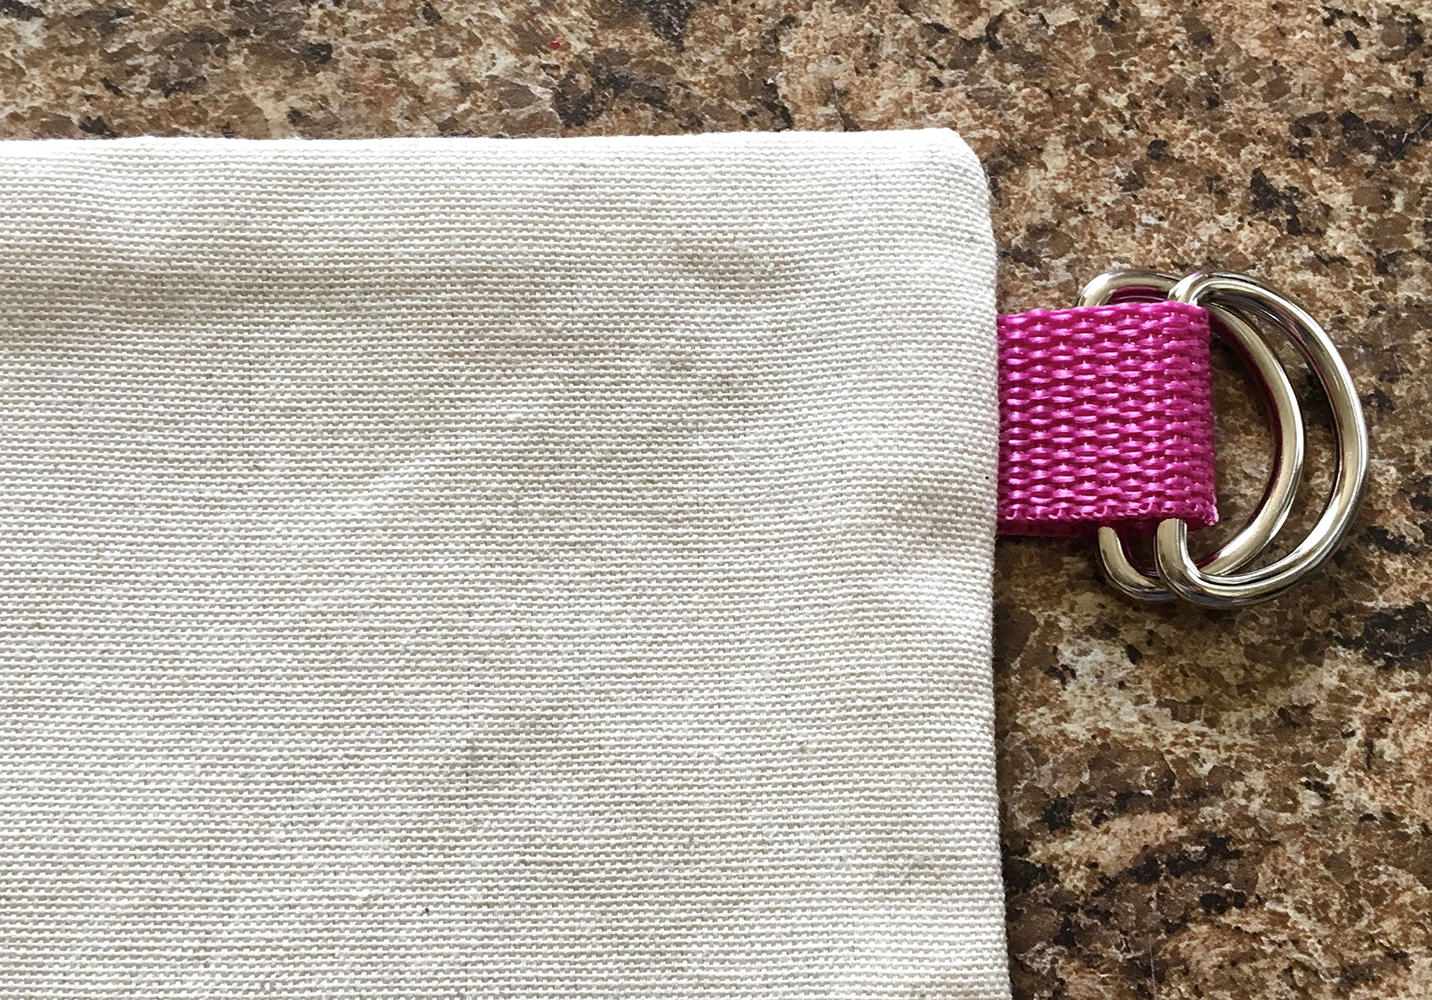
4. Pin the strap to the fabric 1.25" from the top edge on the right side of one fabric piece. Cut an 18” long strap piece. Pin it 1.25" from the top on the left side of the fabric. The rings and strap should be pointing to the center of the fabric.
5. Place the second fabric piece over the first, matching all edges. Pin the top edge together. Stitch 3" in from the left and right sides with a 5/8" seam. Stitch the center with a machine basting stitch. Press the seam open and remove the basting.
6. Sew the other three other seams with normal stitches. Turn the fabric right side out through the top opening.
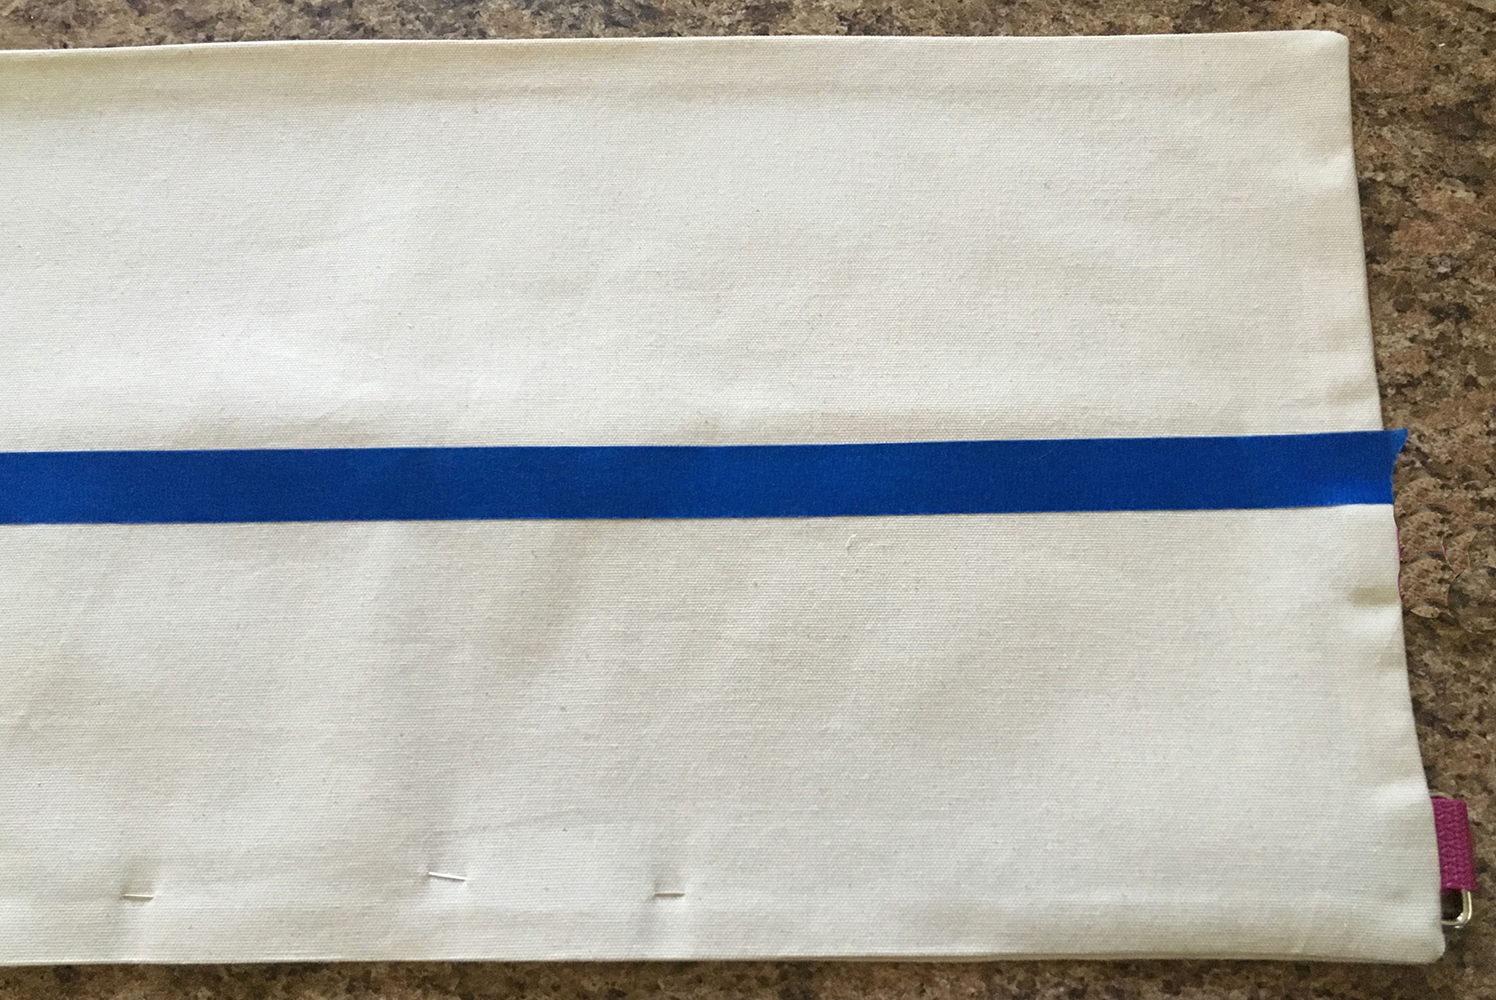
7. Position painters tape across the width of the fabric 5.50" from the bottom.
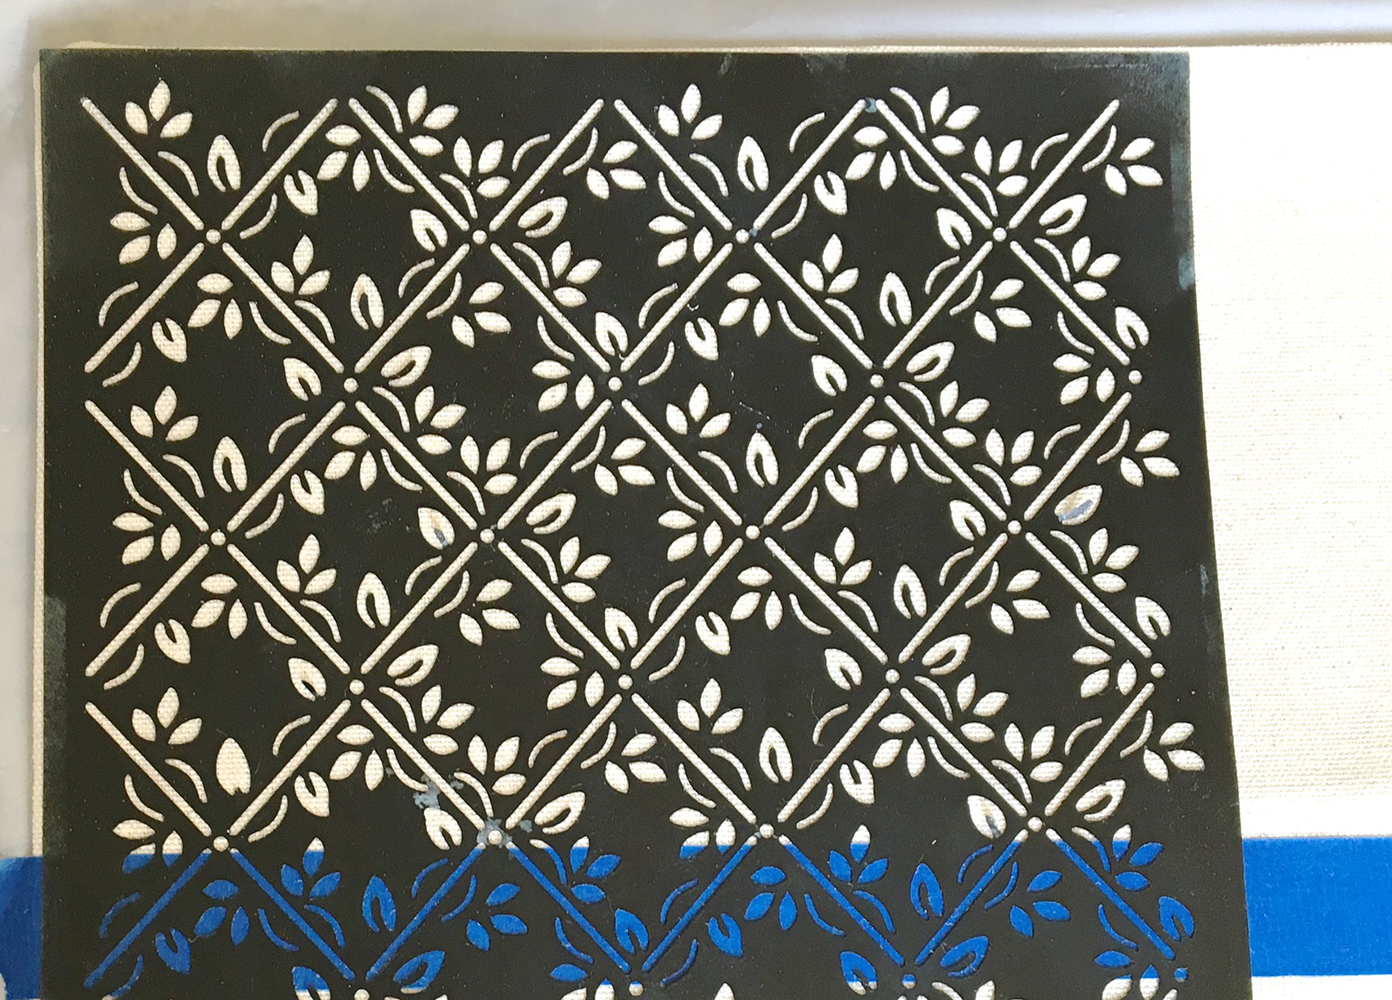
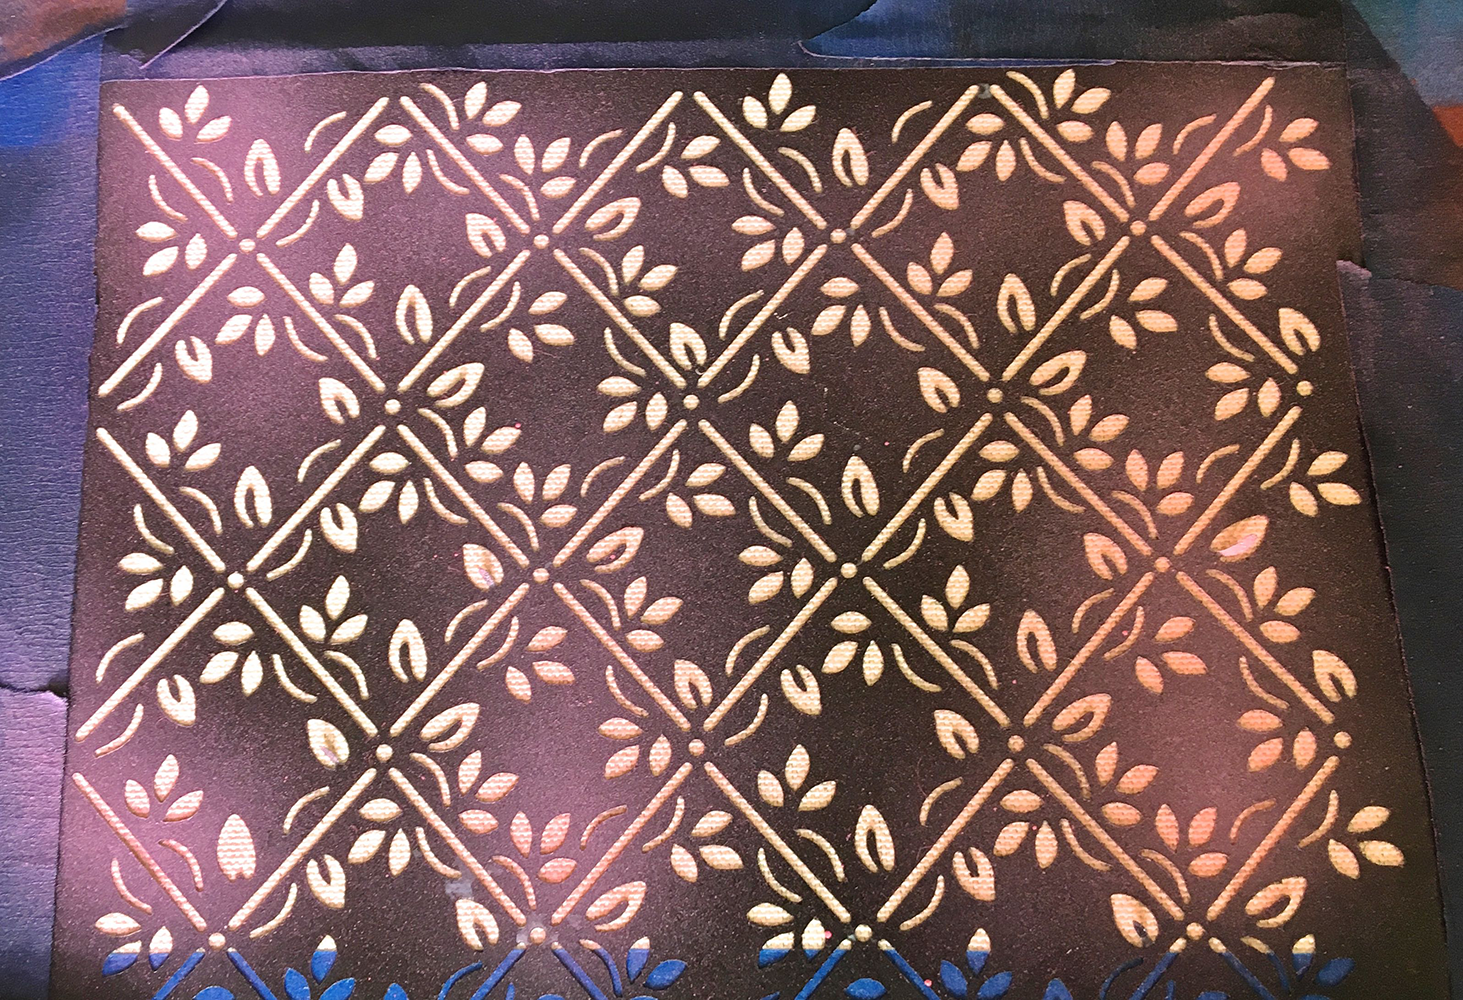
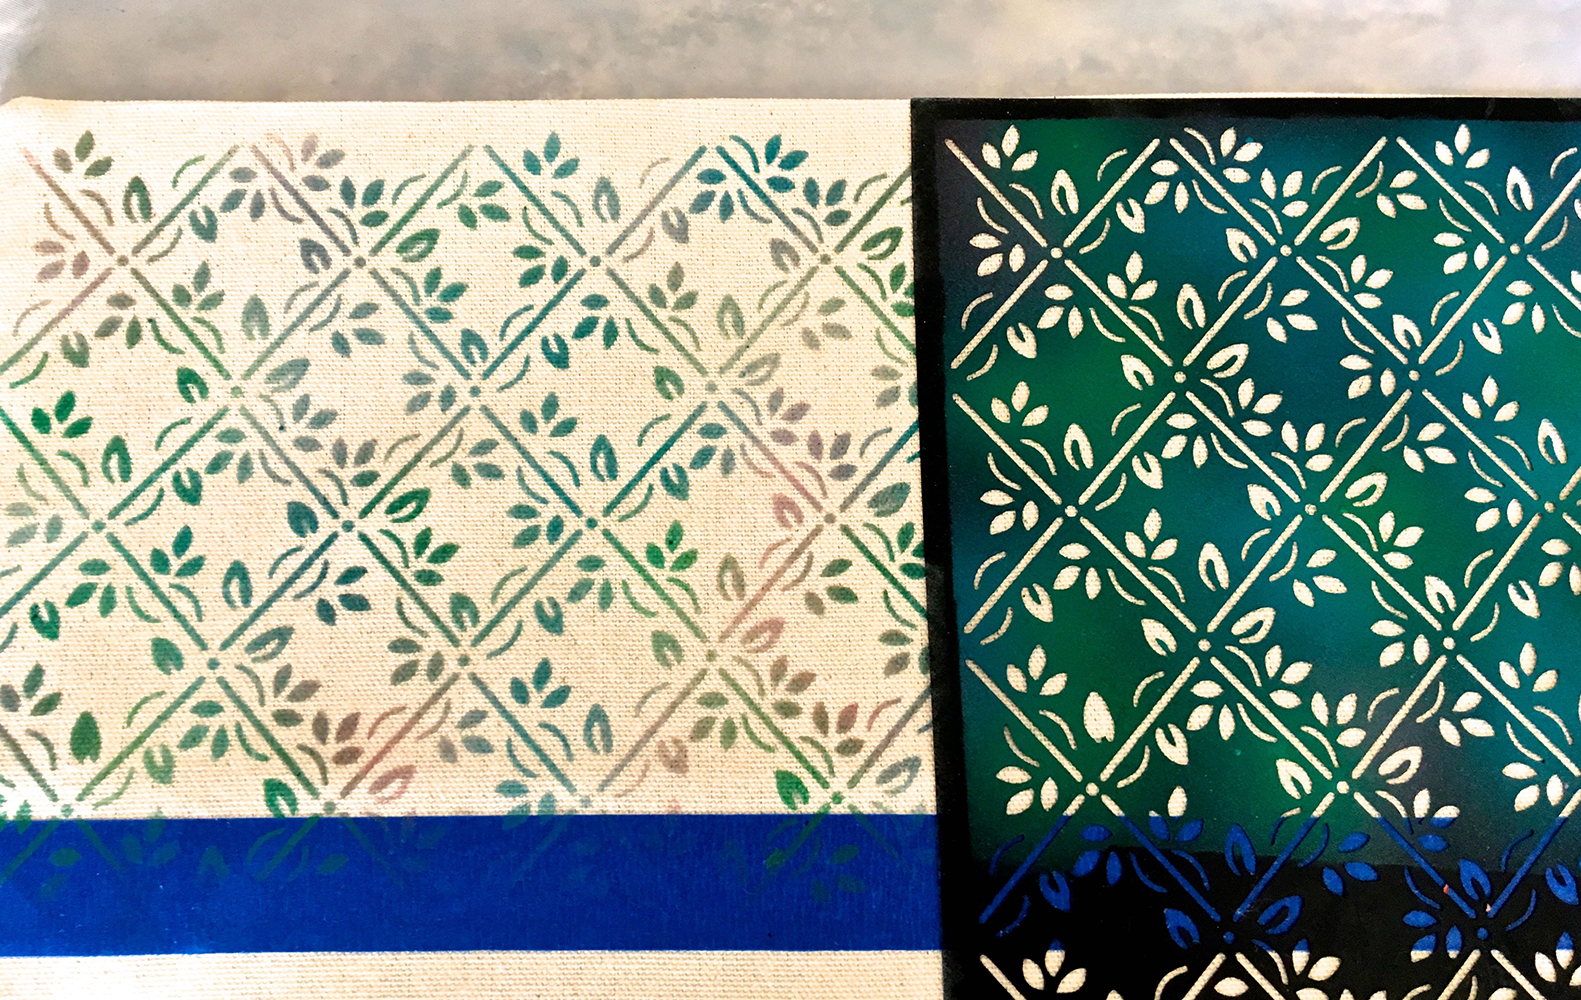
8. Apply adhesive to the back of the stencil. Align the left and top edge of the stencil with the fabric.
9. Airbrush small areas of the stencil with pink paint, followed by turquoise, then green.
10. Remove the stencil and move it to the right with the top edge matching the fabric and the left edge matching the painted design. Airbrush the stencil with the three colors.
11. Keep moving the stencil to the right and airbrushing until the width of the fabric is painted.
12. Place the strap across the top edge of the fabric. Turn under the short ends and pin in place. Sew across the long edges of the strap.
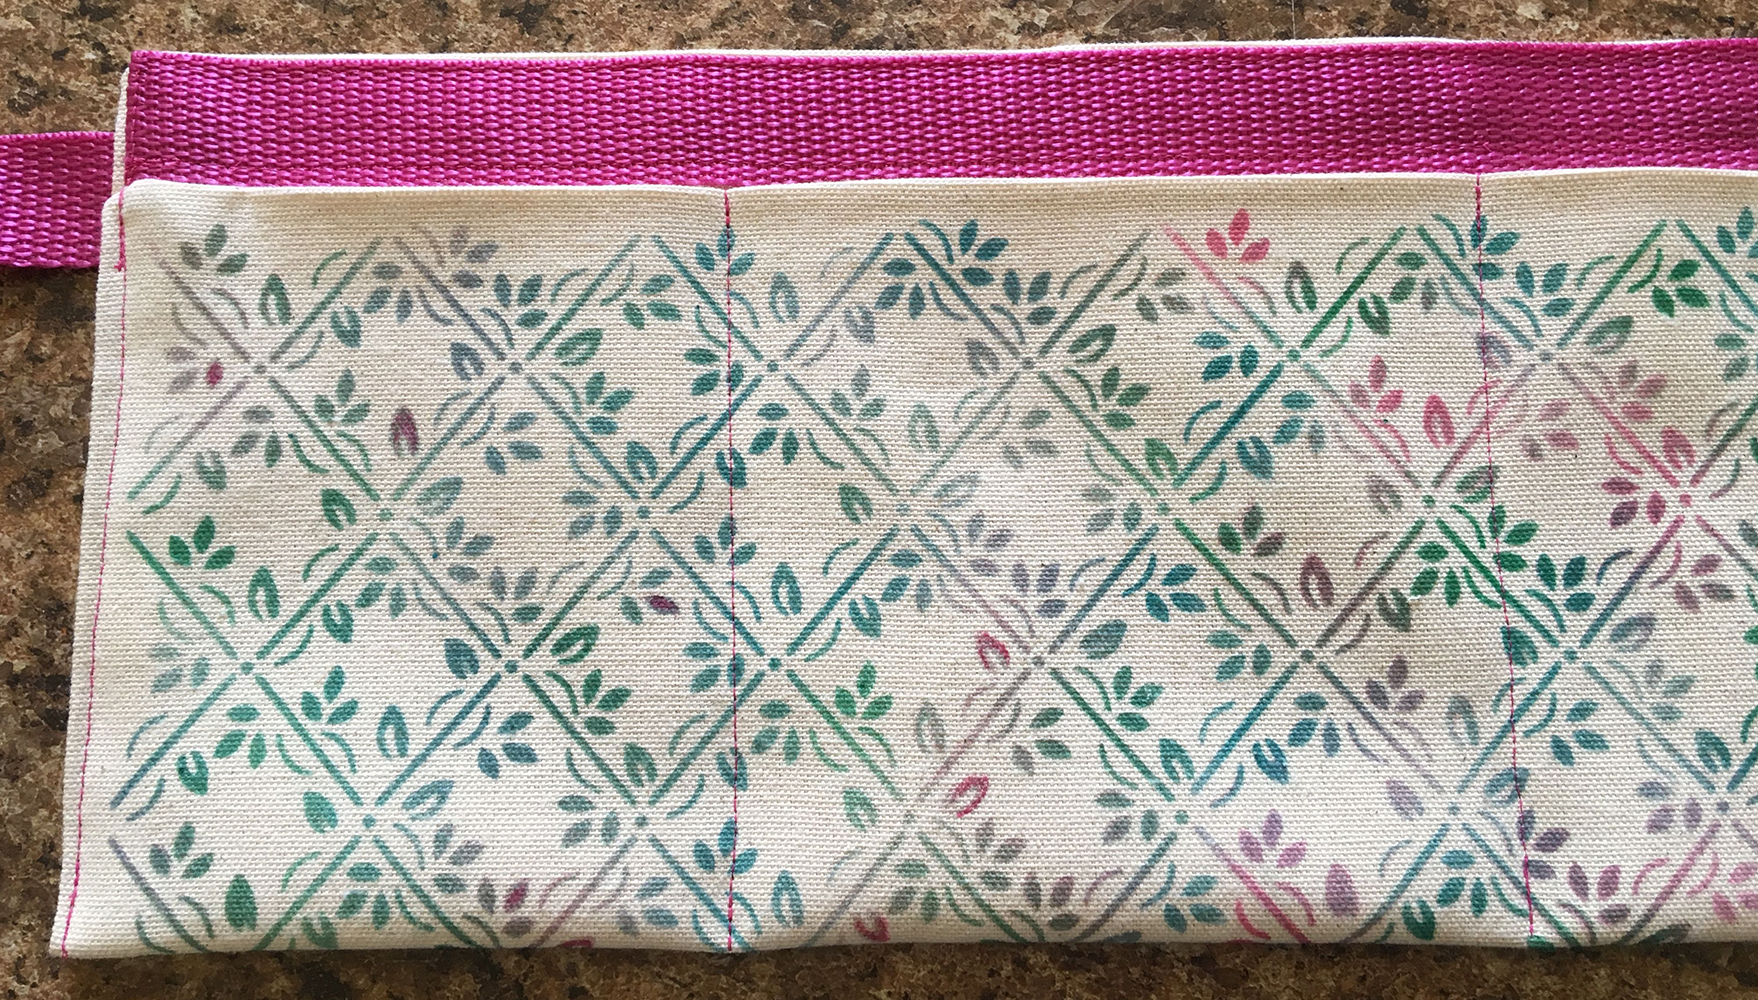
13. To create one long pocket, bring the painted fabric up on the right side and fold it at 5.50". Pin the sides together and sew through all layers. Do the same on the left edge.
14. Sew vertical lines across the fabric to create the perfect size pockets to hold the garden tools you will use. Be sure the space will allow the tool to slip in and out easily.
15. Sew 2" pieces of Velcro to the middle and ends of the fabric's top edge on the wrong side.
16. Press matching Velcro pieces to the ones attached to the fabric. Peel off the liners and wrap the tool organizer loosely around the bucket. Press to adhere the Velcro pieces to the bucket.
17. To use the organizer, remove it from the bucket, load the tools, then attach it to the bucket, pressing the Velcro pieces together.
18. Slip the long strap end into both "D" rings. Slip the strap through one ring to secure the organizer.
TIPS: Allow paint to dry completely between coats.
The organizer can be removed from the bucket and used as an organizer apron.
Tote measures approximately 12” x 6.25”
Project designed and created by Gloria Uhler at Domestic Diva Online for Testors Corporation.