Rust-Oleum Projects
4th of July Canvas Apron
Browse Projects
-
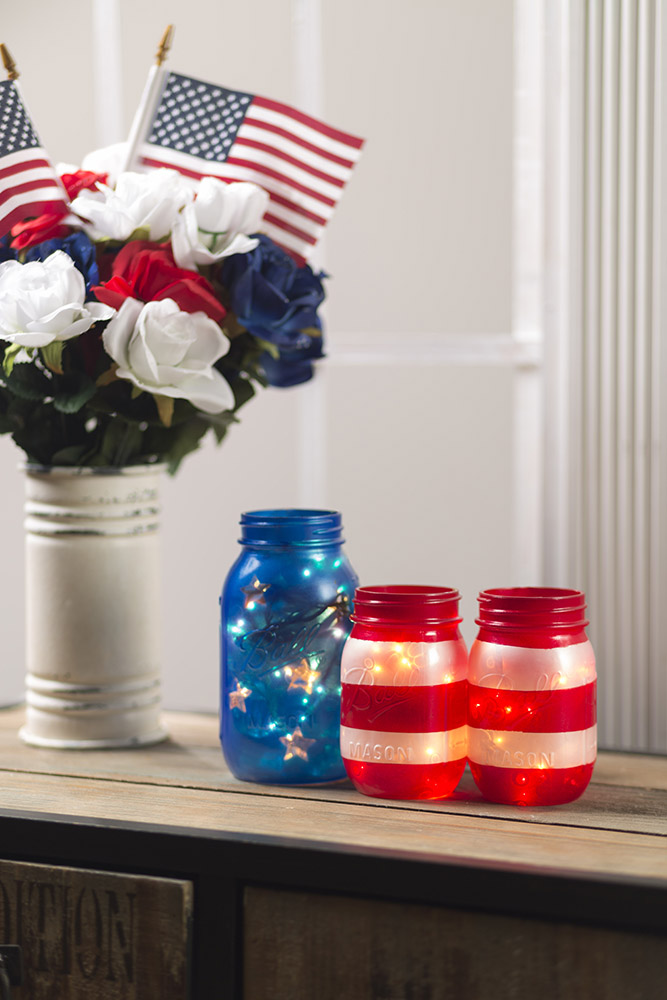
Paint Your Own Mason Jars for 4th of July
-
Tools & Supplies:
-
Aztek Airbrush Paints - #9446 Opaque Red, #9451 Opaque Green and #9449 Opaque Blue
-
Spray Adhesive
-
Aztek Airbrush
-
Painter's Tape
-
Fabric Paint
-
Card Stock
-
Copy Paper
-
Craft Knife
-
Yardstick
-
Scissors
-
Apron
-
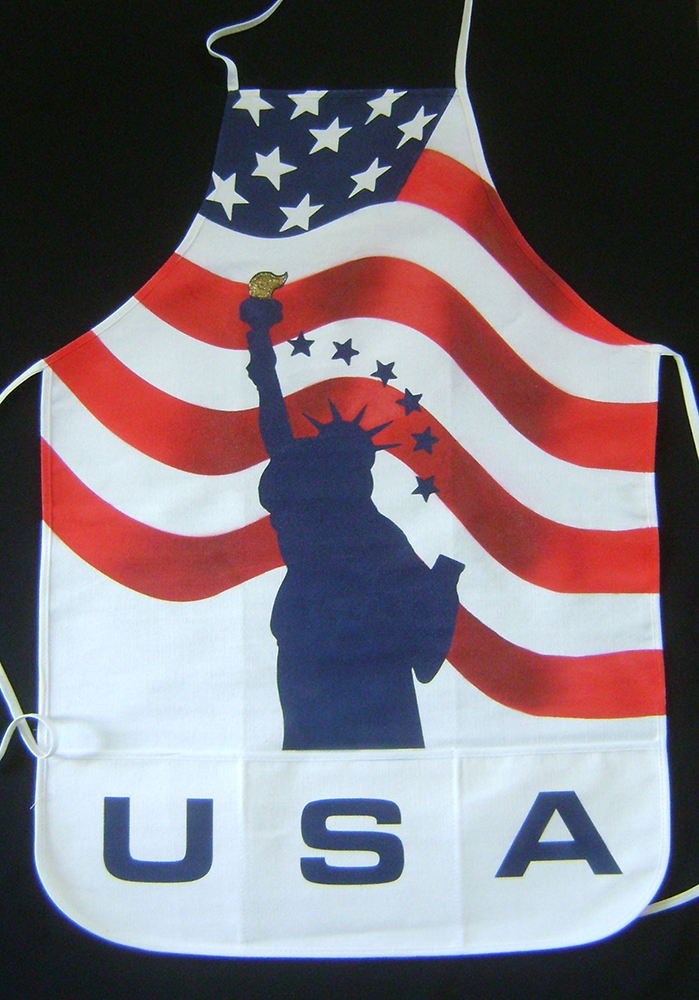
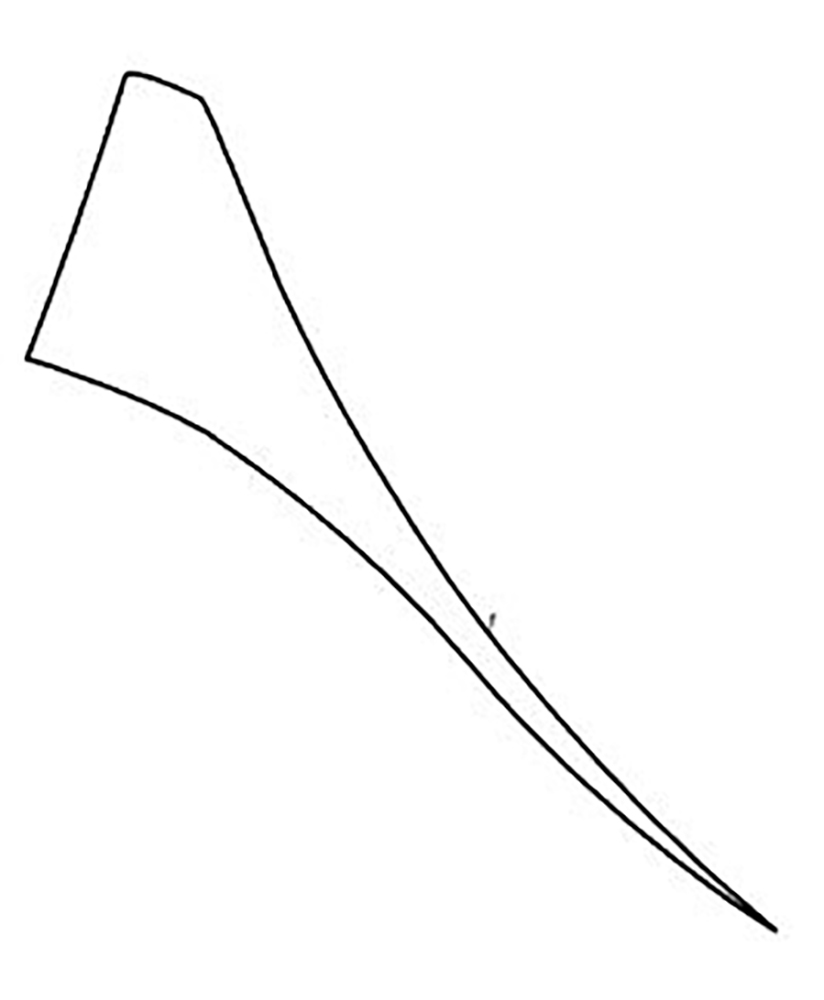
Rock your red, white and blue this 4th of July while at the grill or in the kitchen. Keep your clothes clean with an airbrushed patriotic apron. Print step by step instructions here.
- Iron a crease down the vertical center of the apron.
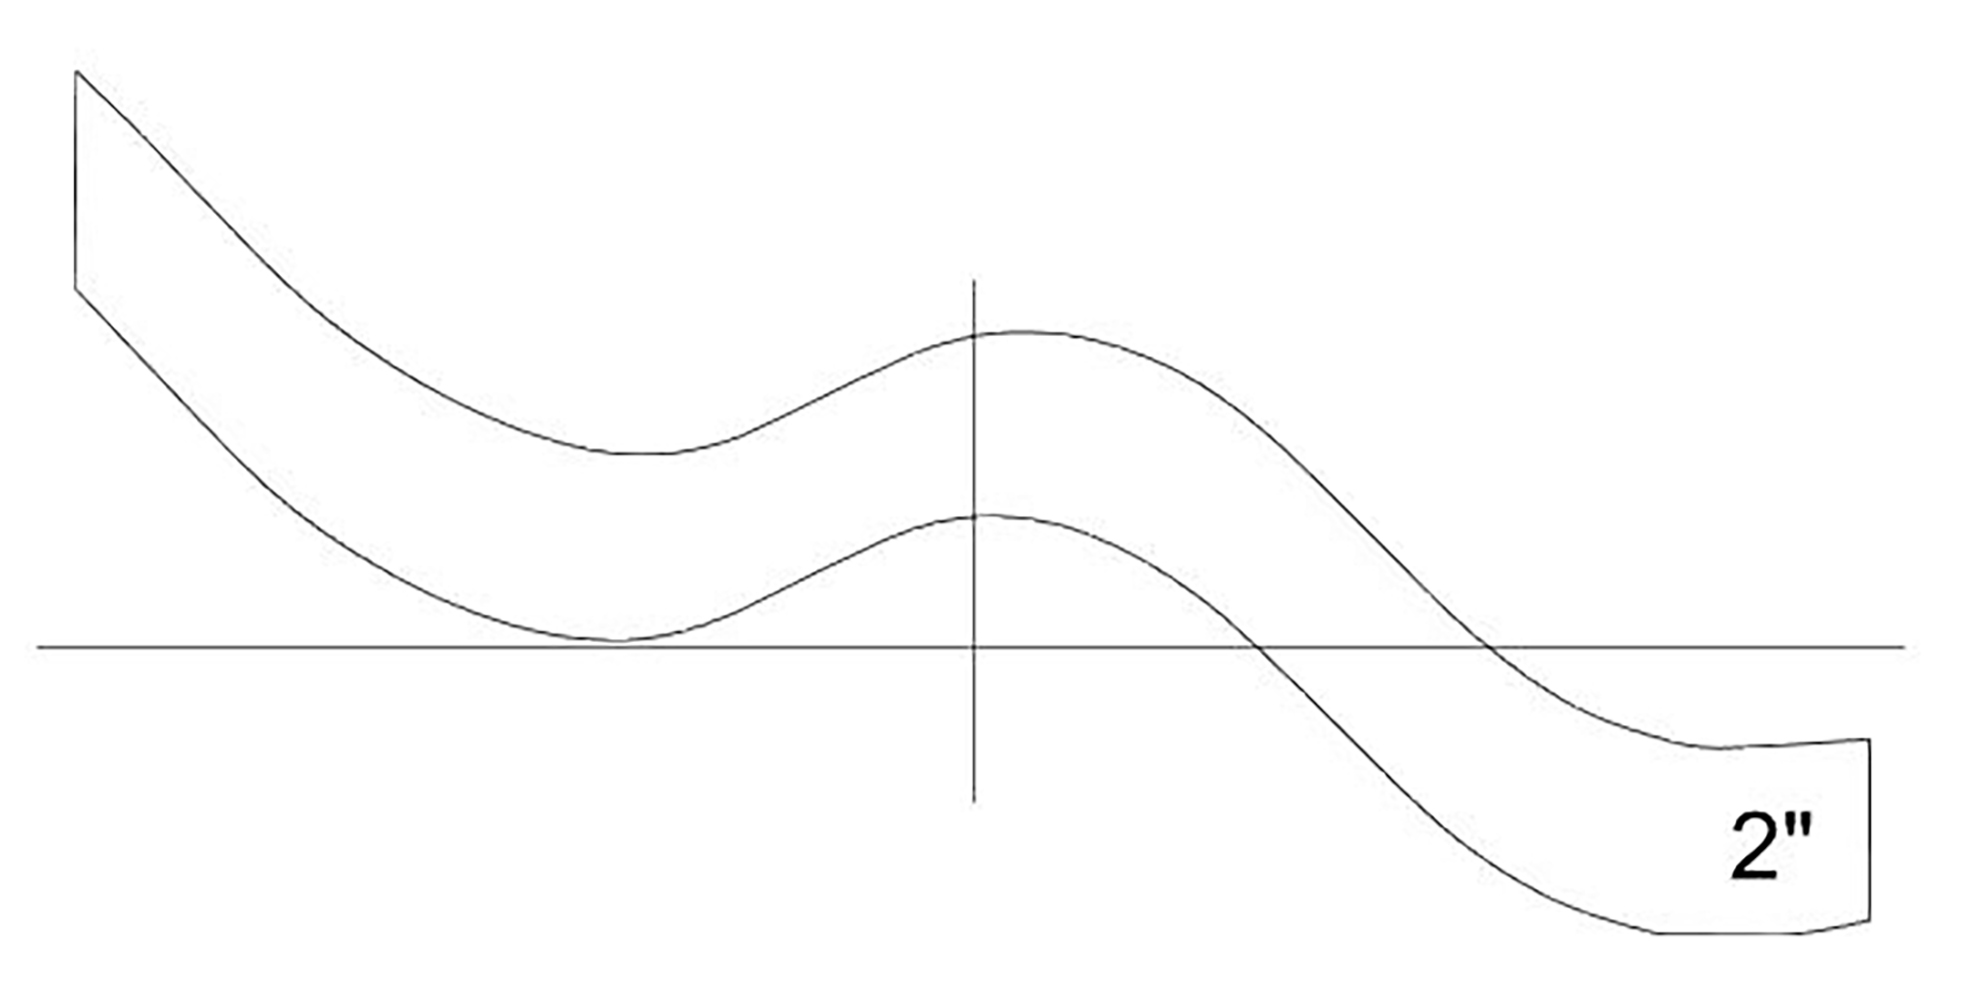
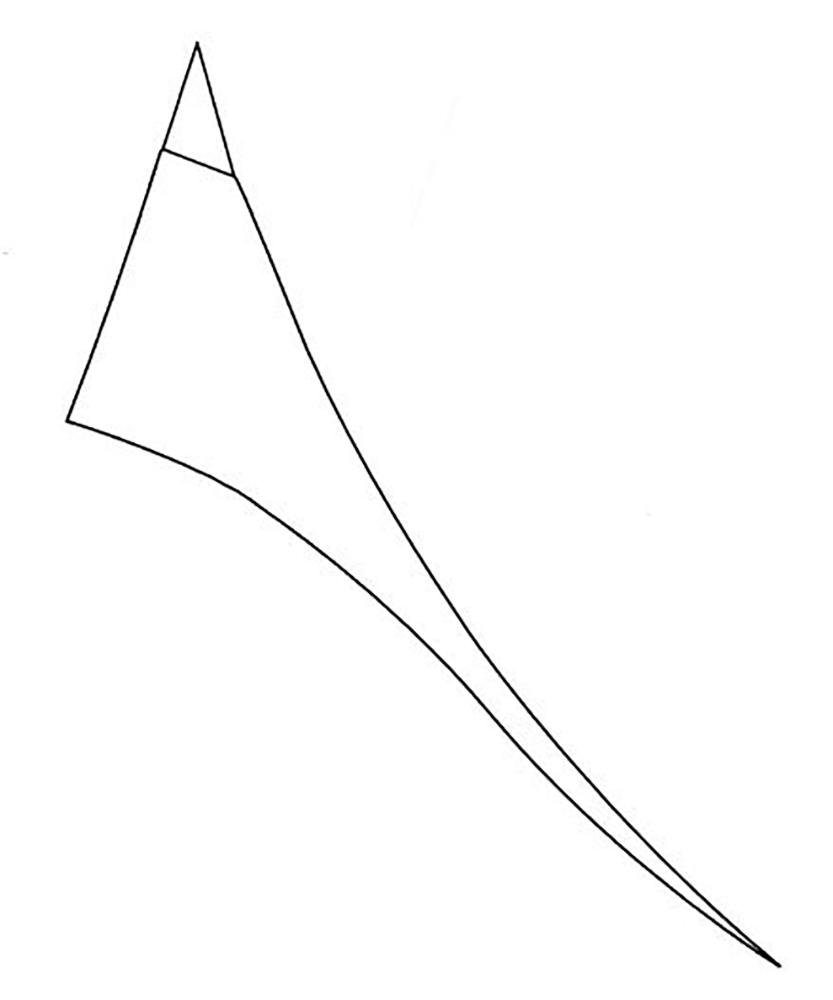
- Tape together two 11" long card stock pages to measure 22”. Draw a curved line on the card stock. Create a matching line 2” below to create a template. Tilt the template and draw straight intersecting vertical and horizontal lines in the center.
- Duplicate the template. You will need three copies.
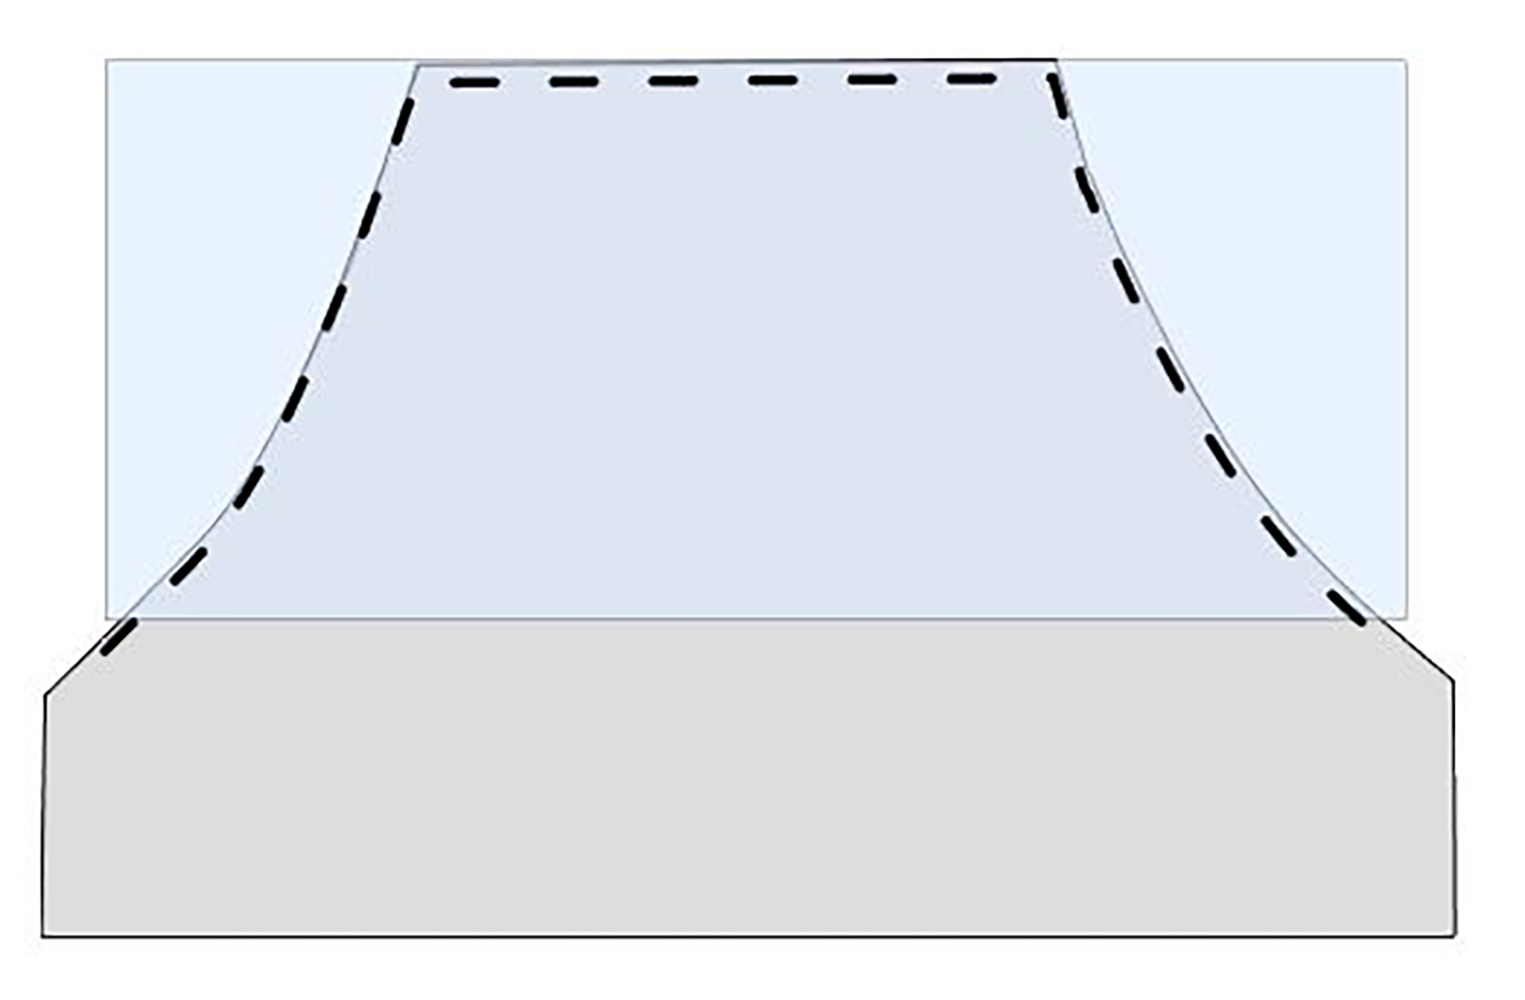
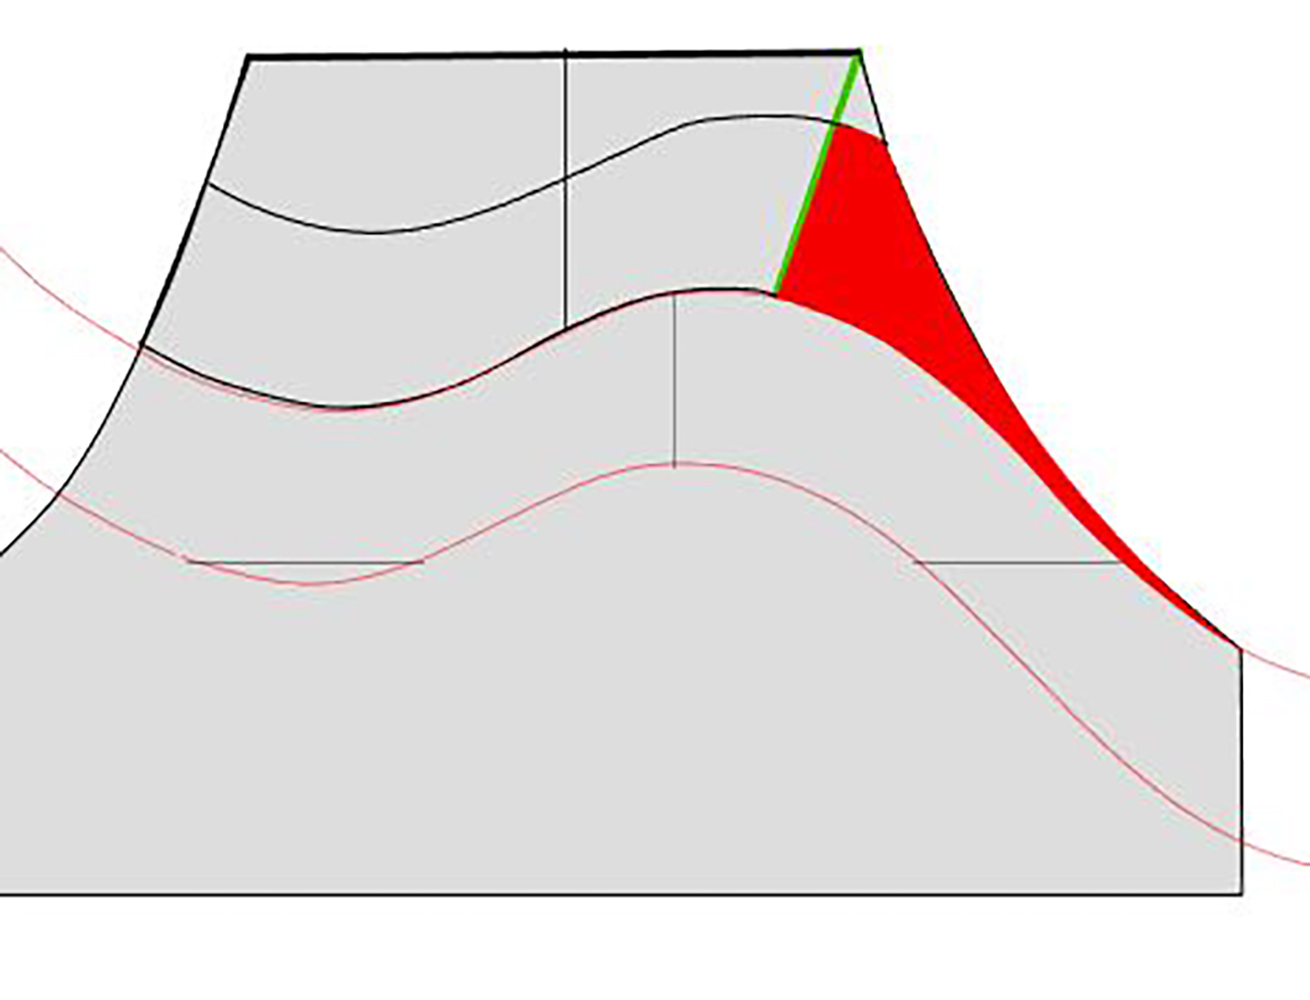
- Align a piece of paper (blue) with the top of the apron (grey). Trace across the top, left and right side of the apron edge.
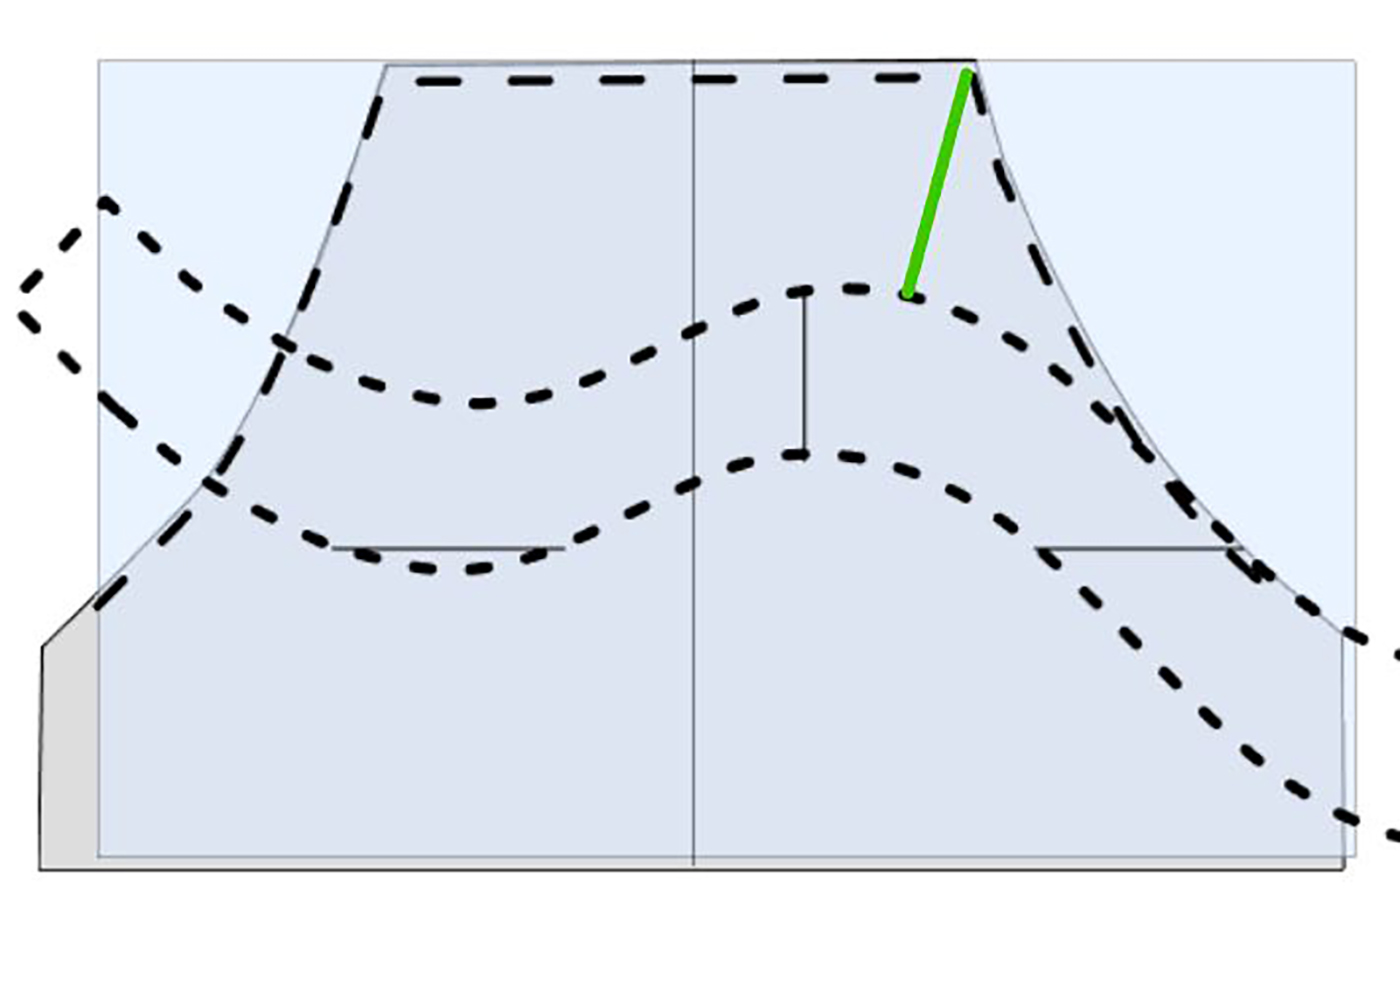
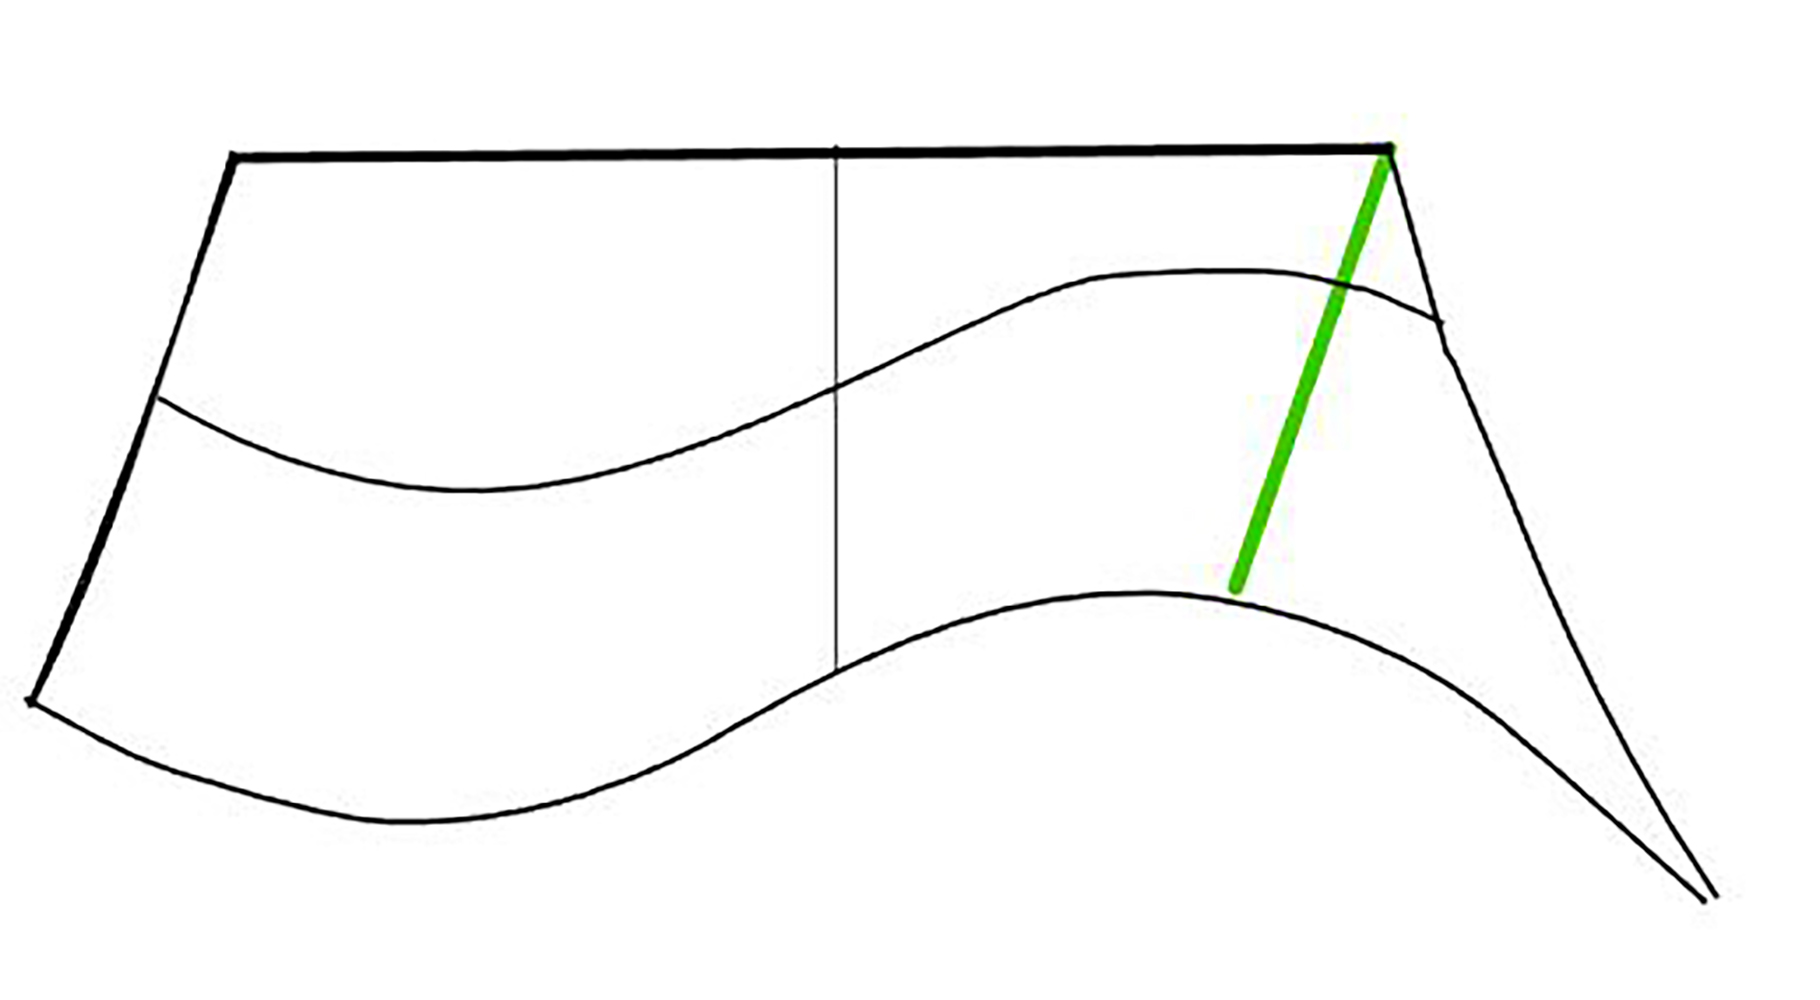
- Place a wave template 4 1/4” down from the top left edge of the apron. Be sure the wave’s vertical line is parallel to the apron’s center crease. Trace the top and bottom of the wave on the paper.
- Draw a slanted line (green) from the top right corner of the apron down to meet the wave line.
- Use the paper to create a card stock template for the top of the apron. Transfer the right slanted line to the template as well as the top line of the wave.
- Cut away the 2” section to the right of the slanted line. Save this piece.
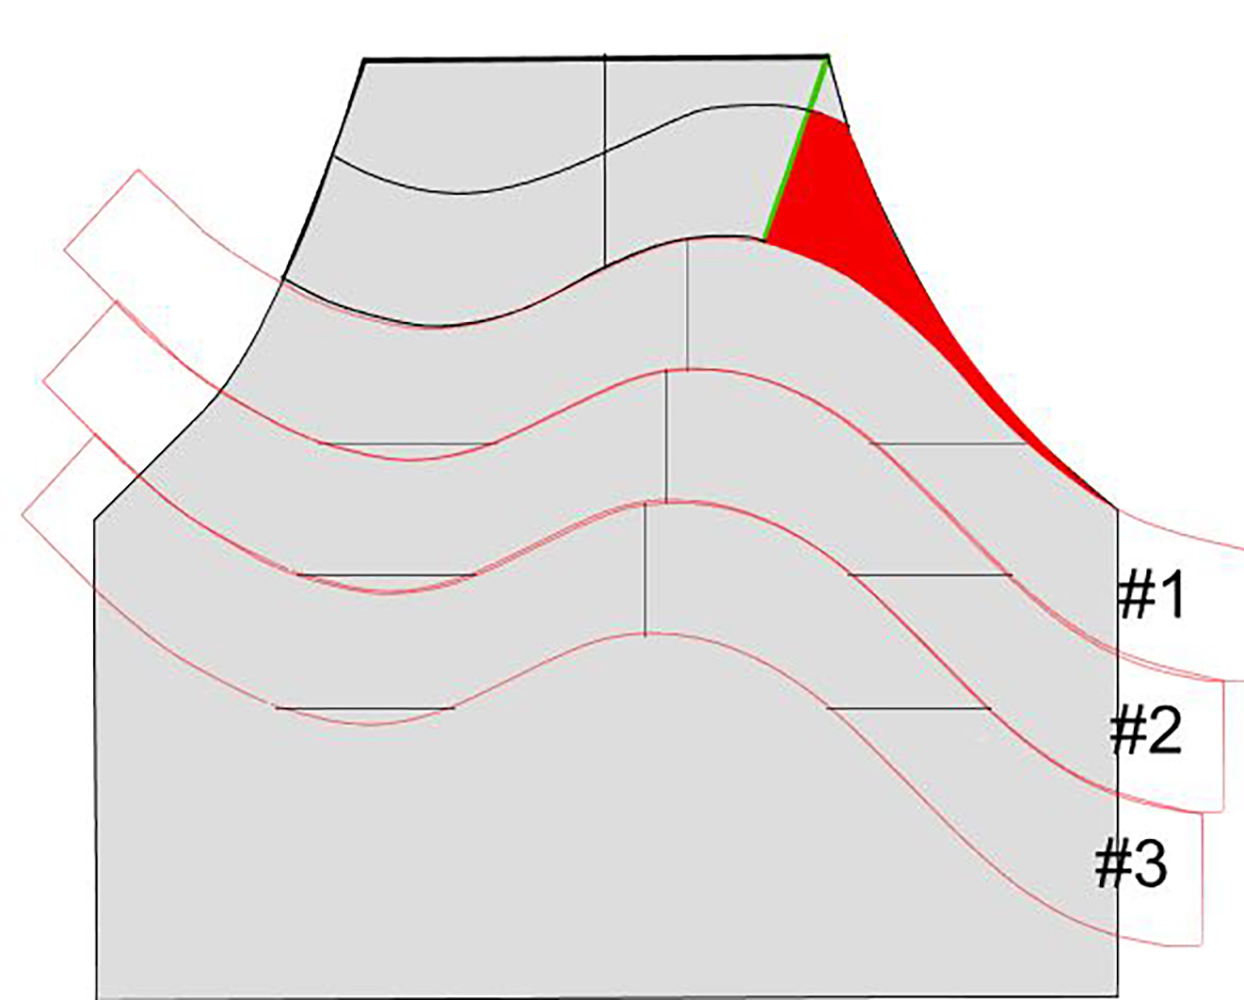
- Spray adhesive on the back of the template and all the waves. Align the template with the top of the apron. Number the waves and place #1 below the template.
- Protect all areas not being painted. Fill an airbrush paint cup with red paint. In another cup, mix a bit of green with the red to darken it. Airbrush the cut away area with red paint. Add shadows to the right of the highest part of the curve with the darkened paint. This will give the flag dimension.
- Place wave #2 and #3 beneath #1.
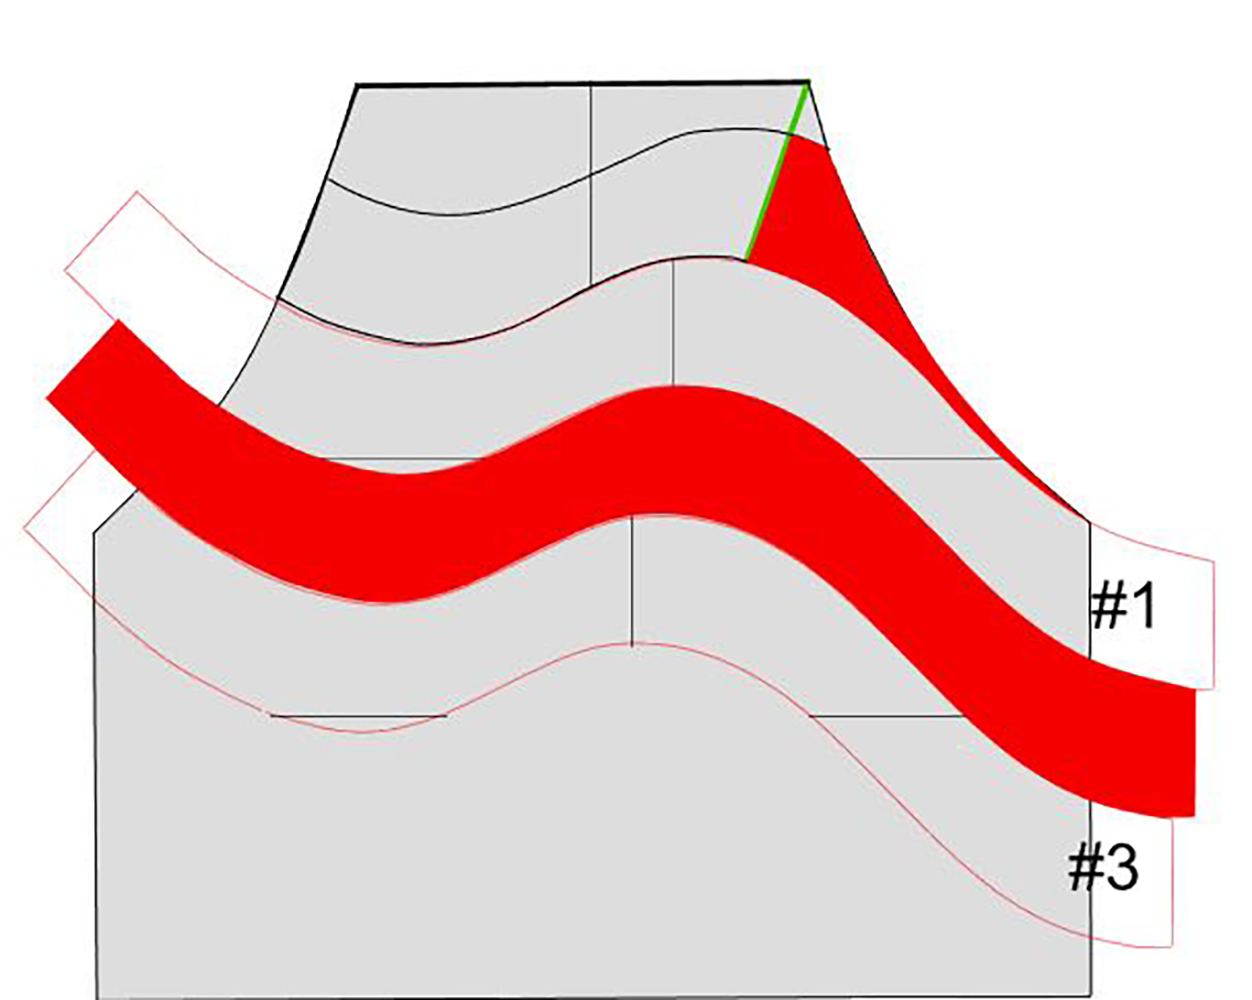
- Remove #2 and airbrush the space red. Add the shading to both the left and right of the highest curve.
- Continue airbrushing red spaces by removing waves and replacing them further down the apron, protecting the areas that won’t be painted.
-
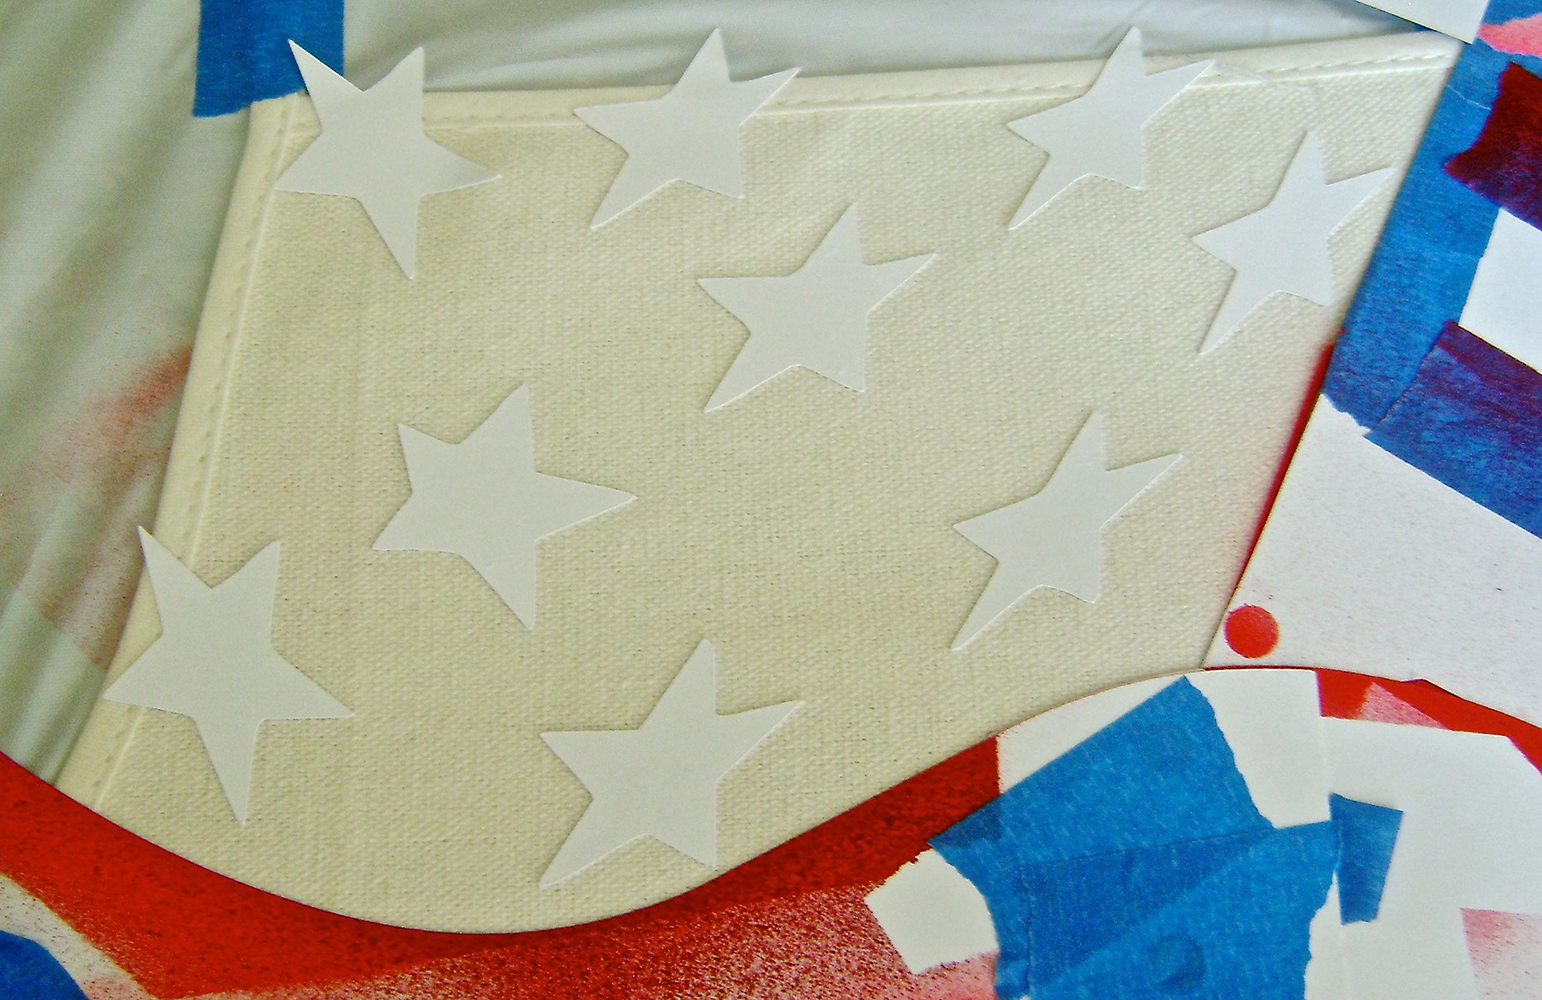
Spray one side of a new sheet of card stock with adhesive. With scissors or a craft knife cut out irregular shaped stars.
- Apply adhesive to and replace the #2 section saved in step 8. Cut the small piece that goes above it from the template. Apply adhesive and set it in place on the apron.
- Return #1 wave to its first position. Arrange the stars above it within the open space.
- Mix a bit of red paint with the blue to create a dark navy blue color. Airbrush the space with the navy paint.
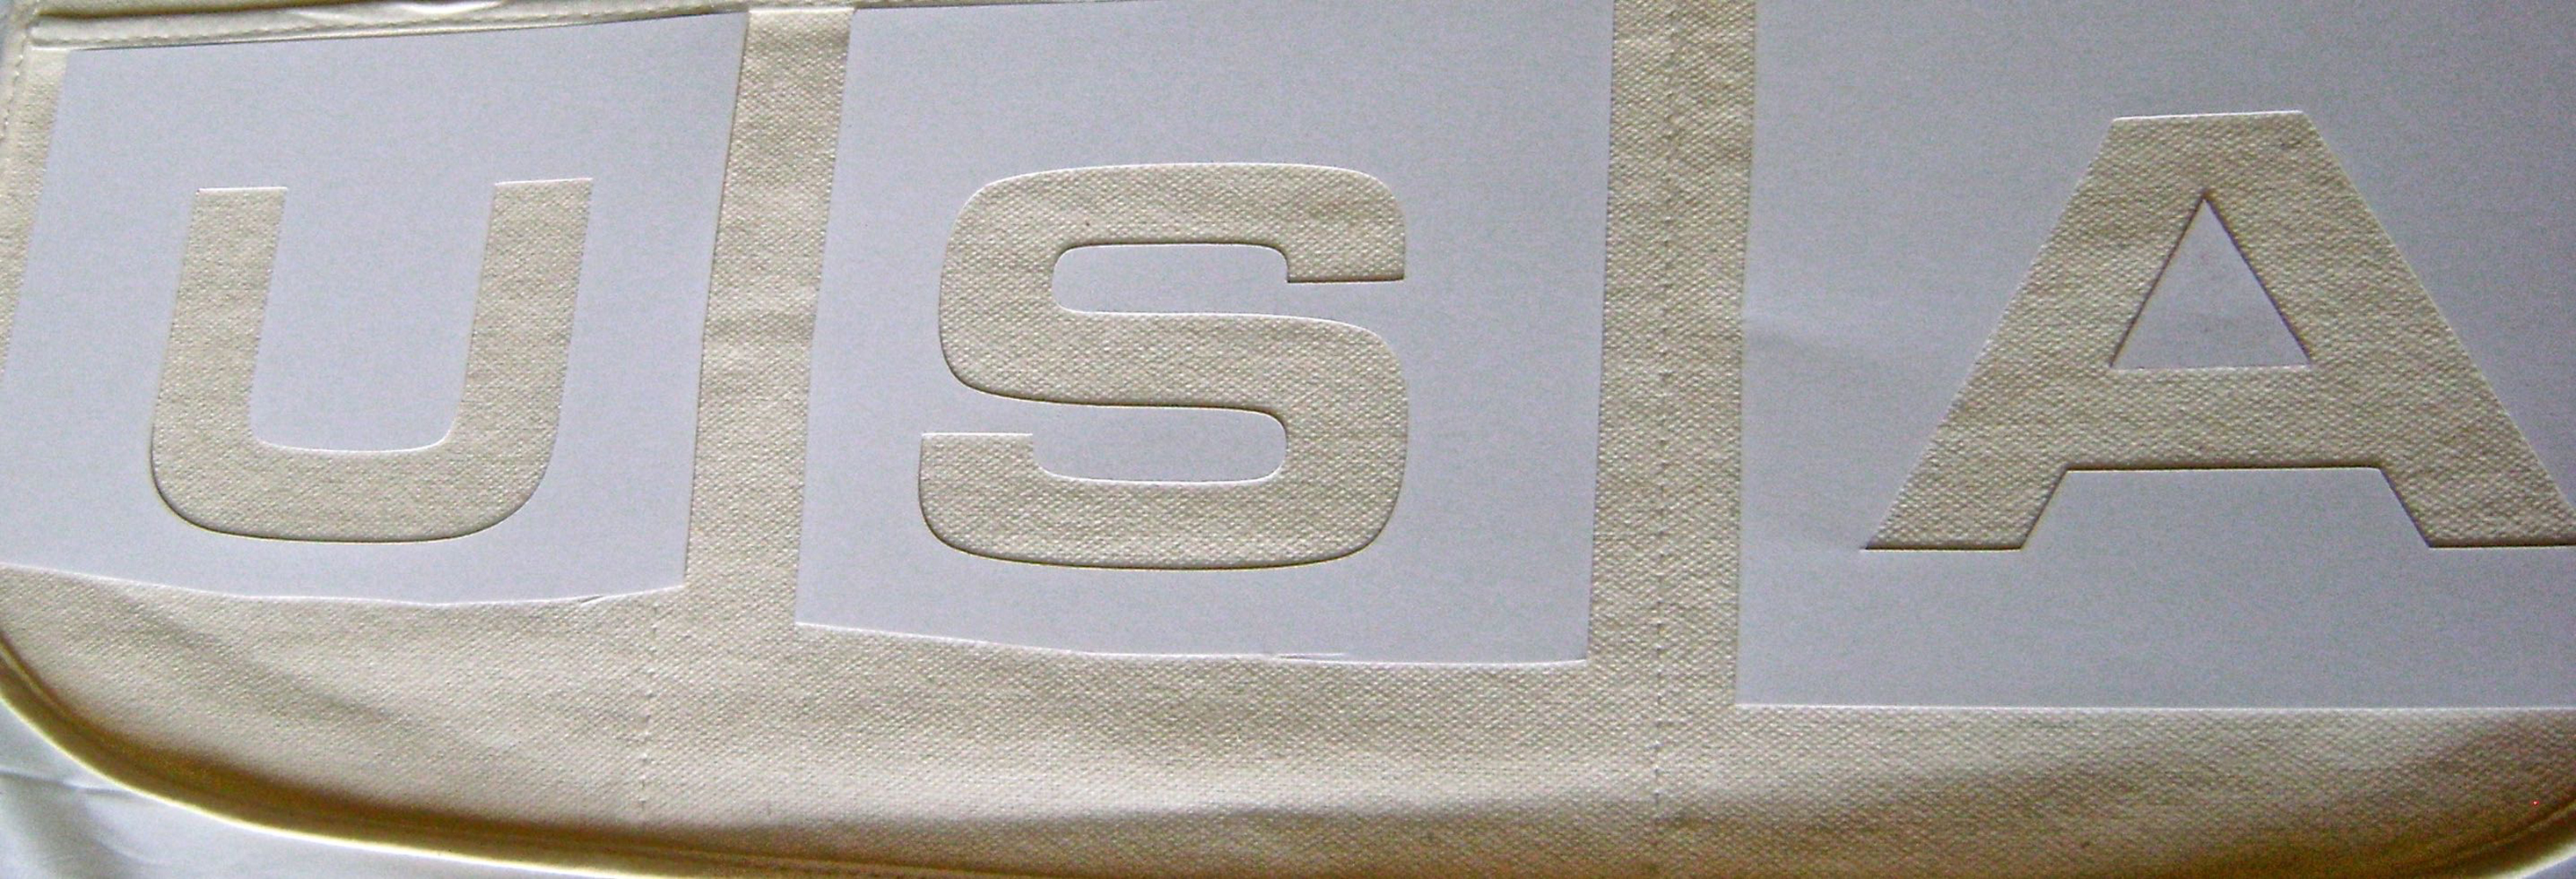
- Print out large thick letters on card stock for the pockets. Cut the letters out with a craft knife. Apply adhesive to the backside of the card stock and arrange one letter stencil on each pocket. Airbrush them with navy paint.
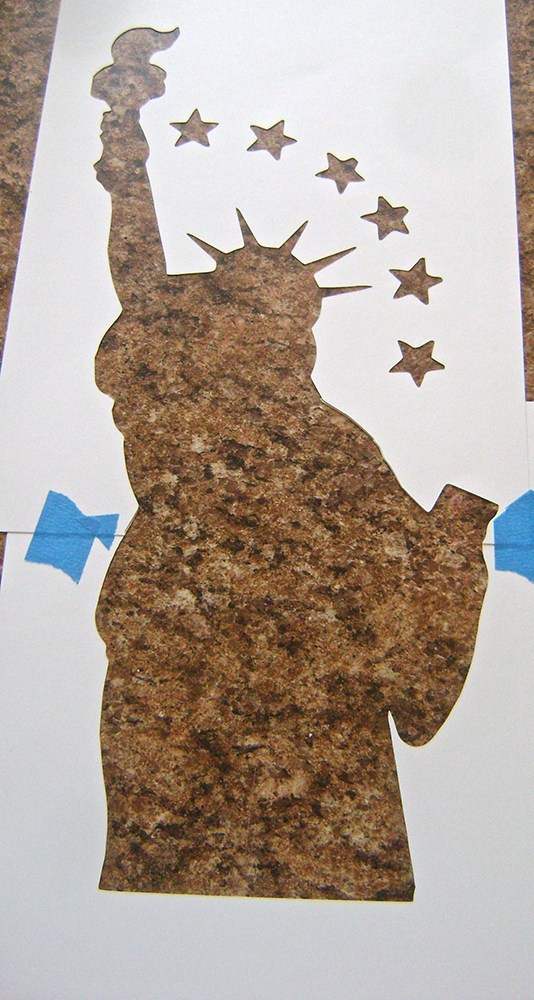
- Search Google Images for a Lady Liberty silhouette. Enlarge it and print it out in two sections on card stock. Tape it together and cut out the silhouette with a craft knife.
- Apply adhesive to the back of the Liberty stencil and adhere it to the center of the apron. Airbrush it with the navy blue paint.
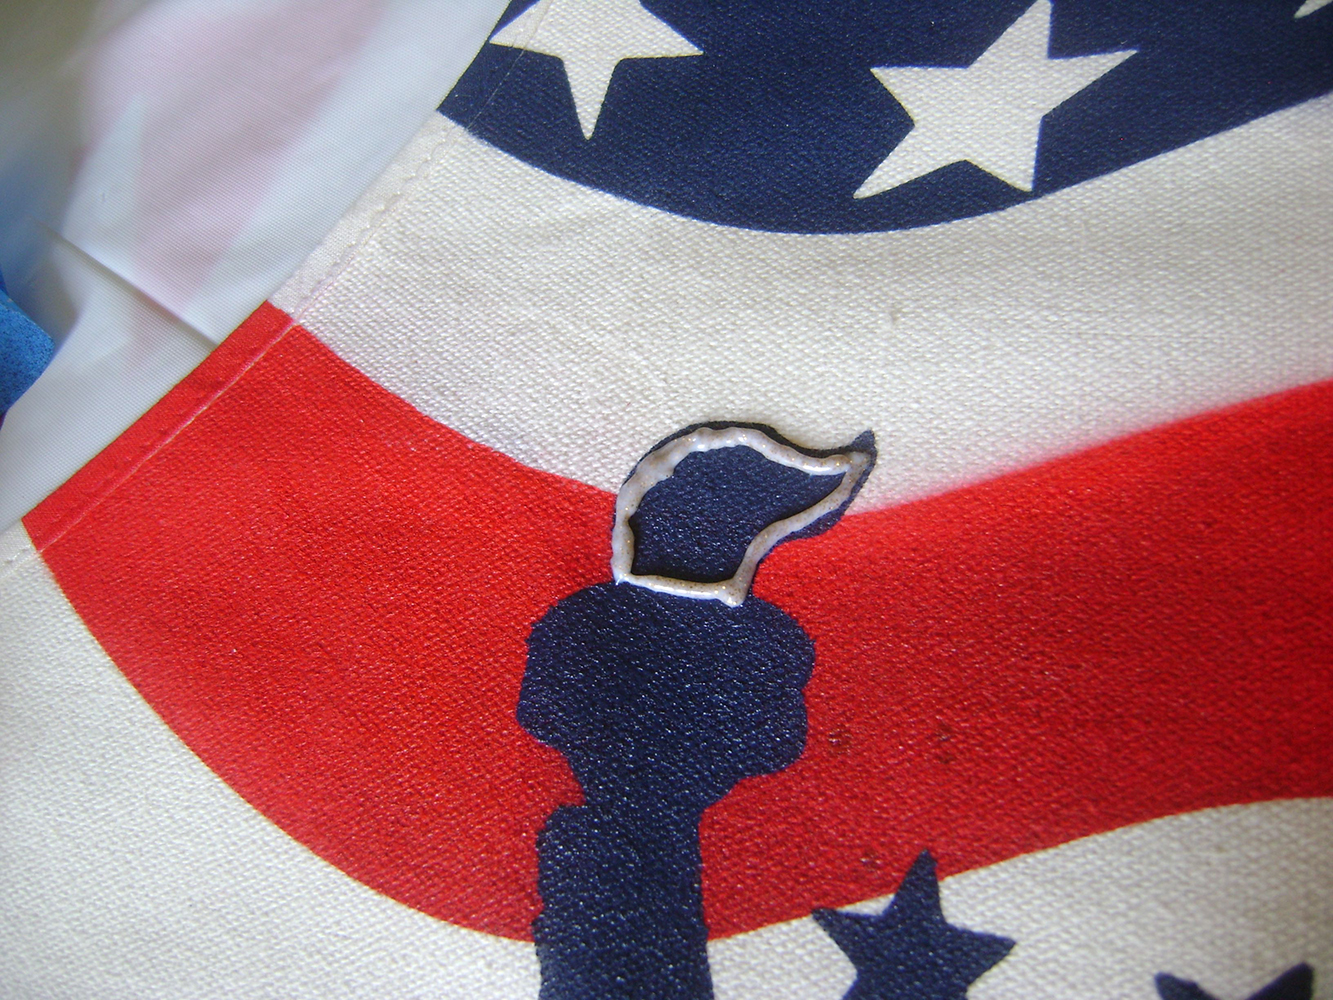
- Apply gold 3-D paint straight from the bottle for lady liberty's torch. First outline the space then fill it in. Leave a navy blue outline showing around the gold.
- After 24 hours, set the paint. Cover the painted apron with a cloth and set the iron on a cotton setting with no steam. Avoid the gold area and iron across the other paint for one or two minutes.