Rust-Oleum Projects
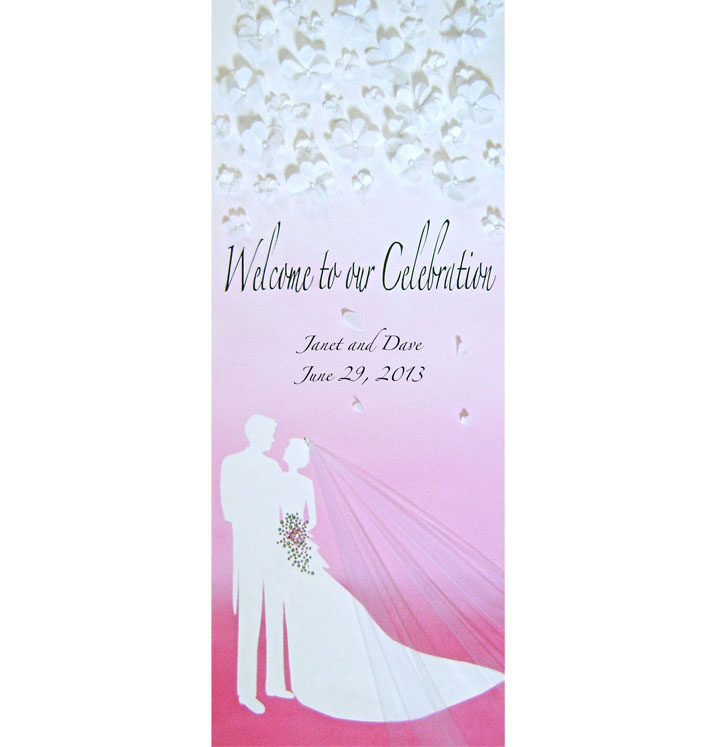
Shining a Light on Love
Browse Projects
-
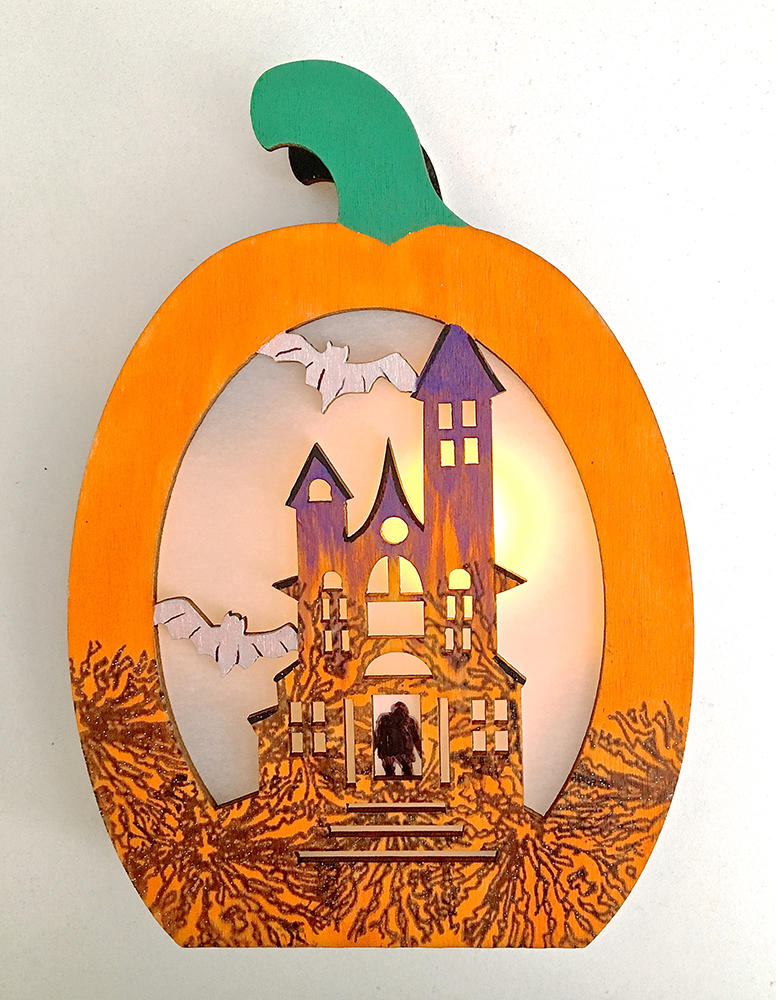
Halloween Lighted Haunted House
-
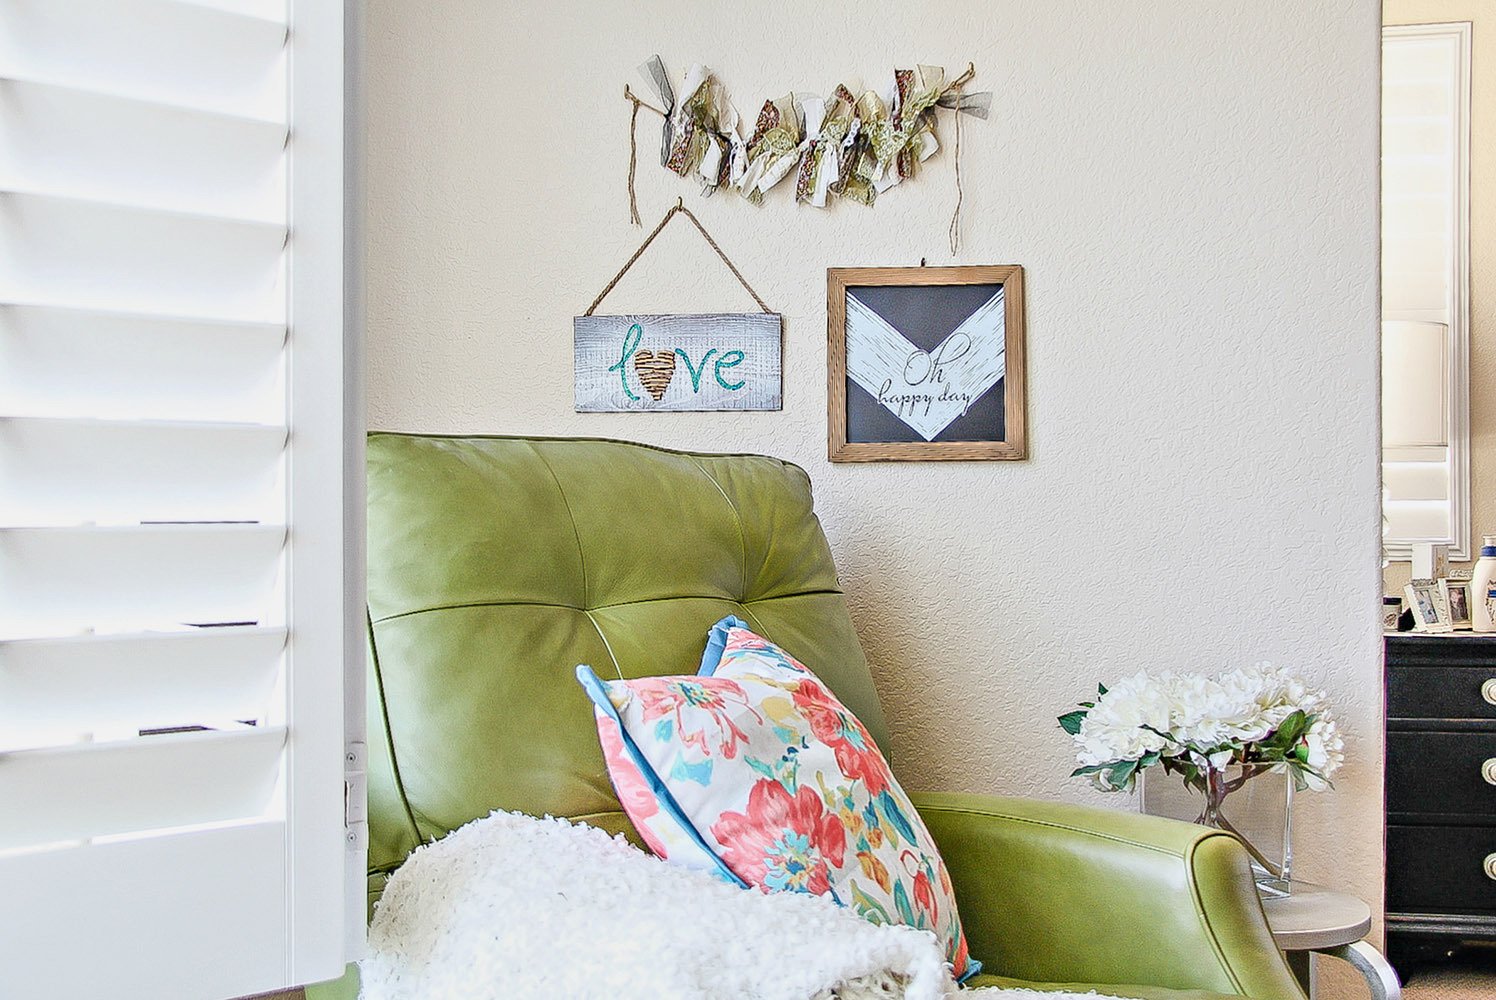
DIY Wood Pallet Love Sign
-
Tools & Supplies:
-
Canvas
-
Card Stock
-
Clear Hotfix Rhinestones
-
Gift Wrap Tissue
-
Hotfix Rhinestone Setter
-
Hot Glue Gun
-
LED 40 Lights String
-
Painter's tape
-
Pearls
-
Card Stock
-
Pink Rhinestones
-
Rhinestones
-
Scotch Spray Mount Repositionable Adhesive
-
Tape
-
Tulle Fabric Square
-
Instructions:
- Download and print out the wedding couple stencil and the welcome message on card stock found here.
- Using a Testors Hobby Knife or stencil cutting machine, cut the stencils.
- Tape together the three die cut pieces of the couple stencil and the two pieces of the welcome message. Spray the back of the couple with the adhesive and press it onto a 16" x 40" 1.5" piece of canvas.
- Fill three airbrush paint cups, one with rose paint, another with half rose and half white, another with 2/3 white, 1/3 rose. For best results, use Aztek Feed Cups.
- Use tape to mark 12" down from the top of canvas. The area above this mark will remain unpainted. Divide the remaining canvas into three sections and mark with tape.
- Airbrush the bottom section with the darkest rose color, the middle section with the medium rose color and the top section with the lightest rose color. As you switch shades of rose allow overspray from the new shade to lightly color the very top edge of the previous shade.
- When the paint is dry, remove the couple stencil. Spray the back of the welcome stencil with adhesive. Place the baseline of the lettering approximately 16” from the top of the canvas. Protect everything but the lettering from overspray and airbrush the stencil with black paint. Remove the stencil when dry.
- Create a stencil and airbrush the couple's names and wedding date with black paint or use stick on letters.
- Arrange 9ss and 16ss green rhinestones to form the outline of the brides bouquet. Use a rhinestone applicator to adhere the stones.
- Use hot glue to attach the five 30ss pink stones in the center of the bouquet. Fill in the outline with 9ss and 16ss pink rhinestones, applying them with the applicator.
- Attach five clear 16ss rhinestones in the bride’s hair to represent a crown or tiara.
- Cut a piece of tulle fabric approximately 22” square. It should be large enough to reach from the crown to the bottom and side edges of the canvas. Wrap thread .50" from one corner of the square to gather it. Hot glue it to the canvas and cut off excess.
- Smooth the tulle to the bottom and sides of the canvas and hot glue it to the backside. Cut away the excess, tuck in the remaining, and hot glue it in place.
- Create the flowers with giftwrap tissue. Make two half heart templates, measuring .75” and 1.25" long. Use them to shape the tissue petals. Fold the tissue over several times. The more folds you include the fewer petals you will have to cut. Place the straight edge of the templates on the fold and cut out petals. Each flower is made up of five folded petals.
- Finish each flower with a 3mm pearl hot glued to the center. Fill the top 12 inches of canvas alternating between large and small flowers.
- Use painters tape to attach the battery pack to the center support of the canvas. Be sure to have the switch positioned where it will be easily accessible.
- There are 40 lights in the string to distribute in 12 inches which roughly makes six rows alternating with six and seven lights per row. Attach the lights on the backside of the canvas. The light placement will be more appealing if it is somewhat uneven rather than perfectly aligned. Suggested placement is only intended as a guide to the space you have to work in. It will also help you to avoid bunching all the lights in one area. Turning the lights on while you work will allow you to more easily see if you like their placement. When you're ready to attach the lights put down a dot of hot glue on the canvas and press down the base of the bulb.
“Designed and Created for Testors by Domestic-Divaonline.com