Rust-Oleum Projects
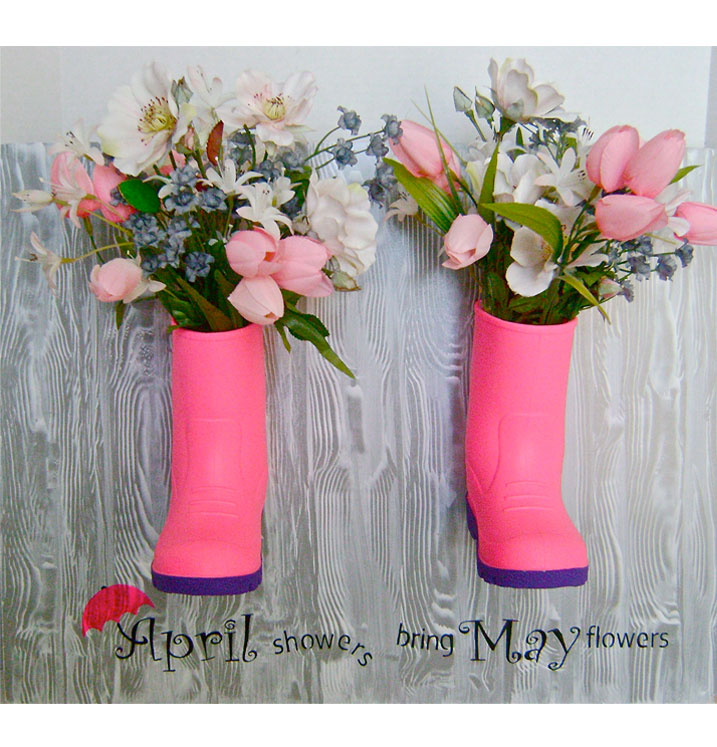
April Showers Bring May Flowers
Browse Projects
-
Tools & Supplies:
-
Acrylic Glazing Liquid
-
Black Cord
-
Card Stock
-
Drill
-
Paper Towels
-
Scotch Spray Mount Repositionable Adhesive
-
Small Wood Pegs
-
Small Washers
-
Sponge Brush
-
Stencil
-
Tape
-
Thick Needle
-
Thin Wire
-
Wood Graining Tool
Instructions:
- The foundation for this project was a leftover piece of 22” X 17” particleboard. You can use anything sturdy to hang and hold the boots with pots inside. Paint the surface with gray paint.
- Mix the Glazing Liquid with equal portions of White paint. Stir thoroughly. Don’t mix a lot. You’ll find it goes a long way. Apply the mix to the board with a sponge brush. Create the look of panels by only applying the mix as wide as the wood graining tool.
- To achieve the wood grain look, work the tool down the painted strip rocking forward and back to create the effect you want. Practice on a sheet of colored card stock until you understand how your hand movements will change the effect.
- If you’re not happy with your result, go over the mix with the sponge brush and start again. You don’t need to add more mix. After you’ve completed one section begin another. Blot away excess mix on a paper towel to avoid pooling on the board.
- Continue adding more sections of the mix side by side. Allow your work to dry completely. Wash your tools with warm soapy water.
- Print out the "April Showers Stencil" located here and cut it out with a craft knife or stencil cutting machine. Join the two sections in the center with tape. Apply adhesive to the backside. Stick the stencil to the bottom of the board.
- Cover the umbrella area and protect other areas from over spray. Airbrush the letters with black paint. When dry remove the stencil.
- Cut the umbrella from the stencil. Position it at the stem of the “A”. Protect other areas from paint and airbrush the umbrella with Hot Pink paint.
- When all the paint is dry, spray two coats of lacquer to protect the paint and allow it to dry.
- On the wrong side of the board, drill two holes, each 4” from the left and right of vertical center, and 4” down from the board’s top edge. Cut two 4” pieces of cord. Bend a piece of thin wire into a “U” wrapping it around a cord to act as a needle to pull the cord through to the front of the board.
- Pull both cords through the board to form 1/2” loops on the front side.
- On the backside, slip a small washer over the cord ends. Tie the ends into a triple knot.
- Use a thick needle to poke a hole in the center back of each boot.
- Use wire to pull a piece of cord through the back of the boot. Create a .75” loop.
- Tie the cord ends into triple knots inside the boot.
- To secure the boots to the board, slip the boot loop into the board loop. Insert the wood peg into the loop and let the boot hang. Place a flowerpot in each boot.


