Rust-Oleum Projects
Inspired by Nature
Browse Projects
-
Tools & Supplies:
-
Hot Glue Gun
-
Sharpie Marker
-
Silver Washers
-
Jewelry Wire 18 Gauge
-
Clear Plastic Water Bottles 500ML
-
Bird Seed
-
Button
-
Card Stock
-
Drill
-
One Liter Clear Plastic Water Bottle
-
Pencil
-
Pipe Cleaners
-
Plastic Spoons
-
Scissors
-
Sharp Thick Needle
-
Spray Mount Repositonable Adhesive
-
Wire Cutters
Instructions:
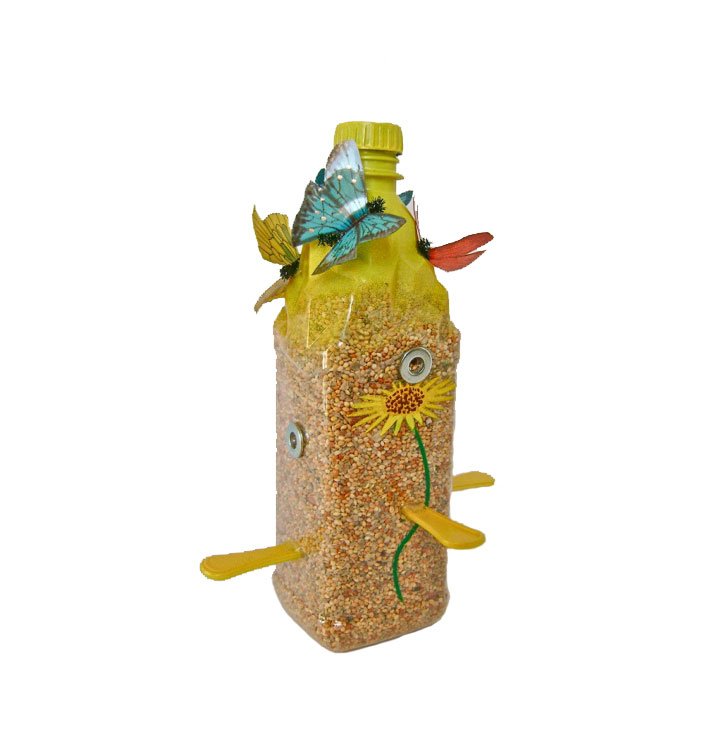
- Remove the label and cap from the one-liter plastic water bottle.
- Create a sunflower stencil on card stock. If you work in Photoshop or a similar program you can easily create the flower by choosing the star shape. Type in “12” or more for the sides to give you more petals. Choose “transform” and then distort to squish the star into the flower shape. Draw a thin stem and you have your flower.
- Cut out the shape and spray the back of the card stock with stencil adhesive. Center the stencil on the bottle and press to adhere.
- Airbrush the stem portion of the stencil with green paint and the flower with yellow. Repeat on the opposite side of the bottle.
- Airbrush the bumpy top part of the bottle with yellow paint. Don’t try to create a perfect definition between the painted and the clear portions of the bottle. Allowing some overspray will give the bottle some character. Paint the bottle cap too.
- Airbrush the stems of four plastic spoons with yellow paint. They may require two coats.
- When the stems are dry, use wire cutters to cut them to measure 2.5” long.
- Use a craft knife to cut a slit at different heights on all four sides of the bottle. Push the stems into the slits and apply hot glue to the slits, to hold the stems straight.
- Create feeding holes on all four sides by piercing a sharp thick needle into the plastic. Remove the needle and force a sharp pointed pencil into the hole with a screwing motion to enlarge it.
- Hot glue a small .75" silver washer over the hole.
- Drill a hole in the center of the cap. Hot glue a washer over the hole. Loop a 5” length of 18-Gauge jewelry wire and push both ends into the hole in the cap to create a hanger for the feeder.
- Put the wire ends through the holes of a button and twist the wire ends to keep them from slipping out of the button.
Accent Butterflies Instructions:
- Remove the label from a 500ml square plastic bottle.
- With a fine marker, draw half a small butterfly shape onto the corner of the bottle. Draw another larger one below it.
- Using scissors, cut horizontally across the plastic through two sides to include the butterfly shapes.
- Press the outside edges together and trace the butterfly shape onto the blank side.
- When you release the plastic, you’ll have a complete butterfly with the angled edge of the plastic in the center. Cut out the butterfly shape.
- Airbrush the butterflies with a base coat color of your choice.
- To add details, start by drawing lines across the wings with a fine point marker then draw curves and slanted shapes in between the lines.
- Outline the butterflies with an enamel paint marker. Use the maker to create “jiggered” spaces on the end of the wings. Dot the wings with the edge of the marker tip using different colors. Also draw a line down the center of the butterfly.
- Hot glue a pipe cleaner to the center back of the butterflies.
- Hot glue the butterflies to the top of the feeder with the pipe cleaner against the bottle.
- Fill the feeder with birdseed, screw on the cap, and hang outdoors.
“Designed and Created for Testors by Domestic-Divaonline.com


