Rust-Oleum Projects
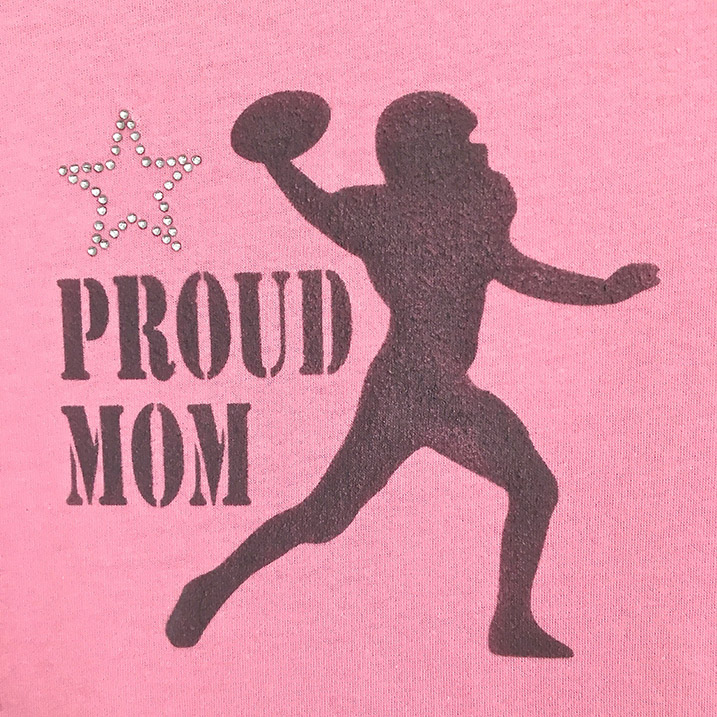
Proud Football Mom Shirt
Browse Projects
-
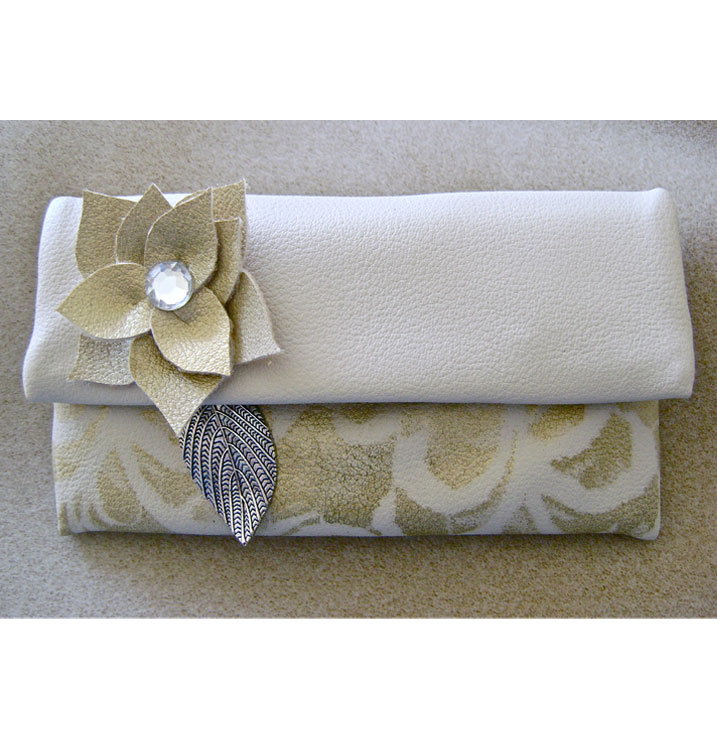
Going Out on a Limb Purse
-
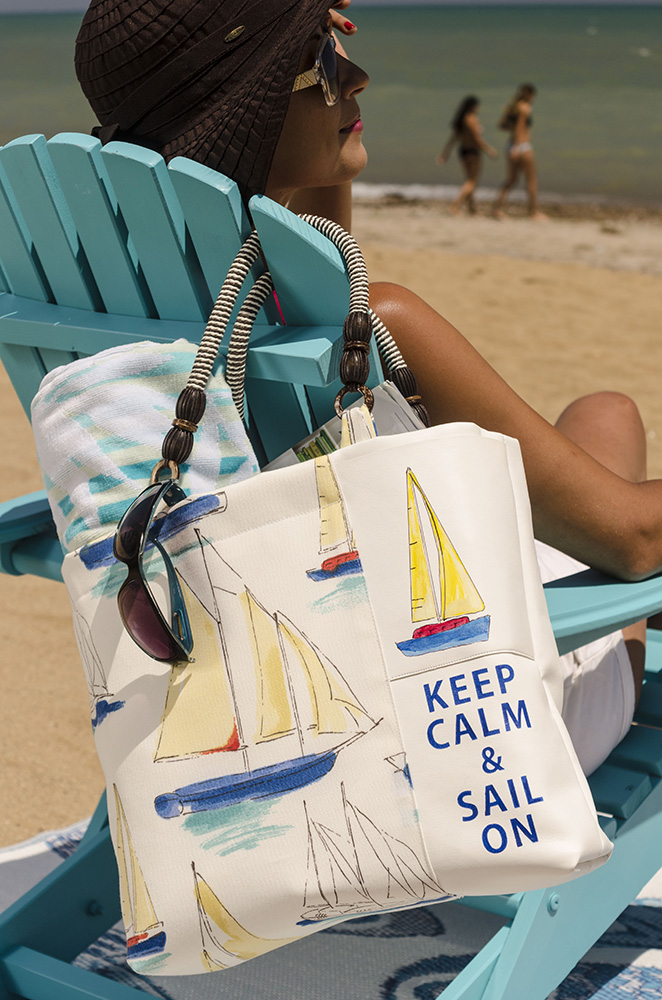
Custom Airbrushed Beach Tote
-
Tools & Supplies:
-
Spray Mount Repositonable Adhesive
-
Card Stock
-
Hot Fix Rhinestone Applicator
-
Rhinestone
-
Masking Tape
-
Iron
-
Ruler
-
Marker
-
Shirt
-
Cardboard
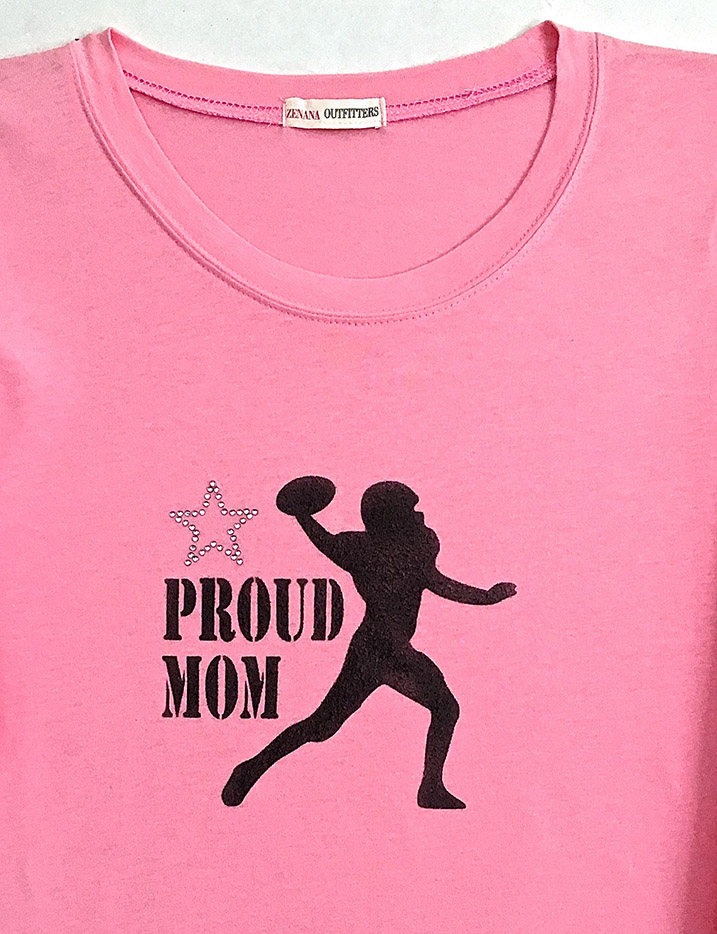
Proud Football Mom Shirt
Project designed and created by Gloria Uhler at Domestic-Divaonline.com for Testor’s Corp.
Materials Needed:
At Testors
Aztek Airbrush
Aztek 9452 Dark Gray paint
Hobby Knife
Shirt
Spray Mount Repositionable Adhesive
Card stock
Hot Fix Rhinestone applicator
Hot fix rhinestones – 4mm
Stiff Cardboard
Masking tape
Iron
Ruler
Pen or marker
Protect your work surface and all areas not being painted. Always allow paint to dry completely before moving to the next step.
Project Steps
Step 1
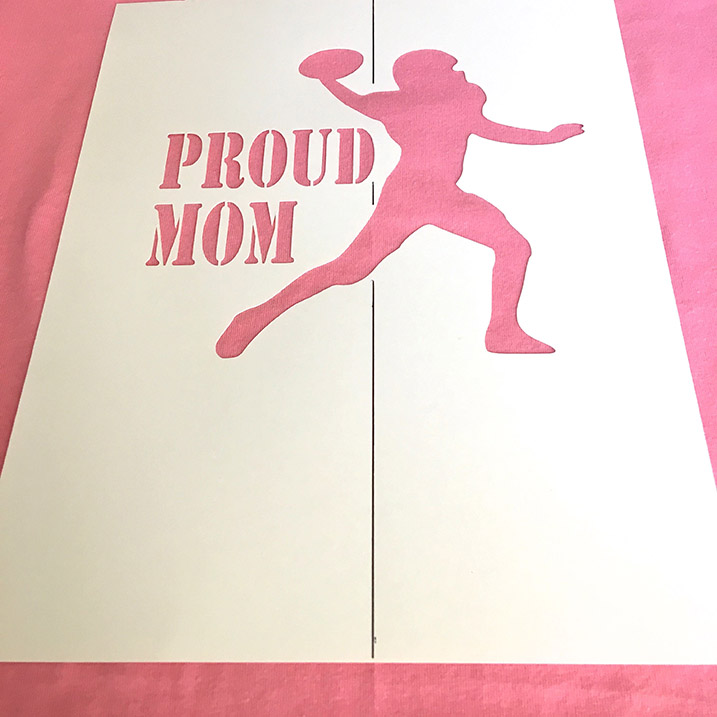
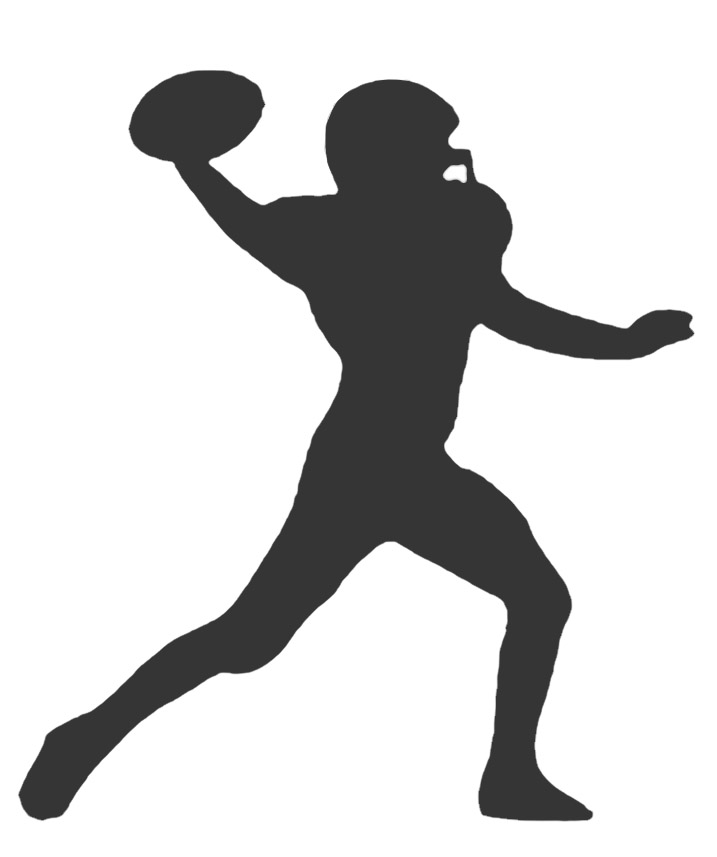
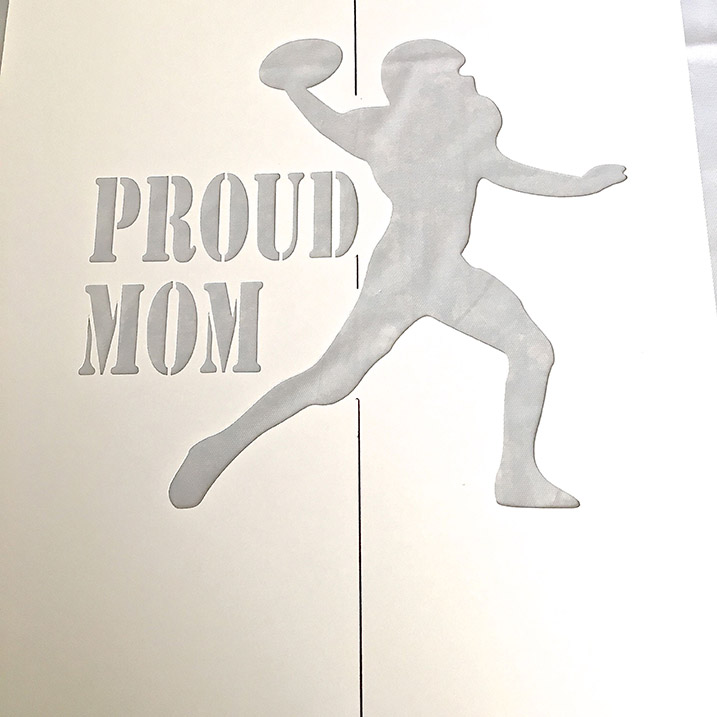
Do a Google image search for free football stencils. Print your chosen image on card stock. Your image may be copyright protected. It is your responsibility to determine if it is in the public domain and if you can legally use it. The football player on this shirt measures 6” tall. Use a craft knife to cut out the image.
Step 2
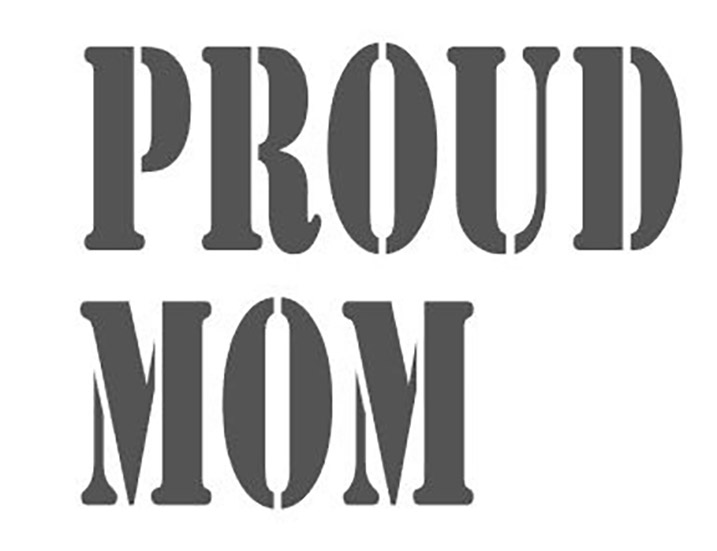
Print the words “Proud Mom” on card stock in an appropriate size to match your image. The Stencil font was chosen for this project. Cut out the letters with the hobby knife.
Step 3
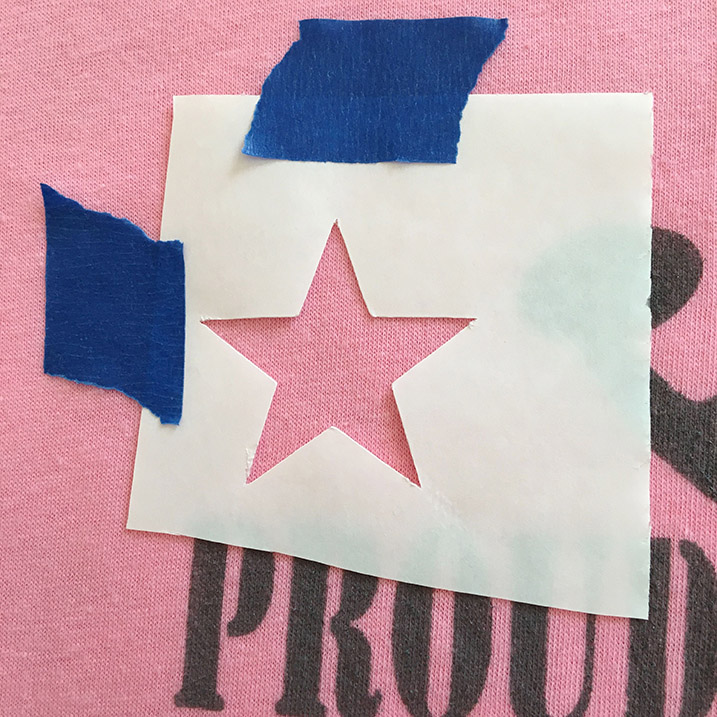
Print a star outline on card stock to measure approximately 1.75” or a size that best fits the image and type you’ve chosen. Cut out the image.
Step 4
Spray adhesive on the backside of all the card stock stencils.
Step 5
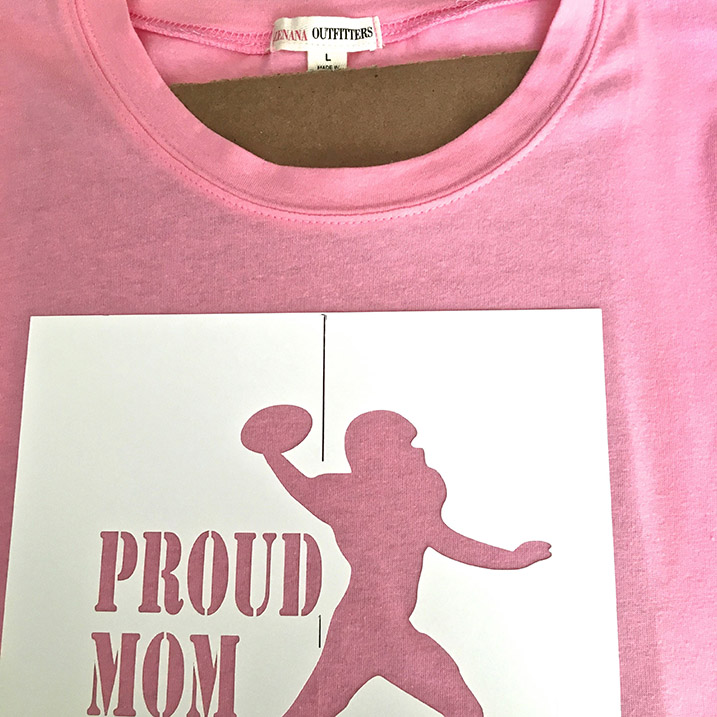
Find the vertical center of your shirt by matching the side seams. With an iron, press a soft crease down the center front.
Step 6
Mark the vertical center of your main card stock stencil.
Step 7
Match the center of the stencil to the center of the shirt and press the stencil to the fabric.
Step 8
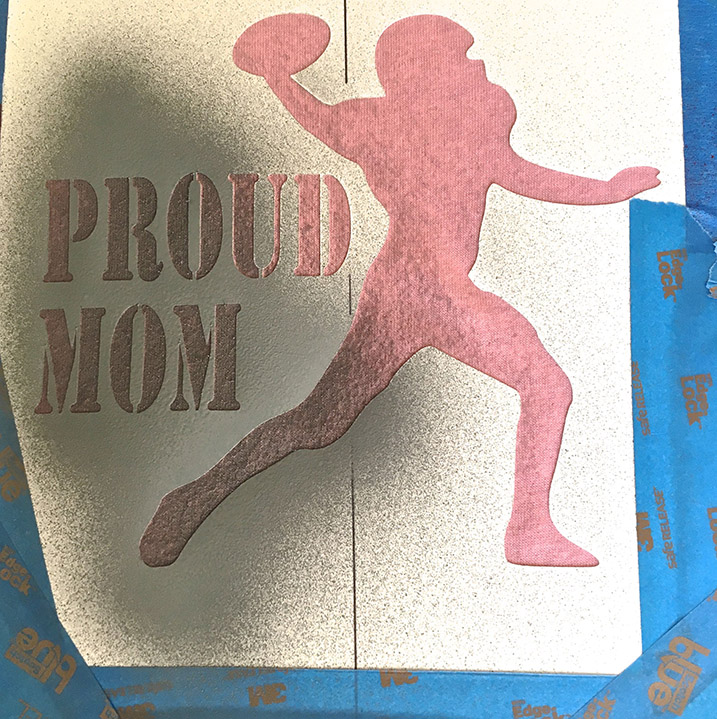
Place a piece of stiff cardboard between the front and back of the shirt beneath the image.
Step 9
Protect the areas surrounding the image from overspray.
Step 10
Airbrush the stencil with Gray paint.
Step 11
Press the star stencil to the shirt. Do not allow the adhesive on the backside to come in contact with the paint.
Step 12
With the applicator, place a rhinestone on each outside point of the star.
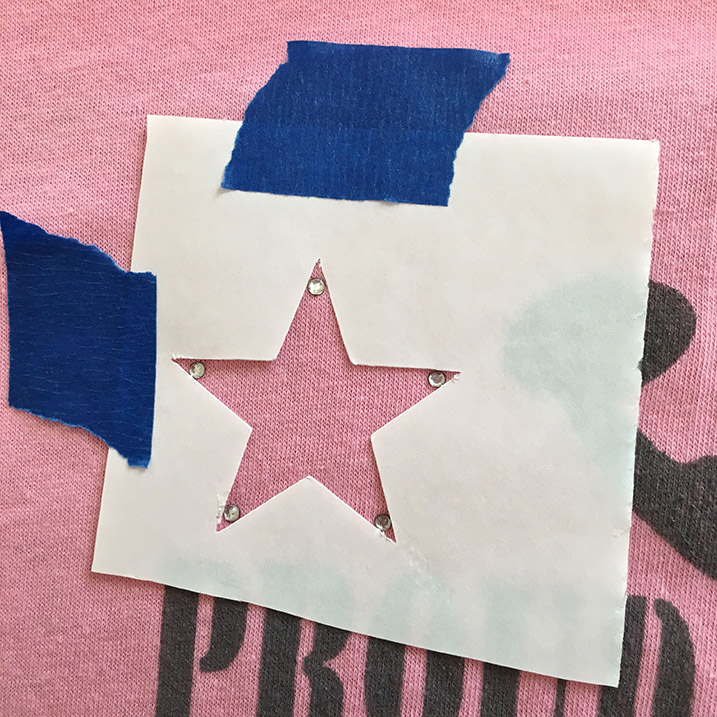
Step 13
Attach a rhinestone to each inside point of the star.
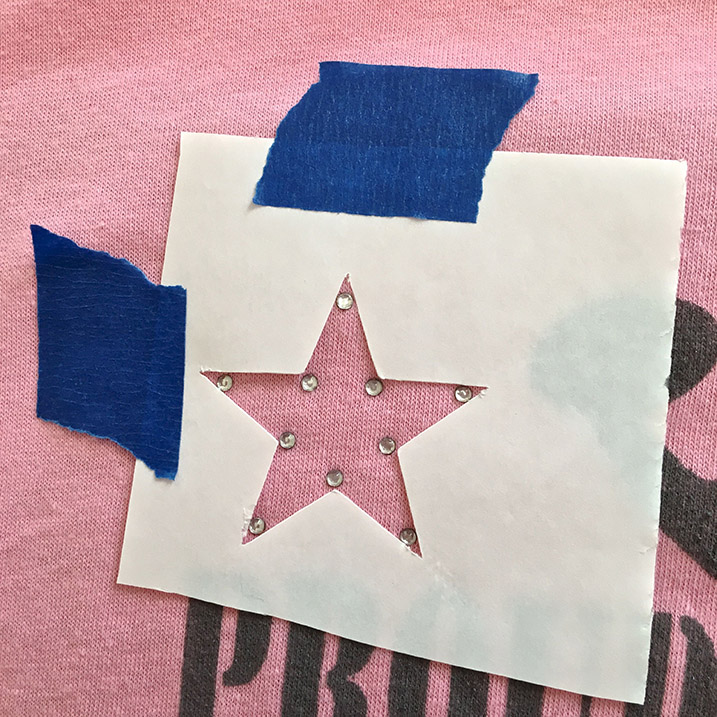
Step 14
Connect the inside and outside points with a line of rhinestones.
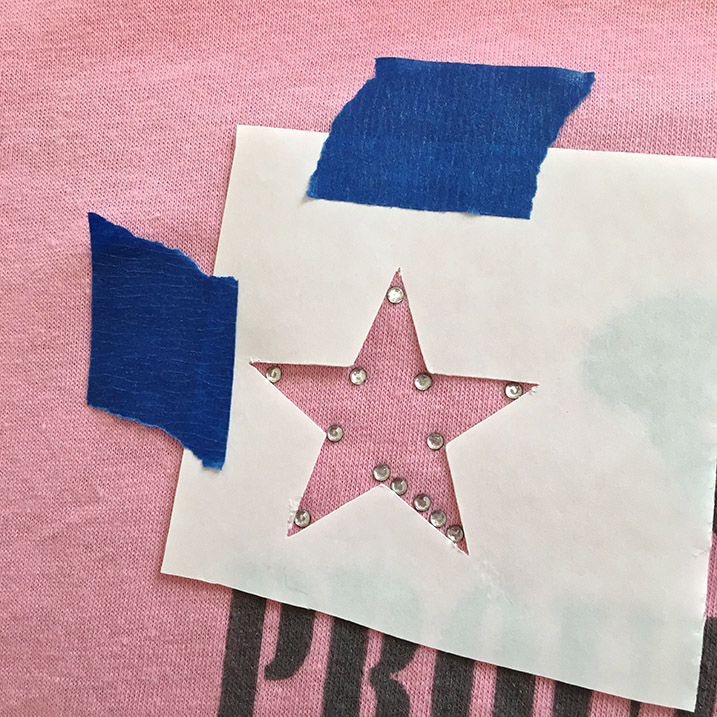
Step 15
Continue working around the image until you have a complete star outline.
Step 16
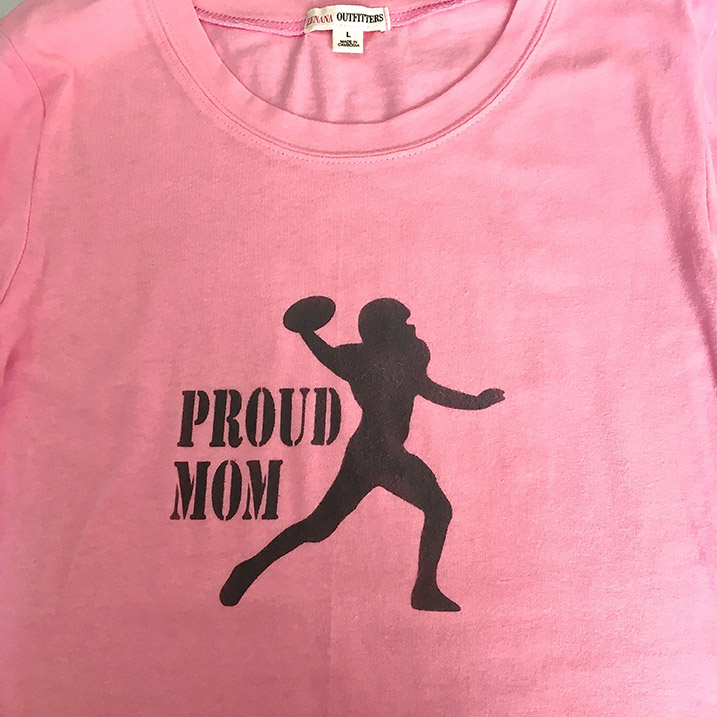
After 48 hours, place a cloth over the painted image and press it for approximately two minutes with a dry iron to set the paint.