Rust-Oleum Projects
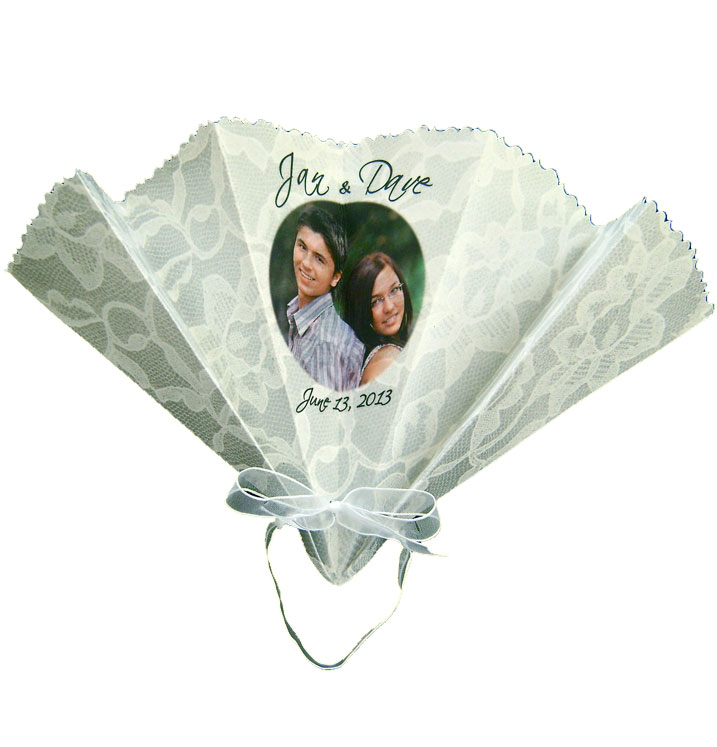
Love & Lace Fan
Browse Projects
-
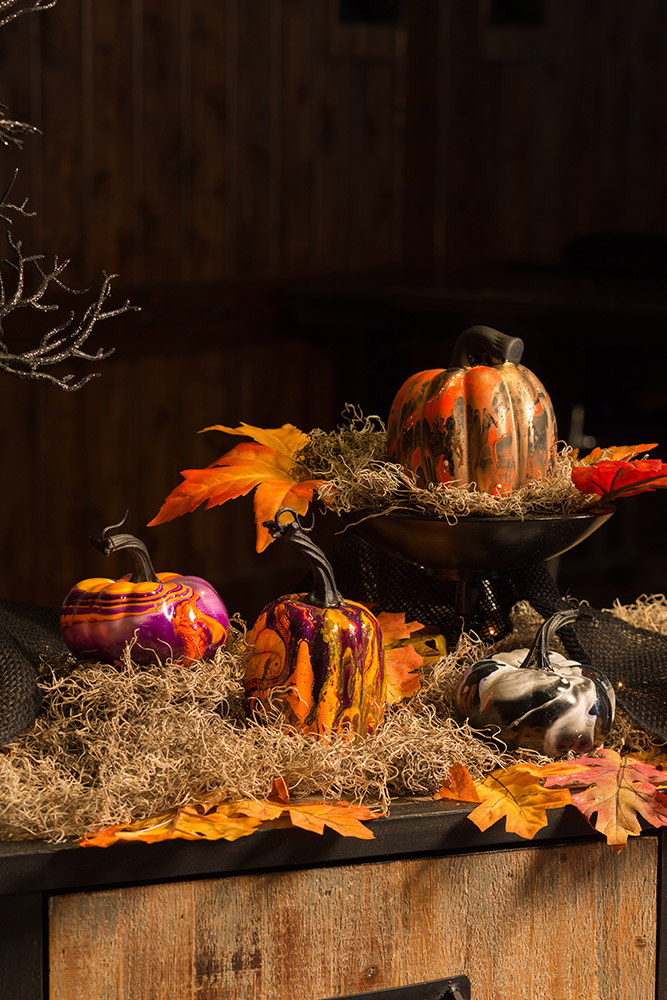
Hydrodipped Halloween Pumpkins
-
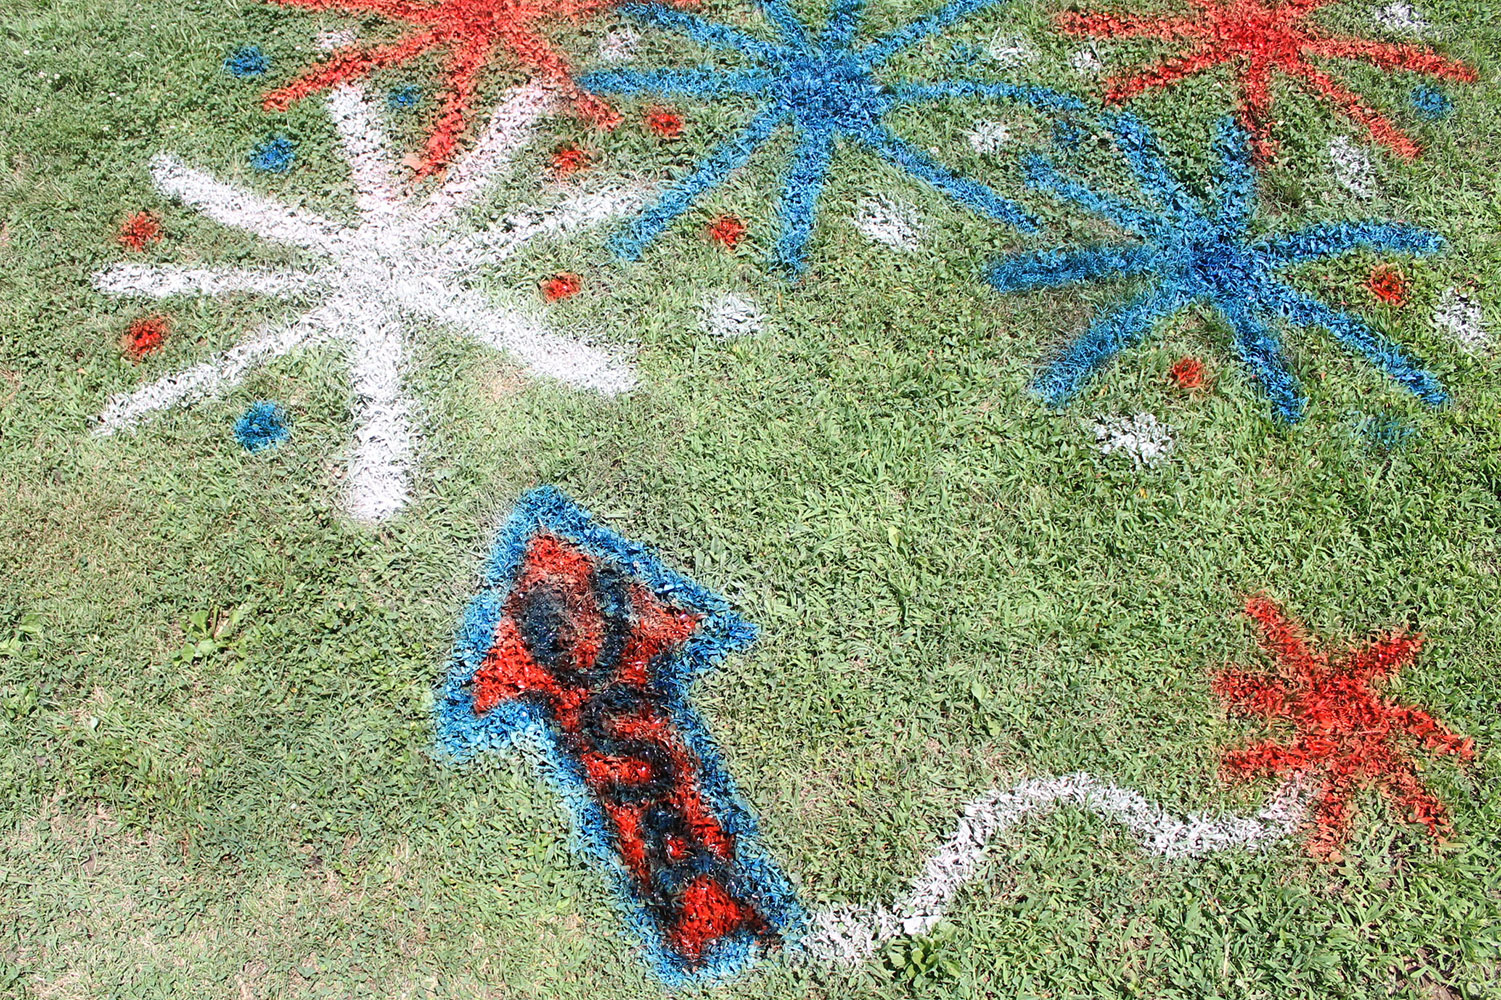
4th of July Spray Chalk Lawn Fireworks
-
Tools & Supplies:
-
Card Stock
-
Craft Attitude Film
-
Decorative Box Ribbon
-
Decorative Fabric Flower
-
Drill
-
Fiskars Majestic Fancy Edge Scissors
-
Hole Punch
-
Lace
-
Scotch Spray Mount Repositionable Adhesive
-
Scotch Super 77 Adhesive
-
Silver Beads
-
Tape
-
White Sheer Ribbon
-
Instructions:
- To create crease 1, fold the 8.5” x 14” card stock in half lengthwise. Open it flat.
- Bring the two bottom outer corners to the center to create crease 2.
- Create crease 3 by turning the page over and bringing crease 2 to the crease 1 line.
- Create crease 4 by bringing the left and right points into crease 1.
- Fold the creased page in half along crease 1. The result will be a long triangle with an uneven top. The shortest vertical side will measure 7” from the pointy end. Starting at the point pivot a ruler across the page making 7” marks. This will give you a slight curve.
- Cut along the curve through all thicknesses. Don’t worry it’s it’s a little ragged because you will be trimming it later.
- If you will be cutting several fans, lay the curved folded fan on a piece of paper and trace it. Use the tracing as a template to quickly shape more fans without the need to create the 7” marks.
- Use a 5/16 drill bit to bore through all the layers of the fan 1.25” from the point. You will later lace ribbon through the holes using a bead as a stop. You can also make the holes with a punch. Just be sure it’s smaller than the beads you choose or they will pass through the holes.
- Position the fan flat on your work surface. Spray the back of the lace with adhesive. Press the lace onto the card stock and airbrush with silver paint. When dry, paint the opposite side.
- In Photoshop or another image manipulation program, layout your images, date, and names for the fan. Scan your image template and overlay your images to fit in the template space. When you’re done, print it all in reverse onto Craft Attitude film. You can fit two on a page. Print on the shiny side of the film.
- Cut out the shape of the image template inside the black lines. Spray the printed side of the film with Super 77 Adhesive. Position the film on the center of the fan. The left and right edge of the film should match the left and right fold. Roll over the film to smooth and adhere it properly. Remove the backing.
- Use the fancy edge scissors to cut across the entire top of the fan.
- Cut a 20” piece of ribbon. On one end, make a knot at 7”. Use a long beading needle to thread a 6mm silver bead onto the ribbon. Push the bead against the knot. Bring the end of the ribbon through to the 4th hole from the right side of the fan.
- Repeat on the left side. Tie the center ribbons into a bow, gathering some of the fan together so it doesn’t lay completely flat. You will have a 6” ribbon loop from knot to knot.
- Airbrush color onto your shoebox if needed. A lining inside the box will keep the fans upright. Create it by taping or gluing sheets of card stock together to measure 13” x 12”. Crease the page creating panels in the sizes indicated above.
- The 2.75” panels should be slanted toward the sides of the box. The 3.5” panels slant to the center. Hot glue a line straight down the center of the box. Press the .50” center lining onto the glue. The panels will angle out to support the shape of the fans.
“Designed and Created for Testors by Domestic-Divaonline.com